Hey guys I’m Mezzy from WoW Weekly and today we’ll be taking a look at Supreme Lord Kazzak in Tanaan Jungle. The essence of this fight comes down to this: Tank him facing away from the raid, taunt on tank debuff, have the rest of your raid spread out and dps the adds when they spawn. But for good measure let’s go over each of the 4 abilities individually.
His first ability is Fel Breath. This will deal a large amount of damage to everyone infront of Kazzak and increases their damage taken by Fel Breath by 100% for 30 seconds. To deal with this face him away from the raid and tankswap after every breath.
His second ability is Mark of Kazzak. This increases your damage and healing done by 100% but you will damage anyone within 8 yards of yourself for the damage or healing you do. This is why you will want your raid to be spread out.
His third ability is Supreme doom. This will reduce multiple players health to 1 and if they are not brought back up to 50% health before the debuff expires, they will deal damage to the entire raid. You will have 10 seconds to heal them back up, so this should be no threat at all.
And then his last ability is Twisted Reflection. At 66% and 33% health he will summon Twisted Reflections. These will walk towards Kazzak and if they reach him they will heal him for 2% health. So when these spawn, kill them quickly as they have almost no health at all.
And that’s all there is to Kazzak, he’s a very simple and easy world boss so enjoy the loot!
If you liked this raiding guide please comment, subscribe and click on the like button to help us out. If you would like to keep up with when new videos come out, but you don’t have a youtube account, you can also follow us on twitter and facebook at twitter.com/bbmezzy or facebook.com/wowweekly. Also be sure to check out our written content on our website wowweekly.net. For now I’m Mezzy and I’ll see you again next time.
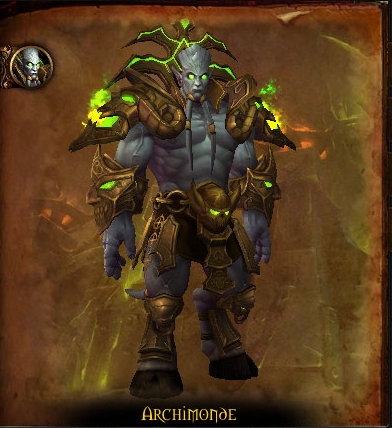
Hey guys I’m Mezzy from WoW Weekly and today we’ll be taking a look at Archimonde in Heroic Hellfire Citadel. These tactics also apply to the normal version.
This is a 3 phase encounter and after 15% health in every phase Archimonde gains an additional ability.
In phase 1 Archimonde can summon a Doomfire Spirit. This Spirit will put fire on the floor that will chase a random player around for 10 seconds. Every dps should switch to the Spirit to take it out as soon as possible. If you get targeted by the fire you will want to kite it away in a straight line. If you get hit by the fire you’ll take some damage and you’ll receive a stacking dot.
Archimonde can use the Allure of Flames spell to teleport the fire to where players are standing. The place the fire will be teleported to will be indicated by a smaller swirl, so you can get out of this in time. To deal with this you can split up the encounter area into 2 or 4 sides. Whenever the Allure of Flames is cast you can move to the other side so that the fire won’t bother you.
There is a bigger swirl you also need to watch for. This is caused by Shadow Burst. With this Archimonde will knock players into the air and when they fall to the ground they will take a huge amount of damage. This damage can be shared with others though. So when someone gets thrown into the air, the bigger swirl will indicate where players can stand to share the damage. So while normally you want to move out of swirls, in this particular case you will want to stand in it. In addition to this, when it gets cast on a player, it will also be put on anyone within 8 yards of that player. So when Burst is about to be cast, have all ranged players spread out.
The tanks will have to contend with Death Brand. This does a huge amount of damage on the tank and puts a stacking dot on them. This also summons a Hellfire Deathcaller which will need to be killed. Once the Deathcaller dies, the dot will disappear from the tank. The Deathcaller himself will randomly Shadow Blast players in the raid, dealing damage and increasing their shadow damage taken by 25% for 30 seconds.
In phase 1 your priority is the Doomfire Spirit, then the Hellfire Deathcaller and finally Archimonde himself. Be sure to catch people that get shot into the air and move from one side of the room to the other when Allure of Flames is used. It’s up to you to decide whether you want to split the area up into 2 or 4 areas. We started out with 2 but in the end our preference went out for 4 areas because it meant we had to move less per Allure of Flames.
At 85% Archimonde gains an additional phase 1 ability called Desecrate. With this he will summon pillars that deal AoE damage to the raid every second. You can’t do much about it, but Yrel can. She will destroy the pillars and leave behind Orbs of Light. Anyone can run over these, and they should. But particularly the tanks need to do so. When they do they will become immune to shadow damage and gain a movement speed increase for 25 seconds. The buff they give will trigger for anyone within 15 yards of the Orb, so if anyone is nearby they will also benefit from this buff.
At 70% Archimonde will go into phase 2. You will no longer have to deal with the Doomfire Spirits and Shadow Bursts in this phase. Because of this you can stack up on the boss in phase 2. You will still have to deal with the Deathcallers and Allure of Flames however.
Archimonde will gain 2 new abilities to replace his old ones. The first is Shackled Torment. He will cast this on 3 random players and each of their souls will become shackled. This will deal damage to those players every second until they are more than 30 yards away from their soul. However when they do get free from the shackles they will deal a moderate amount of damage to the entire raid. Because of this you do not want all 3 of the players to break the shackles as once. Stagger it so that your healers can heal the raid back up.
The second phase 2 ability is Wrought Chaos. This is a debuff that gets put on a random player and this debuff will aim at another player. After 5 seconds a laser beam will fire from the debuffed player to the aimed player. The debuff will get swap onto the player who was aimed at, and the process will repeat itself. This will continue happening until the Wrought Chaos runs out of stacks. To deal with this you will want both players to go out of the group and make sure that there is no one between the 2 players.
So for phase 2 you will still run from marker to marker, kill Deathcallers, let Shackles be broken 1 by 1 and make sure that there is no one between the 2 Wrought Chaos players.
At 55% Archimonde will start summoning 2 kinds of adds, which will need to be killed as well. The first is Felborne Overfiend. All this guy does is cast Heart of Argus and deal AoE damage to the entire raid every time he loses 25% of his health. This needs to be interrupted. Because there are often other adds up when the Overfiend is up, we have a melee switch to the Overfiend even if there are other priorities so that they can interrupt the cast.
The second type of which multiple will spawn is the Dreadstalker. This hound will teleport to random players and deal damage to anyone within 8 yards and interrupt them for 3 seconds. The area they will teleport to will be marked by a purple circle so just run out of it.
Once these adds start spawning your priority will be Deathcallers > Overfiends > Dreadstalkers. If You’re already killing an Overfiend when a Deathcaller spawns, you can finish it off first.
At 40% he will go into phase 3. You will no longer have to deal with any of the adds from phase 1 or 2 and he will no longer use Allure of Flames. You will have to keep dealing with both new abilities from the previous phase.
The first new ability he gains is Demonic Feedback. This is an AoE that does damage to the entire raid and it does an additional amount of damage to anyone standing near you. So what it comes down to is that you have to be spread out in phase 3. This will mean that you have to make sure noone stands between the 2 players with the laser beam.
The other new mechanic of this phase is that Archimonde will use Nether Banish on the tank. This will put a debuff on the tank, and after 8 seconds anyone standing within 8 yards of the tank will be banished to the nether together with the tank. This will also leave behind a giant pool of fel.. stuff. So when the tank gets this cast on them, they should move to the side together with a healer and nearly half of your dps. They will get banished and they will have to deal with what awaits for them in the Nether. I’ll get to the Nether in a minute, but whenever you come out of the nether you will get a debuff preventing you from entering again for a whole minute. So you will have to set up a group to go in with each of the tanks.
From the pool of fel stuff a Living Shadow will spawn regularly and they will charge at random players. If they reach their target they will put the Devour Life debuff on them. This will deal a big amount of shadow damage and reduces their healing taken by 20% for 45 seconds. The Living Shadows can be both stunned and slowed. To deal with them you will want your ranged dps prioritize these. Hunters with tier 18 4set are by far the best to deal with these because the living shadows move quite quickly. They move so quickly in fact that they often don’t get slowed by the first slowing trap when they trigger it.
In the nether itself you will have to dodge circles of fire, take AoE damage every 5 seconds and deal with 2 different adds. Void Stars will regularly spawn and focus on the closest player. If the Void Star reaches the player it will explode knocking anyone within 8 yards off of the platform. You will need a ranged dps who can slow and kill it to deal with them.
The second add is the Shadowed Netherwalker. You need to kill this add to be able to get out of the Nether. Once he dies a portal will spawn which you can click on to get out. The netherwalker has one ability called Touch of Shadows. This can be interrupted. It will deal a moderate amount of damage to everyone within the nether, so you will want to interrupt it as much as you can.
Sadly we did not have footage from the twisting nether, once we do we’ll post it in another video and put an annotation in this one so you can check it out.
So thus far in phase 3 you will have 2 groups for the Nether, your raid spread out, living shadows that need killing and you’ll be dealing with the chain and laser abilities.
At 25% he will gain his final new ability. He will summon infernals that will drop from the sky. You will of course have to move away from the impact location, but some of the infernals will also start attacking you, pulsing for some fire damage. You will need to kill them off. But you cannot tank the one you’re killing close to the other infernals. This is because of the Eternal Flame aura. If an infernal is 15 yards or closer to another infernal it will heal up. What you will want to do is have dps tanking the different infernals, standing away from each other. Kill the infernals and return to the boss.
We stopped our dps right before 25% when a group was banished in the twisting nether. To get them out quickly we sent in more dps than usual so that they could get out quickly. Once they were back out and reached 25%, we used heroism to push for the kill. You really need to get through phase 3 as quickly as possible because of the banishments. Once you get to 3 or 4 living shadows spawning right after one another you’re going to be stressed into getting Archimonde down to 0%.
Because of this we sacrificed 2 players along with the tank on the 4th banishment, so that we could push for a kill. You need 2 other players to join the tank, because if less than 3 people get teleported to the twisting nether, Archimonde will heal for 5% of his health.
And that will be it, if you can get through all of these mechanics you’ll have gotten through Hellfire Citadel succesfully!
If you liked this raiding guide please comment, subscribe and click on the like button to help us out. If you would like to keep up with when new videos come out, but you don’t have a youtube account, you can also follow us on twitter and facebook at twitter.com/bbmezzy or facebook.com/wowweekly. Also be sure to check out our written content on our website wowweekly.net. For now I’m Mezzy and I’ll see you again next time.
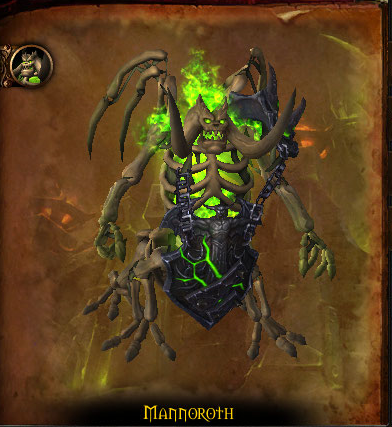
Hey guys I’m Sulya from WoW Weekly and today we’ll be taking a look at Mannoroth in Heroic Hellfire Citadel. These tactics also apply to the normal version.
This is a 4 phase encounter so let’s get right into the first phase.
In phase 1 you will have to contend with Fel Iron Summoners and the demons they bring to the table. You will have to kill each of the 3 Summoners to transition into phase 2. Each Summoner summons a specific demon and when you kill him they will stop spawning for the time being.
You’ll want to move counter clockwise and kill the summoner on the right first. This one will put Curse of the Legion on a random player and when it expires it will deal damage and summon a Doom Lord. The Doom Lord has 3 abilities of which the first is Doom Spike. The Doom Lord’s auto attacks will put a stacking debuff on the tank and once it fades away it will deal 35k damage per stack to the tank. To deal with this you will want to tank swap on the Doom Lord at around 6 stacks.
The second ability is Mark of Doom which is another debuff placed on random players. This will deal a moderate amount of damage on the player when the player takes damage from anything. This damage will also hit everyone within 20 yards, and if you don’t take damage you will die instead when this debuff expires. If you get the Mark you will want to touch the pool in the middle of the room to take some damage and get rid of the debuff without it dealing damage to your entire raid.
The final ability is Shadow Bolt Volley which can and should be interrupted.
The next summoner when you move counter clockwise will summon Fel Imps. These will crash down onto the platform and deal splash damage to anyone near them. These will cast Fel Blast, which deals damage to anyone within 3 yards and they can also blink around. You’ll want to AoE these imps down and if you have death knights with gorefiend’s grasp be sure to use them.
The final summoner summons Inferno’s. These will drop down onto the platform on places indicated by green swirls. This will deal damage to those standing in the swirls and afterwards they will start channeling Fel Hellfire, hitting anyone within 10 yards of them. Simply move away from these infernals and DoT them up while you’re dealing with other mobs. Depending on how many DoT classes you have, you might want to have everyone switch to them to kill them off at points in phase 1.
Once the last summoner falls you will hit phase 2 and mannoroth will enter the fray. Both imps and Inferno’s will start to spawn again and you’ll have to deal with them throughout phase 2. You will want to prioritize dpsing these above the boss.
Before we get into the abilities, let’s talk about positioning. In phases 2 and 3 you can negate 2 abilities by standing near the pillar to the left of you when you teleport onto the platform. We’ve put a blue marker here, which is where we’ll be tanking mannoroth. And then one marker on either side of mannoroth for phase 4. I highly recommend you follow the same positioning as it makes the fight pretty easy. So in phase 2 and 3 stand between the pillar and the boss who should be roughly on the blue marker.
Mannoroth has 2 abilities for the tanks to contend with. And they will hurt quite a lot. They’re both used in the Glaive Combo ability. Mannoroth will first use multiple Glaive Thrusts which deal a large amount of physical damage and put a dot on you. This dot will not apply if you use active mitigation and so it is very very very important that you do so. After he does this he will use Massive Blast on the tank dealing a large amount of shadow damage, knocking them back and increasing their damage taken by Massive Blast by 300% for 45 seconds.
As soon as Massive Blast is cast, the other tank should taunt it and use active mitigation right away because Mannoroth will do another Glaive Thrust. You should not forget to have your back towards the middle so that you do not get thrown off the platform.
Mannoroth also has 3 abilities for the rest of the raid to deal with. The first is Fel Hellstorm. With this he will cause meteors to fall from the sky and you’ll get hit for some damage if you stand in the point of impact. The points of impact will become darker spots on the ground, simply requiring you to move out of these spots.
The next ability is Mannoroth’s Gaze. With this he will fear multiple players and after 4 seconds they will explode for a big amount of damage which can be shared with anyone within 8 yards of them. You will want at least 2 others soak this so that the damage isn’t too high. An easy way to deal with this is to stack up as a raid. Which will be useful for the next ability as well.
One thing to note here, you will want your melee to have their backs towards the pillar as well so that if the Gaze gets put onto them, their damage can be soaked together with the ranged players.
The last ability for phase 2 is Felseeker. With this he will target a random player and channel an AoE. This will pulse 3 times and each time it gets bigger. What you will want to do is get out of the circle when he casts it so you don’t get hit. Then move back once the ability ends. The Felseeker also knocks you back when you get hit, so if you get hit you could get an unlucky angle and be thrown off the platform.
To summarize phase 2:
– Keep AoEing the imps down and kill the infernals.
– Everyone should have their backs to the pillar to deal with Mannoroth’s Gaze efficiently.
– Move away from Hellstorm and Felseeker.
– Tankswap after Massive Blast.
Once he reaches phase 3 at 65% he will no longer summon imps, but gain 1 new ability. This is ShadowForce, which will push multiple players towards the edge of the platform. You’ll need to walk against it just like you would other wind mechanics. The pushback mechanic becomes stronger as he’s channeling it. In this phase you will still have the pillar behind you to prevent you from being thrown off. However if you don’t try to run against it there is a bug that will sometimes push you through the pillar, letting you fall to your death.
At 35% you will reach phase 4, infernals will no longer spawn and all of his abilities will be empowered. You will want to use heroism at this point in time.
ShadowForce will now push the entire raid back and Glaive Thrust will now hit anyone infront of Mannoroth. This means your raid will need to use movement speed increasing spells to get through the ShadowForces.
Massive Blast will now also send out waves of shadow that you need to dodge as they will deal damage to you.
Fel Hellstorm will now be cast continuously and will send more and more meteors onto the platform as the fight goes on. This is the soft enrage mechanic.
Mannoroth’s Gaze will become a lot more difficult to deal with now as when it fades and does damage, it will leave behind a puddle of which the size will grow bigger as more are hit by the explosion. So you will really only want to have 1 or 2 people get hit by the explosion to share the damage. It also means that you can’t stay in the same spot for the rest of the phase. One key factor is that this puddle does slow you down. We’ll get to positioning and using this to your advantage in a second.
Lastly Felseeker will still deal damage to you even if you are out of the circle, but the damage will decrease the further away you are from the blast.
To deal with phase 4 and the no longer having a pillar in your back we have the raid move to one of Mannoroth’s sides. In our case we started at the green marker. We finished off any infernals remaining and started nuking down the boss. You will always first have a Mannoroth’s Gaze before you have a Shadow Force.
As I said, have only 1 or 2 people per Gaze help soak the damage so that the puddles that spawn are not too big. After you have done so successfully, do not move over to Mannoroth’s other side yet. Instead when Shadow Force gets cast, everyone runs against it and makes sure they have the puddles behind them. These puddles will slow you down and for good measure we use a druid’s roar. This should prevent you from being pushed off the edge by Shadow Force.
Once Shadow Force has finished casting move over to Mannoroth’s other side and repeat the process. If Mannoroth isn’t dead yet after the second Shadow Force, we have markers mirroring the first set on the other side of the platform so we can do the same. It’s all rinse and repeat once you’ve done it the first time. Be ready to use healing cooldowns as needed during the Gaze / Shadow Force combination.
To summarize, in phase 4 it’ll be about only having 1 or 2 people share the Mannoroth’s Gaze damage and moving further around the platform without being pushed off by ShadowForce or Massive Blast. Be sure to use movement speed increases and perhaps even a helpful life grip from a priest to pull back the tank getting sent off.
If you liked this raiding guide please comment, subscribe and click on the like button to help us out. If you would like to keep up with when new videos come out, but you don’t have a youtube account, you can also follow us on twitter and facebook at twitter.com/bbmezzy or facebook.com/wowweekly. Also be sure to check out our written content on our website wowweekly.net. For now I’m Sulya and I’ll see you again next time.
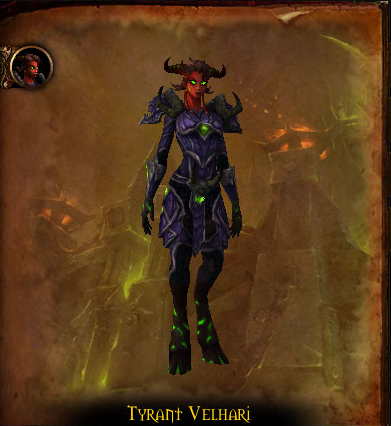
Hey guys I’m Sulya from WoW Weekly and today we’ll be taking a look at Tyrant Velhari in Heroic Hellfire Citadel. These tactics also apply to the normal version.
This is a 3 phase encounter in which you will deal with new abilities and a new add in each phase. She also has 3 abilities she uses in all of the phases. So let’s go over those first.
Her first ability is Edict of Condemnation. This will be put on a random player and every 3 seconds they will pulse a huge amount of damage. However this damage can and should be shared. The Edict’s radius will be marked with a purple circle and will get smaller each time. You’ll want to have half of your ranged players in that circle to share the damage.
The second ability is Touch of Harm. This will put a debuff on a random player and this will absorb a huge amount of healing. The goal is of course to get rid of this debuff by healing it up. You can also dispel this, but then the remaining debuff will be transferred to another player. So heal the person with Touch of Harm until they get to 70% health and then dispel the debuff so they can be healed back up. Repeat this with the next person the debuff is on until the debuff disappears.
The last ability is the tank switching mechanic, Seal of Decay. This is a stacking debuff that reduces healing and absorbs taken by 10%. You’ll want to tank swap on 3 stacks of this debuff.
In each of the phases she will have an aura, an add and a few other abilities. The aura will increase in strength the longer you stay in that phase.
In phase 1 she will have the Aura of Oppression. This will deal damage to you whenever you move. So of course the goal in phase 1 is to have to move as little as possible, while still dealing with mechanics like Edict of Condemnation.
The Tyrant will now also use Annihilating Strike. With this she will target a random player and strike a cone of fire damage towards them. When they get hit by it a patch of fire called Searing Blaze will spawn underneath them and explode after 2 seconds. To deal with the Strike you will want to spread out around the boss. Due to the Aura you’re going to have to get hit by the Strike if you’re in the cone. Once the patch of fire is underneath you move out of it. You can let the Strike hit the tank instead by taunting at the last moment. This sometimes coincides with swapping on the Seal of Decay debuff which is a bonus for you. You will want to use the Seal of Decay and not the Annihilating Strike as a swap mechanic.
The second ability that she gains is Infernal Tempest. She will channel this and deal damage to everyone in the raid. This will also deal extra damage to anyone close to you. So you’ll need to continue being spread out. Each time it ticks for damage a Searing Blaze will spawn underneath them, requiring you to move out. Just remember to not get too close to others. You can do what we call a 2step with Infernal Tempest. After the first fire circle spawns, wait until the second one spawns and then move. That way you only have to move twice.
At 90% health the Ancient Enforcer will spawn. His one ability is Enforcer’s Onslaught, with which he will throw a ball of fire towards a player. This ball of fire will also move back to the Enforcer. If you get hit by the ball you will of course take damage, but another fire patch will spawn underneath you. Simply keep the Enforcer faced away from the raid and only the tank will have to deal with this ability.
In phase 1 you will want to focus on dpsing the boss with cleave damage hitting the Enforcer. If the enforcer is still up when you reach phase 2 finish him off.
Once you reach phase 2 the abilities related to fire will disappear. She will now gain the Aura of Contempt which does not allow you to be healed above 80%. As the Aura gets stronger, the less health you will be allowed to have.
The tyrant’s first new ability is Tainted Shadows. With this she will deal direct shadow damage to the tank and this will also deal damage to anyone within 5 yards of that player.
There is one exception to the rule however, because of her second ability Font of Corruption. This is a debuff that will deal Tainted Shadows damage to these players as well when Tainted Shadows is cast. However the players with the Font of Corruption debuff will be immune to the AoE damage from this spell.
Simply put, to deal with this have everyone stack on one side of the boss. When players get the Font of Corruption have them move to the opposite of the boss and stack on a marker there. This means that their AoE from Tainted Shadows will not hit anyone and it will make healing this phase a lot more manageable. When your debuff is about to fall off, run out so that you don’t get killed by the AoE from the other players fonts. Once your font is gone, stack back up in the nondebuff pile.
At 60% health you will face the next add, the Ancient Harbinger. You will want to ignore this add, except to interrupt her spell. This is Harbinger’s Mending, with which she will heal the Tyrant. This can and should be interrupted.
Phase 2 is all about healing people up and still dealing with the other mechanics. Tank swap at 3 stacks and heal the absorption debuff. This is the most lethal phase and because of that you will want to use heroism to speed up the process.
Once you reach Phase 3 the shadow themed abilities will disappear. Finish the Harbinger off quickly and get ready to deal with the new mechanics.
Her new Aura will cause you to deal 20% more damage and take 10% more damage. This will increase over time like the other aura’s.
Her first new ability is Bulwark of the Tyrant. This will deal damage to the tank and 2 other players. On top of that it will leave a Despoiled Ground patch underneath those players. This will deal damage every second to those who stand in it. As a result of this you will want to move around as a group with everyone hugging the boss.
Her second new ability is Gavel of the Tyrant. This will deal direct damage to everyone, pulse AoE damage to everyone for 8 seconds and knock everyone back.
At 30% health the last add will spawn, the Ancient Sovereign. He will not do much other than make the boss take reduced damage by 90%. This means you’ll want to dps this guy down as soon as possible.
Phase 3 isn’t a very complex one. Simply deal with the basic abilities while hugging the boss, moving around as a group and kill the add when it spawns.
If you liked this raiding guide please comment, subscribe and click on the like button to help us out. If you would like to keep up with when new videos come out, but you don’t have a youtube account, you can also follow us on twitter and facebook at twitter.com/bbmezzy or facebook.com/wowweekly. Also be sure to check out our written content on our website wowweekly.net. For now I’m Sulya and I’ll see you again next time.
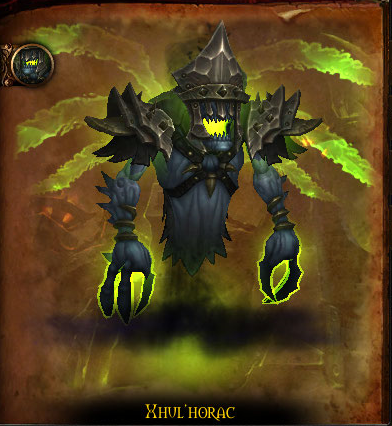
Hey guys I’m Mezzy from WoW Weekly and today we’ll be taking a look at Xhul’horac in Heroic Hellfire Citadel. These tactics also apply to the normal version.
This is a 4 phase encounter in which you will deal with different abilities in the first 2 phases and then face them both in the last 2 phases. The core of this encounter is that Xhul’horac will use 2 different magic schools: Fire and Shadow. If you get hit by a fire spell you will get a 10 second debuff. If you get hit by a Shadow spell in those 20 seconds, you will explode dealing a large amount of damage to anyone within 20 yards. The same applies for if you get hit by a shadow spell, you will not be allowed to get hit by a fire spell for 20 seconds.
When you cause an explosion you will also increase your damage taken by the next explosion by 100% for 1 minute.
Different spells will create moving patches of fire and shadow on the ground in this fight. Standing in fire will give you a stacking fire dot and standing in shadow will give you a stacking shadow dot. When the patches of fire and shadow touch each other they will explode dealing a lot of damage to anyone standing nearby. This will also increase their damage taken by the explosion by 100% for 1 minute. This detail is important because you’ll want to force some explosions as they clear up the fire where the explosion occurs.
So, with the environmental mechanics out of the way, let’s talk phase 1.
In phase 1 Xhul’horac will use Fel Strike on the tank dealing a big amount of fire damage to them. Meanwhile he will put the Fel Surge debuff on random players. After 5 seconds the debuff will expire and leave patches of fire underneath those players. So to deal with this in phase 1 you will want to use one side of the room and if you get the debuff move to the edges of the room so that the fire can stay out of the way for as long as possible.
You will also have to deal with adds in this phase. There will be a mini boss called Vanguard Akkelion. This will need to be tanked by the tank that’s not tanking Xhul’horac as he will also be putting heavy damage on the tank through his ability Felblaze Flurry. The damage of this attack will increase on the tank each time. This means it will require a tank swap after Felblaze Flurry ends.
Akkelion’s second ability is Chains of Fel. With this he will chain players together and a dot will start ticking on them. They can break this chain by moving away from each other, and they should of course do so.
During phase 1 you will also have to deal with Wild Pyromaniacs. These are just imps. They will start casting Fel Orbs which will throw balls of fire into the environment. If they hit the ground patches of fire will spawn from this. However if you get hit by the fire ball instead the fire will not spawn but you’ll get a stacking dot for 15 seconds. So to deal with the imps you’ll want to group them up if you can with grips and you can stun/interrupt them. Dps these down as soon as possible and if a fire ball does get cast, get hit by it so less fire spawns.
Your dps priority will be the imps, then Akkelion and if you can cleave damage onto him, the boss. Any damage Akkelion takes will also be put on the boss. In phase 1 run away from your chain partner, intercept the Fel Orbs and if you get the Fel Surge debuff run as far as you can to the edge.
Once Akkelion dies you will enter phase 2. You will face mostly similar mechanics but now they will be of the shadow school spell. So if you get hit by fire, do not get hit by shadow and vice versa. You will also want to move to the other side of the room to reduce the chance of fire and shadow meeting each other.
In phase 2 Xhul’horac will now hit the tank with a high hitting shadow damage spell, Void Strike. He will also put the debuff Void Surge on 1 player, which will also put shadow patches on the ground after 5 seconds. Once again, run this to the edge if you get this debuff. This will deal a lot more damage to that player though, so they will need healing.
The mini boss during phase 2 is Omnus. His Withering Gaze ability works just like Felblaze Flurry. This is a heavy hitting attack that will increase your damage taken from Withering Gaze by 20%. You will again want to swap tanks after Withering Gaze ends.
Instead of chains, now you will have to deal with Black Hole. This will keep pulling everyone towards it until it explodes. You can make the Black Hole explode by letting someone run to it’s center. This will then deal a huge amount of damage to anyone within 11 yards of the center. So choose a group 4-5 of players to take care of the Black Holes each time. To make coordinating this easier, we put raid marks on the assigned players so it would be easy to see when enough players were at the black hole to make it explode. Any extra people soaking the explosion because they were close are just a bonus to spread the damage more.
In addition to the imps you will also deal with Unstable Voidfiends. These will teleport to the nearest player, dealing a moderate amount of shadow damage. You will see a small purple swirl on the ground where they are going to teleport. So you can get out of the way without being hit. If someone gets hit by it then a patch of shadow will be put on the ground.
In phase 2 prioritize killing the imps, then voidfiends and then Omnus. Assign multiple people to close Blackholes and if you get the Void Surge move it out of the raid.
In phase 2 you will also want to start using explosions to your advantage to clear up the fire on the other side of the room. The green and purple flames will expand over time so you want to clear as much up as possible. We had multiple people get hit by shadow damage on purpose, run over to the green side of the room and clear up the fire by letting explosions occur.
You need to continue doing this in phase 3 as well because it will get quite hectic. We put up additional markers in the encounter area so that it was easier to call out where to clean up the fire or shadow so that anyone else near that point could get away.
Once Omnus dies you will enter phase 3. In this phase Xhul’horac will use both spell schools and all spells from the previous phases. If you get Fel Surge, move to the fire side and if you get Void Surge move to the shadow side. Keep taking care of adds and move the boss to where there isn’t any fire. !!!!One tank should tank the boss when he’s in his fire mode and one should tank him when he’s in his shadow mode.!!!
You will also have to clear up the shadow fire on the purple side now so be sure to coordinate letting explosions occur there as well. If you have one rogue or more you can really use them well by having both feint to reduce the explosion damage and cloak of shadows to take off the damage increasing debuff once they have 3 or 4 stacks. It will mean you don’t have to have a lot of people clearing up the fire which helps the general coordination.
Once Xhul’horac reaches 20% you will go into phase 4. No more adds will spawn, but you will now have to deal with the soft enrage. Xhul’horac will use Overwhelming Chaos every 10 seconds. He will pulse for a moderate amount of Chaos damage but he will also increase his damage done by 20% each time. Use heroism at this point clear up any adds and finish him off. Just be sure to stand on a part of the platform that does not have fire or shadow.
If you liked this raiding guide please comment, subscribe and click on the like button to help us out. If you would like to keep up with when new videos come out, but you don’t have a youtube account, you can also follow us on twitter and facebook at twitter.com/bbmezzy or facebook.com/wowweekly. Also be sure to check out our written content on our website wowweekly.net. For now I’m Mezzy and I’ll see you again next time.
Hey guys I’m Sulya from WoW Weekly and today we’ll be taking a look at Socrethar the Eternal in Heroic Hellfire Citadel. These tactics also apply to the normal version.
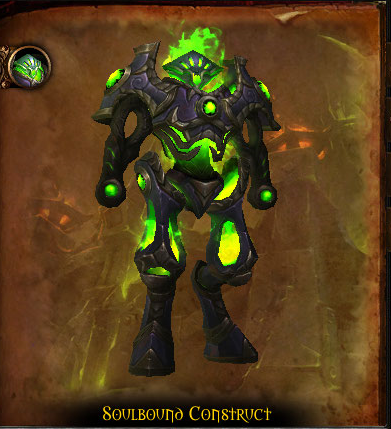
This is a 2 phase encounter in which you will have to deal with the Soulbound Construct in one phase and with Socrethar in the other phase.
The Construct has 4 abilities. The first one is Reverberating Blow which will deal a large amount of physical damage in a cone towards the tank. So you will want to face him away from the raid. This has a second effect called Shattered Defenses, which is a stacking debuff increasing all damage taken from Reverberating Blow by 200%. It will distribute 3 stacks of the debuff on anyone close to the tank. This means that if noone is close to the tank, the tank will get all 3 stacks. To deal
with this we had the tanks soak 2 blows in a row. For the first one they did not need cooldowns, but for the second blow they did.
The next ability is Fel Prison. A ring on the floor will spawn and anyone that gets hit by it will be put into a prison for 30 seconds. They will be linked to a crystal via a chain and the crystal will need to be broken. Simply move out of the prison before it activates because you don’t want to waste dps on this crystal.
The next ability is Volatile Fel Orb. This will be put on a random player and they will get a green arrow above their head. They should move away from the rest of the group because an orb will be thrown at them dealing damage to anyone near that player.
The construct will also put a dot on random players called Overwhelming Power. This will have to be healed up.
The final ability is Felblaze Charge. With this he will target a random player and charge after him. This charge will leave a line of fire behind him, meaning your group will have to move.
In phase 1 we started on one side of the room. If a player got targeted by the charge they moved to the left. If they got targeted by the orb it didn’t matter much where they moved as long as they moved out of the raid. And then finally if a Prison got put on the raid, we all moved to the right.
Once your defeat the Construct, Socrethar will come out and you will have to battle him. 1 player will be able to take over the Construct and this should be one of the tanks. The construct will have all of the abilities except for the dot. The construct can still harm your players so don’t accidentally put your raid in a prison or a fire line.
Socrethar himself will have 2 abilities. Exert Dominance with which he will damage the Construct for 10% health, can and needs to be interrupted. This is because once the construct reaches 1 health, Socrethar will go back in it and you will go back to phase 1.
His second ability is Apocalypse. This is a 10 second raidwide AoE which will deal damage to everyone in the raid.
The reason you need to use the construct in this phase is because of 3 types of portals that will spawn adds. You’ll want to use the construct to help with them.
First off there’s the purple portals. These will spawn the Sargerei Shadowcallers. These puts Shadow Word: Agony dots on random players. This dot can be dispelled. They also cast Shadow Bolt Volleys which can be interrupted.
Secondly there’s the blue portals which spawn Haunting Souls. These will fixate on random players and if they reach them they will explode for a massive amount of damage and fear anyone nearby for 8 seconds.
Finally there’s the red portal that will spawn a Sargerei Dominator. This add will make Socrethar immune to all damage and interrupts. Every single dps should switch to this as soon as possible, because the longer it is up, the more damage it will do to the Construct. The Dominator will also put a pulsing debuff on random players. This debuff will deal damage to anyone near you. So if you get it, get away from the rest of the group.
This fight has been hotfixed which might force you to change the way you deal with phase 2.
You can use all of the abilities from the construct on the adds, including the prison. Before the hotfix you used the construct to prioritise getting rid of the Haunting Souls. However because of the hotfixes more Dominators will spawn meaning you’ll likely go back into phase 1 one more time.
If you just had the construct deal with the Souls it would mean that you would have to deal withthem once phase 1 started again. So now instead we just have the construct leave the flames from charge in the line between the portal and the raid, and have destruction warlocks kill the souls when they spawn. This gives the construct more time to deal damage to the boss himself and the dominator when they spawn. You do not want the construct charging over the Souls when they are up as they will deal a massive amount of damage to the construct when he is within 5 yards of them.
The Shadowcallers should be dealt with by the raid. Let a ranged player interrupt them and let your tank taunt them. You can assign a few dps to kill them, but you can also passively cleave them down as you’re dealing damage to Socrethar.
When the Construct reaches 1 health, Socrethar will go back in it and you’ll go back to phase 1. The adds that are still alive will stay and you will have to deal with these as well. However if your raid can kill the Dominators quickly enough you can get through the encounter without ever switching back to phase 1. Should you have the dps to do so, it also means that you can just use the Construct to prison the Haunting Souls.
When it comes to the adds in phase 2 it comes down to this: If you have the burst to quickly get rid of the dominators have the construct deal with the Haunting Souls, otherwise kill them off. You can use slows and stuns on the souls to make sure they don’t reach your group. Have your entire raid stack up on melee so that they all move in the same direction. The portals will occasionally change position so don’t be afraid to use a druid’s roar to get across the room quicker. Have your tank in the construct communicate to the group when they need to kill the Souls, and really put your burst damage into killing off the dominators as quickly as possible
In phase 1 remember to move away from the prisons. If you get targeted by the orb, move out of the raid. Tankswap after 2 Reverbating Blows. In phase 2 have an interrupt rotation going for Exert Dominance.
If you liked this raiding guide please comment, subscribe and click on the like button to help us out. If you would like to keep up with when new videos come out, but you don’t have a youtube account, you can also follow us on twitter and facebook at twitter.com/bbmezzy or facebook.com/wowweekly. Also be sure to check out our written content on our website wowweekly.net. For now I’m Sulya and I’ll see you again next time.
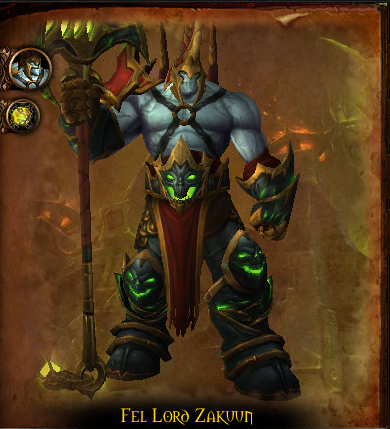
Hey guys I’m Sulya from WoW Weekly and today we’ll be taking a look at Fel Lord Zakuun in Heroic Hellfire Citadel. These tactics also apply to the normal version.
This is a 2 phase encounter, it has the Armed phase and the Disarmed phase. Each phase will give Zakuun different abilities for the tanks to deal with. But this encounter really revolves around pillars that will spawn and waves of shadow that are not allowed to hit it. So let’s talk about how that works first.
Zakuun will cast Fissures and Crystals. This will spawn 3 or 4 green swirls on the ground and Crystal pillars will spawn from them. You can prevent pillars from spawning from 3 of these by having different players stand on top of each one. Once 3 of the swirls have been absorbed, a pillar will spawn from the 4th swirl. The idea is that once the first pillar has spawned, when Fissures and Crystals is cast again, you will want the swirl closest to the existing pillar to remain empty so that the pillars are close together.
From now on whenever a wave of shadow hit the pillar, it will deal a big amount of damage to the entire raid. On top of that the pillar will also deal damage to anyone standing close to it, and a small amount of damage to everyone in the entire raid. And on top of this the players who prevented other pillars from spawning will get the Latent Energy debuff. This basically makes them walking pillars. They are not allowed to touch the waves of shadow at any cost, as they will explodes just like the pillars if they get hit by them.
Lastly when you prevent a pillar from spawning and get a Latent Energy debuff, you will not be able to prevent another pillar from spawning until the debuff disappears. This means that everyone is responsible for dealing with pillars spawning.
So how can these waves of shadow spawn? Zakuun has a bunch of abilities that will make them do so. First of all when Zakuun is Armed he will cast Soul Cleave on the tank. This will deal a lot of shadow damage and put them in an alternate realm in which they have to dodge waves of shadow. Should they get hit it will mean damage for the rest of the raid. Once the tank is back in the regular realm some waves of shadow will spawn from them and increase their shadow damage taken by 50% for 1,5 minute. This is basicly is the tank switch mechanic for this phase.
His next ability is Cavitation with which he will send Wakes of Destruction, or as I call them the waves of shadow towards random raiders.
The final ability when he’s armed is Befouled. This will put a debuff on random players which will absorb heals. When it has healed a certain amount of heals it will fade away, but as it does it will explode dealing a huge amount of damage to any players within 6 yards of the target. So this means that when you get Befouled you should run out of the raid, to not harm anyone.
So there are multiple abilities that cause waves of shadow, which are not allowed to hit the pillars. To deal with this you want a couple of players to guard the pillars. If a wave of shadow glides toward a pillar the player should get hit by the wave of shadow instead. This is so that only that player will then take damage instead of the entire raid. This only applies to these waves of shadow though. Waves that would not hit pillars need to be dodged by everyone so that the raid doesn’t take unnecessary damage. The players assigned to guard the pillars are not allowed to prevent them from spawning because otherwise they will get the Latent Energy debuff.
You will have to continue dealing with the pillars and waves of shadow in the Disarmed phase. Zakuun will throw away his weapon, which will then pulse damage to the entire raid every 3 seconds. On top of that Zakuun’s auto attacks will now cleave to the closest target. This means that the tanks will have to stack on top of each other during the Disarmed phase. This phase hurts your tanks and they will require external cooldowns.
The new ability Zakuun has during this phase is Seed of Destruction. This will put a debuff on 5 players and after 5 seconds they will shoot out a wave of shadow in every direction. This means that players with Seed of Destruction have to get away from the rest of the raid, but also stay away from the pillars so that they don’t get so many waves of shadow moving towards them.
So just like in the Armed phase, in this phase you will also need a few players to intercept waves of shadow that move towards the pillars.
At 30% health Zakuun enrages. With this he will pulse damage and do cleaving damage even when he is Armed. Your tanks have to stack up on top of each other and you should use heroism to get through the enrage. Zakuun will now also alternate between all of his abilities.
So what you will want to do in the encounter is the following: Everyone should be responsible for preventing from pillars from spawning. Assign a few players to take the hits of waves of shadows that are heading towards pillars. Dodge any waves of shadow that are not going towards the pillars and if you get the Befouled debuff, run out of the raid.
When Zakuun is Disarmed, have your tanks stack up. And finally if you get the Seed of Destruction debuff on you, move away from the rest of the raid and the pillars.
Other than the mechanics let’s talk about the coordination in your group. To make the encounter easier we put up raid markers in each of the 4 corners of the room so we could reference them.
The raid leader would call out which swirl to leave empty for the pillar to spawn in and it also allowed easy communication to the tanks for where to go to when they’re in the alternate realm in the armed phase. You don’t want the tank to go to the corner where the pillars are and having the shadow waves from them spawn and hit the pillars.
In the Disarmed phase we moved around the red marker for the group to group on. The players with the seeds debuff would then have more room to get away from the group as well as the pillars.
If you liked this raiding guide please comment, subscribe and click on the like button to help us out. If you would like to keep up with when new videos come out, but you don’t have a youtube account, you can also follow us on twitter and facebook at twitter.com/bbmezzy or facebook.com/wowweekly. Also be sure to check out our written content on our website wowweekly.net. For now I’m Sulya and I’ll see you again next time.