fbpx
Menu Close

Category: Warlords of Draenor

Normal/Heroic Shadow-Lord Iskar Raiding Guide

Shadow-Lord Iskar
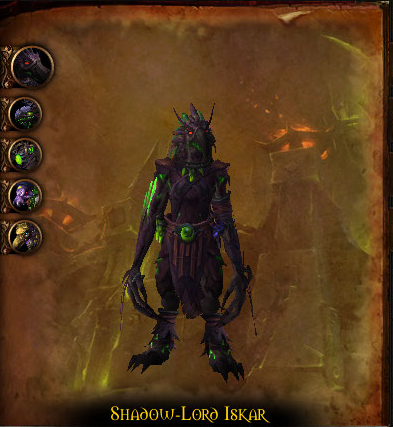
Hey guys I’m Mezzy from WoW Weekly and today we’ll be taking a look at Shadow-Lord Iskar in Heroic Hellfire Citadel. These tactics also apply to the normal version.

This encounter has two phases. In phase 1 you’ll be dealing with Iskar and his abilities and in phase 2 you’ll be dealing with adds. In both phases the most important mechanic is the Eye of Anzu. This is an item right near the boss at the start of the encounter and it needs to be picked up by a player. If it’s not held by a player it will start ticking fire damage to the entire raid and wipe you.

When you hold the Eye of Anzu you will get a stacking dot, meaning that you will have to rotate the Eye through 3 players. After you pass on the Eye to another player the stacking dot will slowly decrease again. Luckily the Eye is of some use to you as well because you will need it to counter multiple abilities.

You normally pass the Eye of Anzu onto other players by targeting them and clicking your extra action button, but you can also download the Iskar Assist addon. This is the list of players you see on the right of the screen. This addon allows you to just left click on the player in the list you want to throw the Eye to and you will do so without switching targets. Healers can also right click on a player to use their dispel in phase 2.

In phase 1 Iskar will regularly cast Phantasmal Winds which will put a debuff on multiple players and start pushing them off the platform. The only way to deal with this is by throwing the Eye to each of the players, the Eye will remove the debuff allowing you to remain on the platform.

Iskar will also put the Phantasmal Wounds debuff on random players. This is a dot that will cause you to take a lot of damage until you reach 90% of your health again. This can be healed up but it can also be removed by throwing the Eye of Anzu to the players effected by it. It’s up to your group to decide what is easier. Our healers found the debuff easy to heal up and thought it was better to just use the Eye for removing the Winds debuff.

Other than the Eye mechanics, there are two other abilities Iskar has in phase 1.

The first is Fel Chakram. He will target 3 players and he will throw his Chakram at them. This will deal damage to everyone in the raid. The damage gets less the further away the target is from the rest of the raid. Each of the 3 players will get a bullseye above their heads, so when you do get targeted move away from the raid and each other. When the Chakram is thrown it will also deal damage to anyone who gets hit by it while it’s flying around.

The final ability he has is Fel Incineration. You might remember this from the Skyreach’s final boss. This will target a random player and a laser beam will start chasing them. It will leave behind fire. To deal with this you could choose to either use a cooldown and let the fire stack on top of each other, or kite it out of the raid to the side in 1 straight line. You can also choose a hybrid of the two. Instead of running it out as a straight line, once you’re out of the raid run circles around the fire that’s spawning so that it leaves behind a patch of fire.

Because of the fire causing a lot of trouble, we ended up putting 5 markers in the encounter area. One on each the left, middle and right and a marker on each side away from the 3 main markers. We start on the left hand side and the Chakram targets go to the marker on the left hand side that’s away from the main group. In the video it means we stand on blue and if you get the Chakram you form a triangle near the red marker. Once we hit phase 2 we go to the middle to deal with that. Once phase 2 ends we go to the right marker and deal with phase 1 again. We repeat this.

So it’ll go phase 1 on blue, phase 2 on green, phase 1 on yellow, phase 2 on green, phase 1 on blue, etcetera. Hearing this might sound confusing, so pay attention to our movement in the video during phase transitions.

To summarize phase 1: move out of the group if you’re targeted by Chakrams and the Fel Incineration. Heal up or use the Eye for the Wounds debuff and throw around the Eye for the Winds debuff. When there are no debuffs to deal with, designate 3 players to hold the Eye until they reach 3 stacks of the dot.

At 70%, 45% and 20% Iskar will go into phase 2. In phase 2 Iskar will fly up in the air and start casting Focused Blast on the player holding the Eye of Anzu. This does nearly 2 million damage, but the damage is shared between every player that gets hit by it. So you’ll want to stay grouped up around the person holding the Eye. The beam goes in a straight line so as long as the melee are in the same line with the ranged they will share the damage as well.

The goal of phase 2 is to kill off the adds that spawn and deal with their new abilities. These will also involve the Eye of Anzu. As you go through more phase 2’s, different types of adds will spawn.

In every phase 2, the Corrupted Priest of Terokk will spawn. This will cast bombs on multiple players. After 5 seconds these will explode. To deal with this you want to throw the Eye of Anzu onto a healer. This healer will then be able to see an extra bomb, the Phantasmal Fel Bomb. The healer can dispel this, which will cause the other bombs to disappear. In the first phase 2 you can just rotate the Eye through your healers.

In the second and third phase 2’s, the Shadowfel Warden will spawn. It will start channeling Fel Conduit which will do an increasing amount of damage to your raid. This can be interrupted but only if you have the Eye of Anzu. If your healer can interrupt then they can combine doing this with dispelling the Fel Bombs. We found it easier however to have the Eye on the tank interrupting the Warden. The tank would then throw the Eye to a healer when the bombs needed to be dispelled.

In the last phase 2 you will also have to deal with the Fel Raven. This will cast Phantasmal Corruption on the tank. This will start causing AoE fire damage to nearby players and increases their damage taken by fire damage by 100%. If you hold the Eye of Anzu you will be immune to this.
In the final phase 2 we had the tank that interrupts the Warden also tank the Raven. When he didn’t need to interrupt the Warden he tanked the Raven outside of the group so that the AoE fire damage would not kill the melee. This simplified the last phase 2 because we could continue throwing the Eye between 1 tank and the healers.

Because of having to deal with every add in the last phase 2 we used heroism in that phase.

In all phase 2’s you’ll have to deal with the Fel Incineration laser beam, which further promotes moving to different parts of the room after every transition.

After a few Focused Blasts you’ll go back into phase 1. Your priority will be to finish off any of the remaining adds before switching back to Iskar.

If you liked this raiding guide please comment, subscribe and click on the like button to help us out. If you would like to keep up with when new videos come out, but you don’t have a youtube account, you can also follow us on twitter and facebook at twitter.com/bbmezzy or facebook.com/wowweekly. Also be sure to check out our written content on our website wowweekly.net. For now I’m Mezzy and I’ll see you again next time.

Normal/Heroic Gorefiend Raiding Guide

GorefiendHey guys I’m Myln from WoW Weekly and today we’ll be taking a look at Gorefiend in Heroic Hellfire Citadel. These tactics also apply to the normal version.

There are multiple parts to the encounter, so to start with let’s look at Gorefiends regular abilities.

His first ability is Touch of Doom, this is an 8 second debuff that will detonate after 8 seconds dealing a moderate amount of shadow damage to everyone within the raid. The further away you are the less damage it will do. However when this detonates it will also leave a void zone underneath the player that had Touch of Doom. So to deal with this when you get Touch of Doom you’ll want to move to the edge of the room to place the void zone away from the rest of the raid.

His second ability is an aura called Surging Shadows. This deals damage to every player standing within 5 yards of of each other, every two seconds. This means that on this fight as well you will need a 5 yard spread between players.

The third ability is Shared Fate. This will link 3 players together and one of them will be rooted. The other 2 players need to run towards the rooted player and when they get close enough, it will disappear. If they fail to do so within 10 seconds, they will take a big amount of damage.

The final regular ability is Crushing Darkness. Gorefiend will put shadow swirls on the ground that will explode. Simply move out of these.

Now what makes this encounter special is that when you die, you don’t actually die right away but you get teleported to Gorefiend’s stomach. Gorefiend will also regularly teleport players to his stomach with Shadow of Doom. Once inside the stomach you get a 3 minute debuff called Gorefiend’s Corruption. This will prevent you from entering the stomach again. Meaning that if you die within the next 3 minutes, you are really dead. Also once you are inside the stomach you will have 40 seconds to get back out or you will die instantly as well. To get out of the stomach simply run into the middle.

When you’re in the stomach you want to make use of the time that you have. This is because in the stomach 3 different types of adds will spawn and try to get into the middle to get to where the rest of the raid is. We’ll get to what you have to do with adds that spawn in the main realm after we deal with this phase.

Damage dealers should focus and kill as many Shadowy Constructs as possible. The only exception is when the adds spawn for the tanks. Tanks have to take care of the Enraged Spirit that spawns while interrupting Bellowing Shout. This is because the Bellowing Shout increases their physical damage done by 300%. At 70% health the Enraged Spirit will make a run for the middle and it will have to be dealt with in the regular encounter room. The dps should help getting this spirit to 70% so that the tank can go back out into the normal room. Lastly the healers will have to heal up every Tortured Essence in the stomach that they can.

One issue we ran into in our early pulls was that too many of our players were in the stomach. For example we had 2 healers in the stomach at one point, leaving too few healers in the regular encounter room. So communicate with your group and if there is more than 1 healer in the stomach, perhaps try swapping healers – whoever entered first, should be the first one out.

When an add reaches the middle they will exit the stomach and go into the main encounter area. These adds should be your absolute priority. The Shadowy Constructs will fixate on a player and move towards them. If they reach the player it will explode killing anyone within a 10 yard range.

The Essences will now start casting Spirit Volleys, which reduces your movement speed by 50% and the damage of Spirit Volley will keep increasing by 20%.

Then lastly there are the Spirits that need to be tanked. These have 3 threats to deal with now. First off they keep Bellowing Shout, so remember to always interrupt these. Secondly they now put a stacking dot on the tank called Fel Flames. This will require you to do regular tank swaps at 5 stacks. And thirdly the Spirit will charge at random players with Raging Charge. You need to get out of the way because this will stun you if you get hit.

The main priority during this first stage of the encounter is to deal with the mechanics and adds when they spawn. If your dps don’t kill the adds as soon as possible you’ll likely wipe. Especially the Spirits, they deal heavy damage to the tank so, the faster they go down, the better.

When Gorefiend reaches 0 energy he will cast Feast of Souls, dealing AoE damage every 2 seconds for 1 minute. During this phase you will want to stack up and use healing cooldowns. Gorefiend will now take 100% more damage so you should use stuff like heroism here to get the damage done on the boss. During this phase Unstable Souls will spawn which need to be touched by the tanks. This will deal a moderate amount of damage to the raid, but this needs to be done because if the souls reach Gorefiend he will gain energy more quickly.

There are a lot of abilities to keep track of but the encounter comes down to this:
If you get linked with other players move towards them quickly. Stay spread 5 yards. If you get the Touch of Doom debuff move to the edge of the room. Kill off all adds. Move away from charges and interrupt Bellowing shout. In the stomach you will also need to kill the adds and as a healer heal the Essences.

If you liked this raiding guide please comment, subscribe and click on the like button to help us out. If you would like to keep up with when new videos come out, but you don’t have a youtube account, you can also follow us on twitter and facebook at twitter.com/bbmezzy or facebook.com/wowweekly. Also be sure to check out our written content on our website wowweekly.net. For now I’m Myln and I’ll see you again next time.

Normal/Heroic Kilrogg Deadeye Raiding Guide

Kilrogg DeadeyeHey guys I’m Sulya from WoW Weekly and today we’ll be taking a look at Kilrogg Deadeye in Heroic Hellfire Citadel. These tactics also apply to the normal version.

To start off, various abilities in this encounter will give you Fel Corruption. If this reaches 100 you will become mind controlled by the Burning Legion! However when you do have Fel Corruption, this will slowly decrease over time.

Kilrogg uses Shred Armor on the tank, increasing their damage taken by 40% per stack. However this will not apply if the tank uses Active Mitigation when Shred Armor is applied. So you’ll of course want to do so.

You’ll be dealing with a bunch of different adds, causing you to split up your group into the left side and right side. But before we get to that, Kilrogg also uses the Heart Seeker ability on a random player. You’ll see a big red arrow in the direction that he will throw it. If you get targeted by this you’ll want to move to the back, in the middle between the two groups. This is because this ability will also hit anyone else in the path of the seeker.

When Heart Seeker hits you, it will put a bleeding dot on you and it will spawn a Globule. This globule will start moving towards Kilrogg and needs to be killed. Should the Globule reach Kilrog it will deal AoE damage to the entire raid. This is where being in the middle helps, because not only will you avoid it hitting someone else, both groups will be able to reach the Globule and dps it down.

Killrogg’s last ability is Death Throes. This is a raid wide AoE that will deal less damage the further away you are from him. Not only that but he will also throw balls of fel goo, which you can dodge by not standing in the swirls. The damage of Death Throes will increase by 12% each time he uses it.

At the same time, splitting the group serves another purpose. Salivating Bloodthirster orcs will spawn at the left, right and at the back in the middle. These will run to the pools in the front of the room. The orcs need to be killed off before they reach it because if they do, they will turn into Hulking Terrors. The orcs can and should be slowed.

Once in a while you will get a Hulking Terror spawn nonetheless. Have one tank pick it up and all your dps switch to it when the other adds aren’t up. The Terror needs to be tanked facing away from the rest of the raid due to it’s conal Savage Strikes attack. It will also cast Rending Howl, which needs to be interrupted as it’s another AoE damage spell. Each time you interrupt it the casting speed will increase by 50%. When the Terror dies it will explode dealing damage to anyone within 10 yards.

Kilrogg’s eye will also open 3 runes near Kilrogg. When a player stands on one each it’ll teleport them to an alternate realm. Here you’ll have to kill as many adds as you can before you reach 1 health. The imps will cast Fel Blaze, if this finishes this will put you at 1 health instantly. The fiends explode on death and mistresses breath fire in the direction they’re standing. You will want to avoid each of these threats to prolong your time in the alternate realm.

Once you reach 1 health you’ll be teleported back into the regular encounter and you’ll have a buff increasing your damage or healing depending on how many adds you killed. This will allow dps to kill adds much more quickly and healers will also gain an aura that will reduce Fel Corruption from those that they stand close to. If your tanks are getting high on Fel Corruption you’ll want your healer to stand in melee so that their corruption can be lowered.

You will also receive a debuff preventing you from entering the next alternate realm. This means you’ll need 2 groups to go into the alternate realm. If not all the runes are taken you do not get teleported and Kilrogg will deal damage to the entire raid instead.

This isn’t an overly complicated fight. Split the raid into 2 groups: left and right. When you get targeted by Heart Seeker move to the back of the room. Kill all adds and interrupt the howl from the Terror. Dodge the AoE balls from Kilrogg and keep sending different sets of 2 players into the alternate realm.

If you liked this raiding guide please comment, subscribe and click on the like button to help us out. If you would like to keep up with when new videos come out, but you don’t have a youtube account, you can also follow us on twitter and facebook at twitter.com/bbmezzy or facebook.com/wowweekly. Also be sure to check out our written content on our website wowweekly.net. For now I’m Sulya and I’ll see you again next time.

Normal/Heroic Hellfire High Council Raiding Guide

Hellfire High CouncilHey guys I’m Mezzy from WoW Weekly and today we’ll be taking a look at the Hellfire High Council in Heroic Hellfire Citadel. These tactics also apply to the normal version.

This encounter has 3 different bosses but their health is not linked together. When one reaches 30% it will gain a new ability and this will continue being cast even after they die.

First off is Blademaster Jubei’thos. He will use Fel Blade, with which he will throw his sword in the direction of the arrow that shows up when he casts it. Simply move out of that direction to avoid any damage from that ability.

His second ability is Felstorm, which is a simple AoE that you can do nothing about except heal back up.

His third ability is Windwalk. He will summon a lot of mirror images which will each do either one of the blademaster’s abilities. These images can and should be killed off. The damage you do to these images will also transfer to the blademaster himself.

At 30% health he will gain Wicked Strike. With this he will start dealing damage to half of the group. The damage of this will ramp up over time. Once the blademaster is dead he will keep using Wicked Strike.

The second boss is Gurtogg Bloodboil. His first ability is Bloodboil, with this he will deal damage to the 5 players furthest away from him. This means that if you are low on health you might want to move a bit closer to Bloodboil so that you don’t die.

The second ability he has is Acidic Wound, which is a stacking dot on the tank. This will also reduce their armor with 100 per stack. The debuff itself lasts 30 seconds. Due to the last boss you can’t really tankswap. So instead to get rid of this you’ll want to use the next ability to your advantage.

The next ability is Fel Rage. With this he will target a random player and increase that player’s defenses. He will then focus on that player for 25 seconds. That player should tank him, however every successful melee hit that Gurtogg does will increase his attack speed by 10%. This means that as you get to the later part of the 25 seconds you’ll want to use a defensive cooldown to survive. Hand of protection can serve particularly well. Because this fixate only lasts 25 seconds instead of 30, there will be 5 seconds left that you need to create so that Acidic Wound is removed from the tank. When Fel Rage is getting to the 18 second mark you will want the fixated player to move far away from the tanks, so that the after the fixate ends Gurtogg will have to move back to the tank. In that time the debuff should fade from the tank.

Gurtogg’s final ability is Demolishing Leap. With this he will jump around and the further you away you are from the point of impact, the less damage it will do to you.

At 30% health Gurtogg will start casting Tainted Blood. This will reduce the maximum health of everyone by 10% per stack. After Gurtogg dies, the debuff will remain.

The final boss is Dia Darkwhisper. She has an aura called Void Haze. This will make the other 2 bosses immune to damage if they are within 25 yards of Darkwhisper. This is why you’ll have one tank on Darkwhisper and one tank on both the Blademaster and Gurtogg.

Darkwhisper will mostly cast Void Bolt on the tank, dealing a chunk of shadow damage. She can also turn into a Visage of Nightmares. While she’s in this form, she will do a ton of damage to the tank and the tank will need to be focussed on when it comes to healing.

Darkwhisper’s threat to the raid is Mark of the Necromancer. This is a debuff that will ramp up in damage over time. When you dispel it, and you will, the debuff will spread to 2 new players. This process will repeat itself and you’ll want to prevent too many players getting the debuff. Darkwhisper will cast Reap, at which point a permanent void zone will spawn underneath each person with the debuff and the debuff will disappear. So when Reap is cast and you have the debuff on you, move to the sides of the room quickly.

Darkwhisper’s last ability is Wailing Horror. Shadow elementals will spawn around the room and deal shadow damage when they fly over you. You will want to try and dodge these, but the damage is healable.

At 30% Darkwhisper will put the Mark of the Necromancer on half of the raid and no longer cast Reap. This means your healers will be dispelling a lot to reset the debuff, as Darkwhisper will no longer remove it for you.

Because of the 30% mark changes being permanent for the rest of the encounter you’ll want to get all of the bosses around 40% health. At that point you will want to first kill Bloodboil, then the blademaster and finally Darkwhisper. When Bloodboil gets to 30% be sure to use heroism so that your maximum health doesn’t get any lower than it needs to go.

So in this encounter you’ll want to kill mirror images, stay away from arrows, deal with Acidic Wound, keep away from the places Bloodboil jumps to, focus heal the tank when Darkwhisper is a terror, move to the side of the room if you have the mark of the necromancer and reap is being cast and keep Darkwhisper away from the other 2 bosses.

If you liked this raiding guide please comment, subscribe and click on the like button to help us out. If you would like to keep up with when new videos come out, but you don’t have a youtube account, you can also follow us on twitter and facebook at twitter.com/bbmezzy or facebook.com/wowweekly. Also be sure to check out our written content on our website wowweekly.net. For now I’m Mezzy and I’ll see you again next time.

Normal/Heroic Kormrok Raiding Guide

KormrokHey guys I’m Mezzy from WoW Weekly and today we’ll be taking a look at Kormrog in Heroic Hellfire Citadel. These tactics also apply to the normal version.

The boss has only 4 abilities, but their effects will change depending on his empowerment. There are 3 pools in the room and he will use them to empower himself. Before we get to that however, let’s talk about the core abilities.

His first ability is Pound. This deals damage to every player in the raid for 5 seconds. You’ll want to use a healer cooldown for this and you need to spread out. This is because it works like Gruul’s petrify. While Pound is channeling, you will also deal damage to anyone within 4 yards of you.

His next ability is Fel Outpouring with which he will spawn purple waves of goo. You’ll need to dodge these. If you get hit you’ll take a good amount of shadow damage.

The next ability is Explosive Runes with which he will summon multiple explosive runes that will grow over time. If they have not been triggered they will detonate after 15 seconds dealing a huge amount of damage to the entire raid. However if someone walks over it, it deals less damage and just to that person. So you’ll want to have players run over these to prevent them from detonating. They still do a good chunk of damage so you’ll preferably want players with abilities like deterence and cloak of shadows to trigger these. It isn’t required to have the cooldown though. We assigned 5 players in our raid to trigger them so that the rest of the raid could focus on the boss.

His final ability is Grasping Hands which works just like the hands from Kromog, but they spawn on you instead. To deal with this stack up loosely and AoE the hands down quickly, because a Pound could follow and the hands themselves deal damage every second too. I say stack up loosely, because when the hands grab you, they will also deal damage to anyone within 4 yards of you.

During the encounter Kormrog will jump into the 3 different puddles: purple, green and orange. He will always jump to the closest pool that he hasn’t been in yet, until he’s been in all 3 puddles. When he does this he will empower one of his core abilities and gain a special ability to use on the tank. When he uses this ability the tank will also gain the Fel Touch debuff, increasing magic damage taken by 50%. This will require a tank swap.

So when he’s empowered by the purple puddle the Fel Outpouring ability will spawn waves of goo from all of the puddles. To deal with this you’ll want to stand to one of the sides so you’re not in the middle of every single wave. He will also gain Swat. This will deal a fair amount of shadow damage to the tank and knock them back until they reach a wall. This further promotes standing off to one of the sides with your back to the wall. You do not want to be thrown into one of the three pools because this could kill you.

When he’s empowered with the orange pool the Explosive Runes will keep respawning unless they explode near other runes or are the last one. When a rune explodes it will respawn in the direction that your character is facing. So when the original runes spawn you’ll want to face the middle of all the runes and push them towards the middle. That way they will come close to each other and stop spawning.

The tank ability that he gains is called Explosive Burst. He will root the tank and after 10 seconds they will explode dealing a large amount of fire damage to everyone within 40 yards. To deal with this your entire raid will have to move away from the tank. Abilities such as Transcendance Teleport from monks still work, but not all tanks have such abilities.

And then finally when he’s empowered by the green pool, the hands will pick up every raid member and attempt to throw them in the pools. Once again stack up loosely and dps them down before the hands succeed. Slows and stuns do not effect them. The tank ability he gains is Foul Crush, with which the tank will be stuck in a hand. The dps will of course have to get the tank out of it.

We found the easiest order of empowerment to be Orange, Purple and then finally Green.

At 30% Kormrog will enrage, increasing his haste and he will now keep the empowerments. Meaning this is a soft enrage mechanic and you’ll want to use heroism at this point.

So in short, stack loosely for the hands, spread for pound, dodge the waves of goo and use personal cooldowns if you can, to deal with the runes. When the runes are empowered look towards the middle of the runes before standing on it and when purple empowerment is up tank him with your back towards a wall. When a tank gets rooted by explosive burst be sure to move away from them.

If you liked this raiding guide please comment, subscribe and click on the like button to help us out. If you would like to keep up with when new videos come out, but you don’t have a youtube account, you can also follow us on twitter and facebook at twitter.com/bbmezzy or facebook.com/wowweekly. Also be sure to check out our written content on our website wowweekly.net. For now I’m Mezzy and I’ll see you again next time.

Normal/Heroic Iron Reaver Raiding Guide

Iron ReaverHey guys I’m Mezzy from WoW Weekly and today we’ll be taking a look at the Iron Reaver in Heroic Hellfire Citadel. These tactics also apply to the normal version.

This is a 2 phase encounter in which the phrase don’t stand in the fire couldn’t be more appropriate. In the ground phase you’ll be able to attack the Iron Reaver but in the air phase the Iron Reaver will take 95% reduced damage. So your time will be better spent dealing with the encounter’s mechanics.

In both phases you’ll have to deal with patches of fire, which will give you the stacking dot Immolation. So don’t stand in the fire.

In the ground phase the first ability you’ll deal with is Artillery. This is cast on the tank and will require a tank swap. The tank will be targeted by the Reaver and will be shot at. The further away the tank is from the rest of the group, the less damage the impact damage will do to the entire raid. So when you get targeted, tankswap and run away from the rest of the group.

Do note that you don’t have to run endlessly, because you will need to get back as soon as possible because the other tank will have already been targeted by Artillery so you will need to taunt as quickly as possible.

The next ability is Unstable Orb. The reaver will target a random player and shoot an orb at them. It will deal damage and leave a stacking dot to anyone within 8 yards. This means that you’ll need to keep spread out at least 8 yards. The spreading is needed anyway, so healers be aware.

You will also have to deal with the potentially lethal ability called Barrage. The boss will target a player, power up his gun. In his animation you’ll see his clear intent to use the gun, once he fires it it will hit anyone anyone in the way he’s facing. This damage is really high and potentially lethal. When I say the way he’s facing, I mean he will shoot the barrage of fire in the direction of where his elbow is facing, and not the gun that’s powering up.

You really need to pay attention to the animation, because there’s another ability that has an animation as well, which is Blitz. With this he will also target a player, face their direction and then charge at them. Anyone who gets hit by him will be dragged along by the Reaver and be brought back to his original location. The boss will cast Blitz twice in a row. The animation to watch for is he’ll put one leg and an elbow infront of the others. Naturally you’ll want to get out of the way before he charges towards you. This ability will also push the fire away when he charges through it.

His final ability is pounding. With which he’ll do AoE damage to everyone in the raid. This ability could be a pain to deal with because of your being spread for all of the other abilities. This will be used 3 times per ground phase, so be sure to use healing cooldowns for this. Pounding will also knock back the fire on the ground so it might just come flying your way if you’re positioned behind fire.

To deal with the fire in phase 1 we’ve gone through a couple of iterations on the positioning of the raid. And even as I describe it now, it’s slightly different than you see in the video. As you can see there are markers along the room on both sides of the boss.

The entire group starts on one side of the boss near one of the markers. You’ll of course need to spread out 8 yards. You will get a couple of barrages and once there is too much fire on that side move over to the next marker. In the video you’ll see that we move from one side of the boss to the other. In the end that felt too messy so what we will do next time is stay on the same side but move to the next clear marker on the right.

By moving as a group you’ll be able to have more control over the fire and thus the potential damage your raid will take.

After a set amount of time the Reaver will reach 100 energy and go into the air phase.

In the air phase the Reaver will target 3 players with the same Artillery ability as tanks have to deal with in the ground phase. Just like the tanks, the 3 players need to move away from the rest of the raid.

The Iron Reaver will throw fuel onto the battlefield which slows you by 40%. You will want to get away from the fuel as quickly as you can because it will be set on fire after a few seconds. After it’s been set on fire the Reaver will throw multiple Firebombs into the field. These need to be killed because if they’re not killed in time they will detonate dealing a large amount of damage to the raid.

With the positioning at the end of phase 1 you will all be in the same part of the room. Split your raid up into groups for phase 2 so that you can assign them to parts of the room and have the whole room covered to deal with bombs.

When the Reaver goes back into the Ground phase he will target a player and land on their location. He does that rather unceremoniously with Falling Slam. There will be a big circle around that player and everyone needs to get out of the circle. After 6 seconds anyone still standing in the slam will find themselves a dead pancake.

The main thing to keep in mind for this encounter are to stay spread, use healing cooldowns for pounding, get away from the directions he targets with both of his animations and get away from the raid when he targets you with Artillery. In phase 2 kill off the bombs and get out of the oil.

If you liked this raiding guide please comment, subscribe and click on the like button to help us out. If you would like to keep up with when new videos come out, but you don’t have a youtube account, you can also follow us on twitter and facebook at twitter.com/bbmezzy or facebook.com/wowweekly. Also be sure to check out our written content on our website wowweekly.net. For now I’m Mezzy and I’ll see you again next time.

Normal/Heroic Hellfire Assault Raiding Guide

AssaultHey guys I’m Mezzy from WoW Weekly and today we’ll be taking a look at Hellfire Assault in Heroic Hellfire Citadel. These tactics also apply to the normal version.

This encounter is pretty much a pure add encounter with a mini boss at the start. Once she drops to 50% she’ll leave the encounter leaving just the adds to deal with. The goal of this encounter is to use the two big Hellfire Cannons in the back of the room to blow down the door into the citadel.

The adds can be categorized into two sorts: The orcs and the siege weapons. The siege weapons will attack your Hellfire Canons and can destroy them. When you kill a siege weapon it will drop ammo you can pick up and bring to the Hellfire Canons to deal damage to the gate. The ammo will deal a small amount of damage to you every second, but will also increase your movement speed by 100% for 9 seconds. So you’ll be able to quickly move to and from the cannon.

While the siege weapons are important, not all of them are an immediate threat. There are a few orcs that are a lot more of a danger to you. So let’s go ahead and take a look at each of the orcs first.

First off there’s the mini-boss Siegemaster Mar’tak. Her first ability Howling Axe will target random players. When her axe hits them it will deal to anyone within 8 yards, requiring a slight spread. Her second ability is Shockwave. She will mark the ground with brown circles and send a shockwave that way dealing damage. Simply move away from the marked ground to deal with this. Her final ability is Inspiring Presence which is an aura increasing the damage done over time by adds near her. It’s because of this ability you’ll want to get rid of the Siegemaster as quickly as possible.

The next orc you’ll want to watch out for is the Gorebound Felcaster. The Felcaster casts both incinerate and Felfire Volley, and both can and should be interrupted. When he gets low on health the Felcaster will cast metamorphosis and become a Gorebound Terror. They constantly spam Felfire Volley which now does an increased amount of damage. You’ll want to focus these down and use healing cooldowns as needed.

The Hulking Berserkers will be the adds that will hurt your tanks. They cast Slam dealing physical damage and increasing damage taken by physical attacks by 30%, which stacks. When there are no terrors up, this should definitely be the priority of your dps. If there aren’t 2 berserkers up you can of course have the other tank taunt to reset the stacks on the tank. The berserkers also have Cower, which will decrease your movement speed and deal a small amount of physical damage to anyone standing near the berserker.

You will also encounter the Iron Dragoons which are just cannon fodder. Have your tank pick these up and just cleave these down as you’re dealing with the other adds.
The final non-siege adds you’ll have to deal with are the Contracted Engineers. These will work a lot like the engineers from the Blast Furnace encounter. First off they can repair the siege adds and should be interrupted when they do. Their second ability is Conducted Shock Pulse, which is basicly a chain lightning that stuns. While the stun can be dispelled, you’re better off having a slight spread to reduce the chance of this jumping to more players. Their final ability is Boom. With this they will throw out bombs. Simply move away from these.

There are 4 siege weapons: The Felfire Crusher, the Felfire Flamebelcher, the Felfire Artillery and the Felfire Demolisher. When the Crusher and Artillery spawn you need to get rid of them right away. They will both deal a lot of damage quickly to the Hellfire Canons. If they succeed in killing the Cannons it’ll be game over.

The Crusher will deal damage to anyone standing near it. If you’re infront of it you’ll quickly find death as it deals damage every half a second to anyone, as well as the Hellfire Canon, infront of it. If you get close to it from the sides it will breathe fire at you.

The Artillery will simply shoot at the Hellfire Canon, dealing a chunk of damage to anyone within 40 yards.

The Flamebelcher will shoot out fire in every direction. The fireballs that spawn will need to be dodged. Should you get hit you’ll take damage for about a third of your health bar.

The Demolisher will shoot mortars at an area and dealing a moderate amount of damage to anyone in that direction. After it shoots the mortars it will shoot a second mortar at the targeted area. This will deal a large amount of fire damage to anyone in that area. The damage to the entire raid will decrease, the further away you are from the point of impact.

As with all add fights there’s plenty to deal with. Prioritize the Felfire Crusher, Felfire Artillery, the Gorebound Brutes and Gorebound Terrors. Have a slight spread to deal with various abilities. Use healing cooldowns as needed for the Terrors and Brutes. Don’t forget to interrupt repair. And then finally don’t be afraid to bring the siege ammo to the cannon as you’ll be back in the fight quickly.

If you liked this raiding guide please comment, subscribe and click on the like button to help us out. If you would like to keep up with when new videos come out, but you don’t have a youtube account, you can also follow us on twitter and facebook at twitter.com/bbmezzy or facebook.com/wowweekly. Also be sure to check out our written content on our website wowweekly.net. For now I’m Mezzy and I’ll see you again next time.