
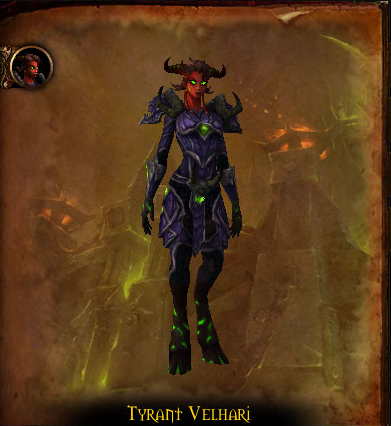
 Hey guys I’m Sulya from WoW Weekly and today we’ll be taking a look at Tyrant Velhari in Heroic Hellfire Citadel. These tactics also apply to the normal version.
This is a 3 phase encounter in which you will deal with new abilities and a new add in each phase. She also has 3 abilities she uses in all of the phases. So let’s go over those first.
Her first ability is Edict of Condemnation. This will be put on a random player and every 3 seconds they will pulse a huge amount of damage. However this damage can and should be shared. The Edict’s radius will be marked with a purple circle and will get smaller each time. You’ll want to have half of your ranged players in that circle to share the damage.
The second ability is Touch of Harm. This will put a debuff on a random player and this will absorb a huge amount of healing. The goal is of course to get rid of this debuff by healing it up. You can also dispel this, but then the remaining debuff will be transferred to another player. So heal the person with Touch of Harm until they get to 70% health and then dispel the debuff so they can be healed back up. Repeat this with the next person the debuff is on until the debuff disappears.
The last ability is the tank switching mechanic, Seal of Decay. This is a stacking debuff that reduces healing and absorbs taken by 10%. You’ll want to tank swap on 3 stacks of this debuff.
In each of the phases she will have an aura, an add and a few other abilities. The aura will increase in strength the longer you stay in that phase.
In phase 1 she will have the Aura of Oppression. This will deal damage to you whenever you move. So of course the goal in phase 1 is to have to move as little as possible, while still dealing with mechanics like Edict of Condemnation.
The Tyrant will now also use Annihilating Strike. With this she will target a random player and strike a cone of fire damage towards them. When they get hit by it a patch of fire called Searing Blaze will spawn underneath them and explode after 2 seconds. To deal with the Strike you will want to spread out around the boss. Due to the Aura you’re going to have to get hit by the Strike if you’re in the cone. Once the patch of fire is underneath you move out of it. You can let the Strike hit the tank instead by taunting at the last moment. This sometimes coincides with swapping on the Seal of Decay debuff which is a bonus for you. You will want to use the Seal of Decay and not the Annihilating Strike as a swap mechanic.
The second ability that she gains is Infernal Tempest. She will channel this and deal damage to everyone in the raid. This will also deal extra damage to anyone close to you. So you’ll need to continue being spread out. Each time it ticks for damage a Searing Blaze will spawn underneath them, requiring you to move out. Just remember to not get too close to others. You can do what we call a 2step with Infernal Tempest. After the first fire circle spawns, wait until the second one spawns and then move. That way you only have to move twice.
At 90% health the Ancient Enforcer will spawn. His one ability is Enforcer’s Onslaught, with which he will throw a ball of fire towards a player. This ball of fire will also move back to the Enforcer. If you get hit by the ball you will of course take damage, but another fire patch will spawn underneath you. Simply keep the Enforcer faced away from the raid and only the tank will have to deal with this ability.
In phase 1 you will want to focus on dpsing the boss with cleave damage hitting the Enforcer. If the enforcer is still up when you reach phase 2 finish him off.
Once you reach phase 2 the abilities related to fire will disappear. She will now gain the Aura of Contempt which does not allow you to be healed above 80%. As the Aura gets stronger, the less health you will be allowed to have.
The tyrant’s first new ability is Tainted Shadows. With this she will deal direct shadow damage to the tank and this will also deal damage to anyone within 5 yards of that player.
There is one exception to the rule however, because of her second ability Font of Corruption. This is a debuff that will deal Tainted Shadows damage to these players as well when Tainted Shadows is cast. However the players with the Font of Corruption debuff will be immune to the AoE damage from this spell.
Simply put, to deal with this have everyone stack on one side of the boss. When players get the Font of Corruption have them move to the opposite of the boss and stack on a marker there. This means that their AoE from Tainted Shadows will not hit anyone and it will make healing this phase a lot more manageable. When your debuff is about to fall off, run out so that you don’t get killed by the AoE from the other players fonts. Once your font is gone, stack back up in the nondebuff pile.
At 60% health you will face the next add, the Ancient Harbinger. You will want to ignore this add, except to interrupt her spell. This is Harbinger’s Mending, with which she will heal the Tyrant. This can and should be interrupted.
Phase 2 is all about healing people up and still dealing with the other mechanics. Tank swap at 3 stacks and heal the absorption debuff. This is the most lethal phase and because of that you will want to use heroism to speed up the process.
Once you reach Phase 3 the shadow themed abilities will disappear. Finish the Harbinger off quickly and get ready to deal with the new mechanics.
Her new Aura will cause you to deal 20% more damage and take 10% more damage. This will increase over time like the other aura’s.
Her first new ability is Bulwark of the Tyrant. This will deal damage to the tank and 2 other players. On top of that it will leave a Despoiled Ground patch underneath those players. This will deal damage every second to those who stand in it. As a result of this you will want to move around as a group with everyone hugging the boss.
Her second new ability is Gavel of the Tyrant. This will deal direct damage to everyone, pulse AoE damage to everyone for 8 seconds and knock everyone back.
At 30% health the last add will spawn, the Ancient Sovereign. He will not do much other than make the boss take reduced damage by 90%. This means you’ll want to dps this guy down as soon as possible.
Phase 3 isn’t a very complex one. Simply deal with the basic abilities while hugging the boss, moving around as a group and kill the add when it spawns.
If you liked this raiding guide please comment, subscribe and click on the like button to help us out. If you would like to keep up with when new videos come out, but you don’t have a youtube account, you can also follow us on twitter and facebook at twitter.com/bbmezzy or facebook.com/wowweekly. Also be sure to check out our written content on our website wowweekly.net. For now I’m Sulya and I’ll see you again next time.