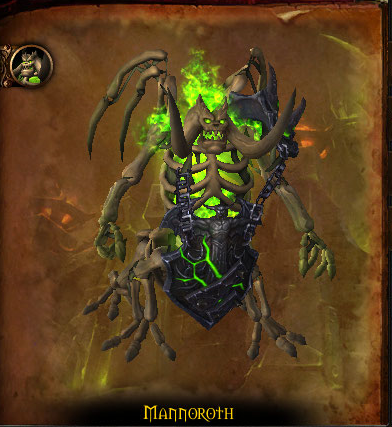

This is a 4 phase encounter so let’s get right into the first phase.
In phase 1 you will have to contend with Fel Iron Summoners and the demons they bring to the table. You will have to kill each of the 3 Summoners to transition into phase 2. Each Summoner summons a specific demon and when you kill him they will stop spawning for the time being.
You’ll want to move counter clockwise and kill the summoner on the right first. This one will put Curse of the Legion on a random player and when it expires it will deal damage and summon a Doom Lord. The Doom Lord has 3 abilities of which the first is Doom Spike. The Doom Lord’s auto attacks will put a stacking debuff on the tank and once it fades away it will deal 35k damage per stack to the tank. To deal with this you will want to tank swap on the Doom Lord at around 6 stacks.
The second ability is Mark of Doom which is another debuff placed on random players. This will deal a moderate amount of damage on the player when the player takes damage from anything. This damage will also hit everyone within 20 yards, and if you don’t take damage you will die instead when this debuff expires. If you get the Mark you will want to touch the pool in the middle of the room to take some damage and get rid of the debuff without it dealing damage to your entire raid.
The final ability is Shadow Bolt Volley which can and should be interrupted.
The next summoner when you move counter clockwise will summon Fel Imps. These will crash down onto the platform and deal splash damage to anyone near them. These will cast Fel Blast, which deals damage to anyone within 3 yards and they can also blink around. You’ll want to AoE these imps down and if you have death knights with gorefiend’s grasp be sure to use them.
The final summoner summons Inferno’s. These will drop down onto the platform on places indicated by green swirls. This will deal damage to those standing in the swirls and afterwards they will start channeling Fel Hellfire, hitting anyone within 10 yards of them. Simply move away from these infernals and DoT them up while you’re dealing with other mobs. Depending on how many DoT classes you have, you might want to have everyone switch to them to kill them off at points in phase 1.
Once the last summoner falls you will hit phase 2 and mannoroth will enter the fray. Both imps and Inferno’s will start to spawn again and you’ll have to deal with them throughout phase 2. You will want to prioritize dpsing these above the boss.
Before we get into the abilities, let’s talk about positioning. In phases 2 and 3 you can negate 2 abilities by standing near the pillar to the left of you when you teleport onto the platform. We’ve put a blue marker here, which is where we’ll be tanking mannoroth. And then one marker on either side of mannoroth for phase 4. I highly recommend you follow the same positioning as it makes the fight pretty easy. So in phase 2 and 3 stand between the pillar and the boss who should be roughly on the blue marker.
Mannoroth has 2 abilities for the tanks to contend with. And they will hurt quite a lot. They’re both used in the Glaive Combo ability. Mannoroth will first use multiple Glaive Thrusts which deal a large amount of physical damage and put a dot on you. This dot will not apply if you use active mitigation and so it is very very very important that you do so. After he does this he will use Massive Blast on the tank dealing a large amount of shadow damage, knocking them back and increasing their damage taken by Massive Blast by 300% for 45 seconds.
As soon as Massive Blast is cast, the other tank should taunt it and use active mitigation right away because Mannoroth will do another Glaive Thrust. You should not forget to have your back towards the middle so that you do not get thrown off the platform.
Mannoroth also has 3 abilities for the rest of the raid to deal with. The first is Fel Hellstorm. With this he will cause meteors to fall from the sky and you’ll get hit for some damage if you stand in the point of impact. The points of impact will become darker spots on the ground, simply requiring you to move out of these spots.
The next ability is Mannoroth’s Gaze. With this he will fear multiple players and after 4 seconds they will explode for a big amount of damage which can be shared with anyone within 8 yards of them. You will want at least 2 others soak this so that the damage isn’t too high. An easy way to deal with this is to stack up as a raid. Which will be useful for the next ability as well.
One thing to note here, you will want your melee to have their backs towards the pillar as well so that if the Gaze gets put onto them, their damage can be soaked together with the ranged players.
The last ability for phase 2 is Felseeker. With this he will target a random player and channel an AoE. This will pulse 3 times and each time it gets bigger. What you will want to do is get out of the circle when he casts it so you don’t get hit. Then move back once the ability ends. The Felseeker also knocks you back when you get hit, so if you get hit you could get an unlucky angle and be thrown off the platform.
To summarize phase 2:
– Keep AoEing the imps down and kill the infernals.
– Everyone should have their backs to the pillar to deal with Mannoroth’s Gaze efficiently.
– Move away from Hellstorm and Felseeker.
– Tankswap after Massive Blast.
Once he reaches phase 3 at 65% he will no longer summon imps, but gain 1 new ability. This is ShadowForce, which will push multiple players towards the edge of the platform. You’ll need to walk against it just like you would other wind mechanics. The pushback mechanic becomes stronger as he’s channeling it. In this phase you will still have the pillar behind you to prevent you from being thrown off. However if you don’t try to run against it there is a bug that will sometimes push you through the pillar, letting you fall to your death.
At 35% you will reach phase 4, infernals will no longer spawn and all of his abilities will be empowered. You will want to use heroism at this point in time.
ShadowForce will now push the entire raid back and Glaive Thrust will now hit anyone infront of Mannoroth. This means your raid will need to use movement speed increasing spells to get through the ShadowForces.
Massive Blast will now also send out waves of shadow that you need to dodge as they will deal damage to you.
Fel Hellstorm will now be cast continuously and will send more and more meteors onto the platform as the fight goes on. This is the soft enrage mechanic.
Mannoroth’s Gaze will become a lot more difficult to deal with now as when it fades and does damage, it will leave behind a puddle of which the size will grow bigger as more are hit by the explosion. So you will really only want to have 1 or 2 people get hit by the explosion to share the damage. It also means that you can’t stay in the same spot for the rest of the phase. One key factor is that this puddle does slow you down. We’ll get to positioning and using this to your advantage in a second.
Lastly Felseeker will still deal damage to you even if you are out of the circle, but the damage will decrease the further away you are from the blast.
To deal with phase 4 and the no longer having a pillar in your back we have the raid move to one of Mannoroth’s sides. In our case we started at the green marker. We finished off any infernals remaining and started nuking down the boss. You will always first have a Mannoroth’s Gaze before you have a Shadow Force.
As I said, have only 1 or 2 people per Gaze help soak the damage so that the puddles that spawn are not too big. After you have done so successfully, do not move over to Mannoroth’s other side yet. Instead when Shadow Force gets cast, everyone runs against it and makes sure they have the puddles behind them. These puddles will slow you down and for good measure we use a druid’s roar. This should prevent you from being pushed off the edge by Shadow Force.
Once Shadow Force has finished casting move over to Mannoroth’s other side and repeat the process. If Mannoroth isn’t dead yet after the second Shadow Force, we have markers mirroring the first set on the other side of the platform so we can do the same. It’s all rinse and repeat once you’ve done it the first time. Be ready to use healing cooldowns as needed during the Gaze / Shadow Force combination.
To summarize, in phase 4 it’ll be about only having 1 or 2 people share the Mannoroth’s Gaze damage and moving further around the platform without being pushed off by ShadowForce or Massive Blast. Be sure to use movement speed increases and perhaps even a helpful life grip from a priest to pull back the tank getting sent off.
If you liked this raiding guide please comment, subscribe and click on the like button to help us out. If you would like to keep up with when new videos come out, but you don’t have a youtube account, you can also follow us on twitter and facebook at twitter.com/bbmezzy or facebook.com/wowweekly. Also be sure to check out our written content on our website wowweekly.net. For now I’m Sulya and I’ll see you again next time.
