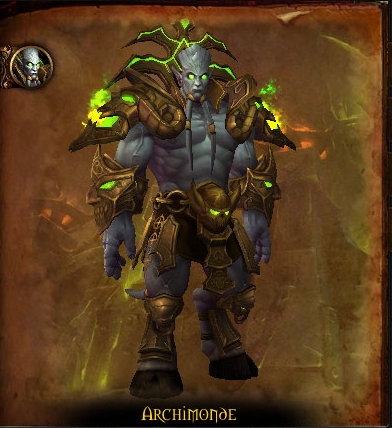

This is a 3 phase encounter and after 15% health in every phase Archimonde gains an additional ability.
In phase 1 Archimonde can summon a Doomfire Spirit. This Spirit will put fire on the floor that will chase a random player around for 10 seconds. Every dps should switch to the Spirit to take it out as soon as possible. If you get targeted by the fire you will want to kite it away in a straight line. If you get hit by the fire you’ll take some damage and you’ll receive a stacking dot.
Archimonde can use the Allure of Flames spell to teleport the fire to where players are standing. The place the fire will be teleported to will be indicated by a smaller swirl, so you can get out of this in time. To deal with this you can split up the encounter area into 2 or 4 sides. Whenever the Allure of Flames is cast you can move to the other side so that the fire won’t bother you.
There is a bigger swirl you also need to watch for. This is caused by Shadow Burst. With this Archimonde will knock players into the air and when they fall to the ground they will take a huge amount of damage. This damage can be shared with others though. So when someone gets thrown into the air, the bigger swirl will indicate where players can stand to share the damage. So while normally you want to move out of swirls, in this particular case you will want to stand in it. In addition to this, when it gets cast on a player, it will also be put on anyone within 8 yards of that player. So when Burst is about to be cast, have all ranged players spread out.
The tanks will have to contend with Death Brand. This does a huge amount of damage on the tank and puts a stacking dot on them. This also summons a Hellfire Deathcaller which will need to be killed. Once the Deathcaller dies, the dot will disappear from the tank. The Deathcaller himself will randomly Shadow Blast players in the raid, dealing damage and increasing their shadow damage taken by 25% for 30 seconds.
In phase 1 your priority is the Doomfire Spirit, then the Hellfire Deathcaller and finally Archimonde himself. Be sure to catch people that get shot into the air and move from one side of the room to the other when Allure of Flames is used. It’s up to you to decide whether you want to split the area up into 2 or 4 areas. We started out with 2 but in the end our preference went out for 4 areas because it meant we had to move less per Allure of Flames.
At 85% Archimonde gains an additional phase 1 ability called Desecrate. With this he will summon pillars that deal AoE damage to the raid every second. You can’t do much about it, but Yrel can. She will destroy the pillars and leave behind Orbs of Light. Anyone can run over these, and they should. But particularly the tanks need to do so. When they do they will become immune to shadow damage and gain a movement speed increase for 25 seconds. The buff they give will trigger for anyone within 15 yards of the Orb, so if anyone is nearby they will also benefit from this buff.
At 70% Archimonde will go into phase 2. You will no longer have to deal with the Doomfire Spirits and Shadow Bursts in this phase. Because of this you can stack up on the boss in phase 2. You will still have to deal with the Deathcallers and Allure of Flames however.
Archimonde will gain 2 new abilities to replace his old ones. The first is Shackled Torment. He will cast this on 3 random players and each of their souls will become shackled. This will deal damage to those players every second until they are more than 30 yards away from their soul. However when they do get free from the shackles they will deal a moderate amount of damage to the entire raid. Because of this you do not want all 3 of the players to break the shackles as once. Stagger it so that your healers can heal the raid back up.
The second phase 2 ability is Wrought Chaos. This is a debuff that gets put on a random player and this debuff will aim at another player. After 5 seconds a laser beam will fire from the debuffed player to the aimed player. The debuff will get swap onto the player who was aimed at, and the process will repeat itself. This will continue happening until the Wrought Chaos runs out of stacks. To deal with this you will want both players to go out of the group and make sure that there is no one between the 2 players.
So for phase 2 you will still run from marker to marker, kill Deathcallers, let Shackles be broken 1 by 1 and make sure that there is no one between the 2 Wrought Chaos players.
At 55% Archimonde will start summoning 2 kinds of adds, which will need to be killed as well. The first is Felborne Overfiend. All this guy does is cast Heart of Argus and deal AoE damage to the entire raid every time he loses 25% of his health. This needs to be interrupted. Because there are often other adds up when the Overfiend is up, we have a melee switch to the Overfiend even if there are other priorities so that they can interrupt the cast.
The second type of which multiple will spawn is the Dreadstalker. This hound will teleport to random players and deal damage to anyone within 8 yards and interrupt them for 3 seconds. The area they will teleport to will be marked by a purple circle so just run out of it.
Once these adds start spawning your priority will be Deathcallers > Overfiends > Dreadstalkers. If You’re already killing an Overfiend when a Deathcaller spawns, you can finish it off first.
At 40% he will go into phase 3. You will no longer have to deal with any of the adds from phase 1 or 2 and he will no longer use Allure of Flames. You will have to keep dealing with both new abilities from the previous phase.
The first new ability he gains is Demonic Feedback. This is an AoE that does damage to the entire raid and it does an additional amount of damage to anyone standing near you. So what it comes down to is that you have to be spread out in phase 3. This will mean that you have to make sure noone stands between the 2 players with the laser beam.
The other new mechanic of this phase is that Archimonde will use Nether Banish on the tank. This will put a debuff on the tank, and after 8 seconds anyone standing within 8 yards of the tank will be banished to the nether together with the tank. This will also leave behind a giant pool of fel.. stuff. So when the tank gets this cast on them, they should move to the side together with a healer and nearly half of your dps. They will get banished and they will have to deal with what awaits for them in the Nether. I’ll get to the Nether in a minute, but whenever you come out of the nether you will get a debuff preventing you from entering again for a whole minute. So you will have to set up a group to go in with each of the tanks.
From the pool of fel stuff a Living Shadow will spawn regularly and they will charge at random players. If they reach their target they will put the Devour Life debuff on them. This will deal a big amount of shadow damage and reduces their healing taken by 20% for 45 seconds. The Living Shadows can be both stunned and slowed. To deal with them you will want your ranged dps prioritize these. Hunters with tier 18 4set are by far the best to deal with these because the living shadows move quite quickly. They move so quickly in fact that they often don’t get slowed by the first slowing trap when they trigger it.
In the nether itself you will have to dodge circles of fire, take AoE damage every 5 seconds and deal with 2 different adds. Void Stars will regularly spawn and focus on the closest player. If the Void Star reaches the player it will explode knocking anyone within 8 yards off of the platform. You will need a ranged dps who can slow and kill it to deal with them.
The second add is the Shadowed Netherwalker. You need to kill this add to be able to get out of the Nether. Once he dies a portal will spawn which you can click on to get out. The netherwalker has one ability called Touch of Shadows. This can be interrupted. It will deal a moderate amount of damage to everyone within the nether, so you will want to interrupt it as much as you can.
Sadly we did not have footage from the twisting nether, once we do we’ll post it in another video and put an annotation in this one so you can check it out.
So thus far in phase 3 you will have 2 groups for the Nether, your raid spread out, living shadows that need killing and you’ll be dealing with the chain and laser abilities.
At 25% he will gain his final new ability. He will summon infernals that will drop from the sky. You will of course have to move away from the impact location, but some of the infernals will also start attacking you, pulsing for some fire damage. You will need to kill them off. But you cannot tank the one you’re killing close to the other infernals. This is because of the Eternal Flame aura. If an infernal is 15 yards or closer to another infernal it will heal up. What you will want to do is have dps tanking the different infernals, standing away from each other. Kill the infernals and return to the boss.
We stopped our dps right before 25% when a group was banished in the twisting nether. To get them out quickly we sent in more dps than usual so that they could get out quickly. Once they were back out and reached 25%, we used heroism to push for the kill. You really need to get through phase 3 as quickly as possible because of the banishments. Once you get to 3 or 4 living shadows spawning right after one another you’re going to be stressed into getting Archimonde down to 0%.
Because of this we sacrificed 2 players along with the tank on the 4th banishment, so that we could push for a kill. You need 2 other players to join the tank, because if less than 3 people get teleported to the twisting nether, Archimonde will heal for 5% of his health.
And that will be it, if you can get through all of these mechanics you’ll have gotten through Hellfire Citadel succesfully!
If you liked this raiding guide please comment, subscribe and click on the like button to help us out. If you would like to keep up with when new videos come out, but you don’t have a youtube account, you can also follow us on twitter and facebook at twitter.com/bbmezzy or facebook.com/wowweekly. Also be sure to check out our written content on our website wowweekly.net. For now I’m Mezzy and I’ll see you again next time.
