
 Hey guys I’m Mezzy from WoW Weekly and today we’ll be taking a look at Hellfire Assault in Heroic Hellfire Citadel. These tactics also apply to the normal version.
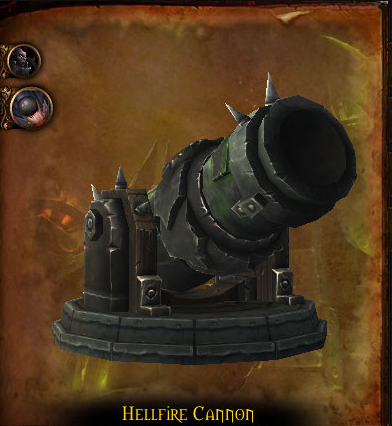
This encounter is pretty much a pure add encounter with a mini boss at the start. Once she drops to 50% she’ll leave the encounter leaving just the adds to deal with. The goal of this encounter is to use the two big Hellfire Cannons in the back of the room to blow down the door into the citadel.
The adds can be categorized into two sorts: The orcs and the siege weapons. The siege weapons will attack your Hellfire Canons and can destroy them. When you kill a siege weapon it will drop ammo you can pick up and bring to the Hellfire Canons to deal damage to the gate. The ammo will deal a small amount of damage to you every second, but will also increase your movement speed by 100% for 9 seconds. So you’ll be able to quickly move to and from the cannon.
While the siege weapons are important, not all of them are an immediate threat. There are a few orcs that are a lot more of a danger to you. So let’s go ahead and take a look at each of the orcs first.
First off there’s the mini-boss Siegemaster Mar’tak. Her first ability Howling Axe will target random players. When her axe hits them it will deal to anyone within 8 yards, requiring a slight spread. Her second ability is Shockwave. She will mark the ground with brown circles and send a shockwave that way dealing damage. Simply move away from the marked ground to deal with this. Her final ability is Inspiring Presence which is an aura increasing the damage done over time by adds near her. It’s because of this ability you’ll want to get rid of the Siegemaster as quickly as possible.
The next orc you’ll want to watch out for is the Gorebound Felcaster. The Felcaster casts both incinerate and Felfire Volley, and both can and should be interrupted. When he gets low on health the Felcaster will cast metamorphosis and become a Gorebound Terror. They constantly spam Felfire Volley which now does an increased amount of damage. You’ll want to focus these down and use healing cooldowns as needed.
The Hulking Berserkers will be the adds that will hurt your tanks. They cast Slam dealing physical damage and increasing damage taken by physical attacks by 30%, which stacks. When there are no terrors up, this should definitely be the priority of your dps. If there aren’t 2 berserkers up you can of course have the other tank taunt to reset the stacks on the tank. The berserkers also have Cower, which will decrease your movement speed and deal a small amount of physical damage to anyone standing near the berserker.
You will also encounter the Iron Dragoons which are just cannon fodder. Have your tank pick these up and just cleave these down as you’re dealing with the other adds.
The final non-siege adds you’ll have to deal with are the Contracted Engineers. These will work a lot like the engineers from the Blast Furnace encounter. First off they can repair the siege adds and should be interrupted when they do. Their second ability is Conducted Shock Pulse, which is basicly a chain lightning that stuns. While the stun can be dispelled, you’re better off having a slight spread to reduce the chance of this jumping to more players. Their final ability is Boom. With this they will throw out bombs. Simply move away from these.
There are 4 siege weapons: The Felfire Crusher, the Felfire Flamebelcher, the Felfire Artillery and the Felfire Demolisher. When the Crusher and Artillery spawn you need to get rid of them right away. They will both deal a lot of damage quickly to the Hellfire Canons. If they succeed in killing the Cannons it’ll be game over.
The Crusher will deal damage to anyone standing near it. If you’re infront of it you’ll quickly find death as it deals damage every half a second to anyone, as well as the Hellfire Canon, infront of it. If you get close to it from the sides it will breathe fire at you.
The Artillery will simply shoot at the Hellfire Canon, dealing a chunk of damage to anyone within 40 yards.
The Flamebelcher will shoot out fire in every direction. The fireballs that spawn will need to be dodged. Should you get hit you’ll take damage for about a third of your health bar.
The Demolisher will shoot mortars at an area and dealing a moderate amount of damage to anyone in that direction. After it shoots the mortars it will shoot a second mortar at the targeted area. This will deal a large amount of fire damage to anyone in that area. The damage to the entire raid will decrease, the further away you are from the point of impact.
As with all add fights there’s plenty to deal with. Prioritize the Felfire Crusher, Felfire Artillery, the Gorebound Brutes and Gorebound Terrors. Have a slight spread to deal with various abilities. Use healing cooldowns as needed for the Terrors and Brutes. Don’t forget to interrupt repair. And then finally don’t be afraid to bring the siege ammo to the cannon as you’ll be back in the fight quickly.
If you liked this raiding guide please comment, subscribe and click on the like button to help us out. If you would like to keep up with when new videos come out, but you don’t have a youtube account, you can also follow us on twitter and facebook at twitter.com/bbmezzy or facebook.com/wowweekly. Also be sure to check out our written content on our website wowweekly.net. For now I’m Mezzy and I’ll see you again next time.