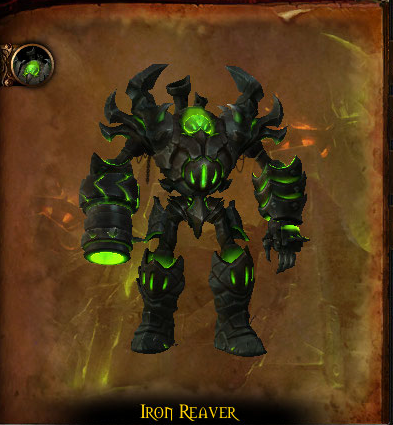

This is a 2 phase encounter in which the phrase don’t stand in the fire couldn’t be more appropriate. In the ground phase you’ll be able to attack the Iron Reaver but in the air phase the Iron Reaver will take 95% reduced damage. So your time will be better spent dealing with the encounter’s mechanics.
In both phases you’ll have to deal with patches of fire, which will give you the stacking dot Immolation. So don’t stand in the fire.
In the ground phase the first ability you’ll deal with is Artillery. This is cast on the tank and will require a tank swap. The tank will be targeted by the Reaver and will be shot at. The further away the tank is from the rest of the group, the less damage the impact damage will do to the entire raid. So when you get targeted, tankswap and run away from the rest of the group.
Do note that you don’t have to run endlessly, because you will need to get back as soon as possible because the other tank will have already been targeted by Artillery so you will need to taunt as quickly as possible.
The next ability is Unstable Orb. The reaver will target a random player and shoot an orb at them. It will deal damage and leave a stacking dot to anyone within 8 yards. This means that you’ll need to keep spread out at least 8 yards. The spreading is needed anyway, so healers be aware.
You will also have to deal with the potentially lethal ability called Barrage. The boss will target a player, power up his gun. In his animation you’ll see his clear intent to use the gun, once he fires it it will hit anyone anyone in the way he’s facing. This damage is really high and potentially lethal. When I say the way he’s facing, I mean he will shoot the barrage of fire in the direction of where his elbow is facing, and not the gun that’s powering up.
You really need to pay attention to the animation, because there’s another ability that has an animation as well, which is Blitz. With this he will also target a player, face their direction and then charge at them. Anyone who gets hit by him will be dragged along by the Reaver and be brought back to his original location. The boss will cast Blitz twice in a row. The animation to watch for is he’ll put one leg and an elbow infront of the others. Naturally you’ll want to get out of the way before he charges towards you. This ability will also push the fire away when he charges through it.
His final ability is pounding. With which he’ll do AoE damage to everyone in the raid. This ability could be a pain to deal with because of your being spread for all of the other abilities. This will be used 3 times per ground phase, so be sure to use healing cooldowns for this. Pounding will also knock back the fire on the ground so it might just come flying your way if you’re positioned behind fire.
To deal with the fire in phase 1 we’ve gone through a couple of iterations on the positioning of the raid. And even as I describe it now, it’s slightly different than you see in the video. As you can see there are markers along the room on both sides of the boss.
The entire group starts on one side of the boss near one of the markers. You’ll of course need to spread out 8 yards. You will get a couple of barrages and once there is too much fire on that side move over to the next marker. In the video you’ll see that we move from one side of the boss to the other. In the end that felt too messy so what we will do next time is stay on the same side but move to the next clear marker on the right.
By moving as a group you’ll be able to have more control over the fire and thus the potential damage your raid will take.
After a set amount of time the Reaver will reach 100 energy and go into the air phase.
In the air phase the Reaver will target 3 players with the same Artillery ability as tanks have to deal with in the ground phase. Just like the tanks, the 3 players need to move away from the rest of the raid.
The Iron Reaver will throw fuel onto the battlefield which slows you by 40%. You will want to get away from the fuel as quickly as you can because it will be set on fire after a few seconds. After it’s been set on fire the Reaver will throw multiple Firebombs into the field. These need to be killed because if they’re not killed in time they will detonate dealing a large amount of damage to the raid.
With the positioning at the end of phase 1 you will all be in the same part of the room. Split your raid up into groups for phase 2 so that you can assign them to parts of the room and have the whole room covered to deal with bombs.
When the Reaver goes back into the Ground phase he will target a player and land on their location. He does that rather unceremoniously with Falling Slam. There will be a big circle around that player and everyone needs to get out of the circle. After 6 seconds anyone still standing in the slam will find themselves a dead pancake.
The main thing to keep in mind for this encounter are to stay spread, use healing cooldowns for pounding, get away from the directions he targets with both of his animations and get away from the raid when he targets you with Artillery. In phase 2 kill off the bombs and get out of the oil.
If you liked this raiding guide please comment, subscribe and click on the like button to help us out. If you would like to keep up with when new videos come out, but you don’t have a youtube account, you can also follow us on twitter and facebook at twitter.com/bbmezzy or facebook.com/wowweekly. Also be sure to check out our written content on our website wowweekly.net. For now I’m Mezzy and I’ll see you again next time.
