
 Hey guys I’m Mezzy from WoW Weekly and today we’ll be taking a look at the Hellfire High Council in Heroic Hellfire Citadel. These tactics also apply to the normal version.
This encounter has 3 different bosses but their health is not linked together. When one reaches 30% it will gain a new ability and this will continue being cast even after they die.
First off is Blademaster Jubei’thos. He will use Fel Blade, with which he will throw his sword in the direction of the arrow that shows up when he casts it. Simply move out of that direction to avoid any damage from that ability.
His second ability is Felstorm, which is a simple AoE that you can do nothing about except heal back up.
His third ability is Windwalk. He will summon a lot of mirror images which will each do either one of the blademaster’s abilities. These images can and should be killed off. The damage you do to these images will also transfer to the blademaster himself.
At 30% health he will gain Wicked Strike. With this he will start dealing damage to half of the group. The damage of this will ramp up over time. Once the blademaster is dead he will keep using Wicked Strike.
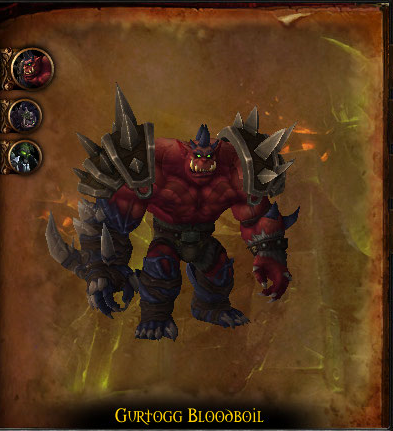
The second boss is Gurtogg Bloodboil. His first ability is Bloodboil, with this he will deal damage to the 5 players furthest away from him. This means that if you are low on health you might want to move a bit closer to Bloodboil so that you don’t die.
The second ability he has is Acidic Wound, which is a stacking dot on the tank. This will also reduce their armor with 100 per stack. The debuff itself lasts 30 seconds. Due to the last boss you can’t really tankswap. So instead to get rid of this you’ll want to use the next ability to your advantage.
The next ability is Fel Rage. With this he will target a random player and increase that player’s defenses. He will then focus on that player for 25 seconds. That player should tank him, however every successful melee hit that Gurtogg does will increase his attack speed by 10%. This means that as you get to the later part of the 25 seconds you’ll want to use a defensive cooldown to survive. Hand of protection can serve particularly well. Because this fixate only lasts 25 seconds instead of 30, there will be 5 seconds left that you need to create so that Acidic Wound is removed from the tank. When Fel Rage is getting to the 18 second mark you will want the fixated player to move far away from the tanks, so that the after the fixate ends Gurtogg will have to move back to the tank. In that time the debuff should fade from the tank.
Gurtogg’s final ability is Demolishing Leap. With this he will jump around and the further you away you are from the point of impact, the less damage it will do to you.
At 30% health Gurtogg will start casting Tainted Blood. This will reduce the maximum health of everyone by 10% per stack. After Gurtogg dies, the debuff will remain.
The final boss is Dia Darkwhisper. She has an aura called Void Haze. This will make the other 2 bosses immune to damage if they are within 25 yards of Darkwhisper. This is why you’ll have one tank on Darkwhisper and one tank on both the Blademaster and Gurtogg.
Darkwhisper will mostly cast Void Bolt on the tank, dealing a chunk of shadow damage. She can also turn into a Visage of Nightmares. While she’s in this form, she will do a ton of damage to the tank and the tank will need to be focussed on when it comes to healing.
Darkwhisper’s threat to the raid is Mark of the Necromancer. This is a debuff that will ramp up in damage over time. When you dispel it, and you will, the debuff will spread to 2 new players. This process will repeat itself and you’ll want to prevent too many players getting the debuff. Darkwhisper will cast Reap, at which point a permanent void zone will spawn underneath each person with the debuff and the debuff will disappear. So when Reap is cast and you have the debuff on you, move to the sides of the room quickly.
Darkwhisper’s last ability is Wailing Horror. Shadow elementals will spawn around the room and deal shadow damage when they fly over you. You will want to try and dodge these, but the damage is healable.
At 30% Darkwhisper will put the Mark of the Necromancer on half of the raid and no longer cast Reap. This means your healers will be dispelling a lot to reset the debuff, as Darkwhisper will no longer remove it for you.
Because of the 30% mark changes being permanent for the rest of the encounter you’ll want to get all of the bosses around 40% health. At that point you will want to first kill Bloodboil, then the blademaster and finally Darkwhisper. When Bloodboil gets to 30% be sure to use heroism so that your maximum health doesn’t get any lower than it needs to go.
So in this encounter you’ll want to kill mirror images, stay away from arrows, deal with Acidic Wound, keep away from the places Bloodboil jumps to, focus heal the tank when Darkwhisper is a terror, move to the side of the room if you have the mark of the necromancer and reap is being cast and keep Darkwhisper away from the other 2 bosses.
If you liked this raiding guide please comment, subscribe and click on the like button to help us out. If you would like to keep up with when new videos come out, but you don’t have a youtube account, you can also follow us on twitter and facebook at twitter.com/bbmezzy or facebook.com/wowweekly. Also be sure to check out our written content on our website wowweekly.net. For now I’m Mezzy and I’ll see you again next time.