fbpx
Menu Close

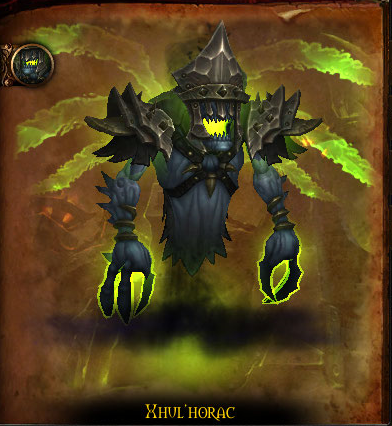
Normal/Heroic Xhul’horac Raiding Guide

Xhul'horacHey guys I’m Mezzy from WoW Weekly and today we’ll be taking a look at Xhul’horac in Heroic Hellfire Citadel. These tactics also apply to the normal version.

This is a 4 phase encounter in which you will deal with different abilities in the first 2 phases and then face them both in the last 2 phases. The core of this encounter is that Xhul’horac will use 2 different magic schools: Fire and Shadow. If you get hit by a fire spell you will get a 10 second debuff. If you get hit by a Shadow spell in those 20 seconds, you will explode dealing a large amount of damage to anyone within 20 yards. The same applies for if you get hit by a shadow spell, you will not be allowed to get hit by a fire spell for 20 seconds.

When you cause an explosion you will also increase your damage taken by the next explosion by 100% for 1 minute.

Different spells will create moving patches of fire and shadow on the ground in this fight. Standing in fire will give you a stacking fire dot and standing in shadow will give you a stacking shadow dot. When the patches of fire and shadow touch each other they will explode dealing a lot of damage to anyone standing nearby. This will also increase their damage taken by the explosion by 100% for 1 minute. This detail is important because you’ll want to force some explosions as they clear up the fire where the explosion occurs.

So, with the environmental mechanics out of the way, let’s talk phase 1.

In phase 1 Xhul’horac will use Fel Strike on the tank dealing a big amount of fire damage to them. Meanwhile he will put the Fel Surge debuff on random players. After 5 seconds the debuff will expire and leave patches of fire underneath those players. So to deal with this in phase 1 you will want to use one side of the room and if you get the debuff move to the edges of the room so that the fire can stay out of the way for as long as possible.

You will also have to deal with adds in this phase. There will be a mini boss called Vanguard Akkelion. This will need to be tanked by the tank that’s not tanking Xhul’horac as he will also be putting heavy damage on the tank through his ability Felblaze Flurry. The damage of this attack will increase on the tank each time. This means it will require a tank swap after Felblaze Flurry ends.

Akkelion’s second ability is Chains of Fel. With this he will chain players together and a dot will start ticking on them. They can break this chain by moving away from each other, and they should of course do so.

During phase 1 you will also have to deal with Wild Pyromaniacs. These are just imps. They will start casting Fel Orbs which will throw balls of fire into the environment. If they hit the ground patches of fire will spawn from this. However if you get hit by the fire ball instead the fire will not spawn but you’ll get a stacking dot for 15 seconds. So to deal with the imps you’ll want to group them up if you can with grips and you can stun/interrupt them. Dps these down as soon as possible and if a fire ball does get cast, get hit by it so less fire spawns.

Your dps priority will be the imps, then Akkelion and if you can cleave damage onto him, the boss. Any damage Akkelion takes will also be put on the boss. In phase 1 run away from your chain partner, intercept the Fel Orbs and if you get the Fel Surge debuff run as far as you can to the edge.

Once Akkelion dies you will enter phase 2. You will face mostly similar mechanics but now they will be of the shadow school spell. So if you get hit by fire, do not get hit by shadow and vice versa. You will also want to move to the other side of the room to reduce the chance of fire and shadow meeting each other.

In phase 2 Xhul’horac will now hit the tank with a high hitting shadow damage spell, Void Strike. He will also put the debuff Void Surge on 1 player, which will also put shadow patches on the ground after 5 seconds. Once again, run this to the edge if you get this debuff. This will deal a lot more damage to that player though, so they will need healing.

The mini boss during phase 2 is Omnus. His Withering Gaze ability works just like Felblaze Flurry. This is a heavy hitting attack that will increase your damage taken from Withering Gaze by 20%. You will again want to swap tanks after Withering Gaze ends.

Instead of chains, now you will have to deal with Black Hole. This will keep pulling everyone towards it until it explodes. You can make the Black Hole explode by letting someone run to it’s center. This will then deal a huge amount of damage to anyone within 11 yards of the center. So choose a group 4-5 of players to take care of the Black Holes each time. To make coordinating this easier, we put raid marks on the assigned players so it would be easy to see when enough players were at the black hole to make it explode. Any extra people soaking the explosion because they were close are just a bonus to spread the damage more.

In addition to the imps you will also deal with Unstable Voidfiends. These will teleport to the nearest player, dealing a moderate amount of shadow damage. You will see a small purple swirl on the ground where they are going to teleport. So you can get out of the way without being hit. If someone gets hit by it then a patch of shadow will be put on the ground.

In phase 2 prioritize killing the imps, then voidfiends and then Omnus. Assign multiple people to close Blackholes and if you get the Void Surge move it out of the raid.

In phase 2 you will also want to start using explosions to your advantage to clear up the fire on the other side of the room. The green and purple flames will expand over time so you want to clear as much up as possible. We had multiple people get hit by shadow damage on purpose, run over to the green side of the room and clear up the fire by letting explosions occur.

You need to continue doing this in phase 3 as well because it will get quite hectic. We put up additional markers in the encounter area so that it was easier to call out where to clean up the fire or shadow so that anyone else near that point could get away.

Once Omnus dies you will enter phase 3. In this phase Xhul’horac will use both spell schools and all spells from the previous phases. If you get Fel Surge, move to the fire side and if you get Void Surge move to the shadow side. Keep taking care of adds and move the boss to where there isn’t any fire. !!!!One tank should tank the boss when he’s in his fire mode and one should tank him when he’s in his shadow mode.!!!

You will also have to clear up the shadow fire on the purple side now so be sure to coordinate letting explosions occur there as well. If you have one rogue or more you can really use them well by having both feint to reduce the explosion damage and cloak of shadows to take off the damage increasing debuff once they have 3 or 4 stacks. It will mean you don’t have to have a lot of people clearing up the fire which helps the general coordination.

Once Xhul’horac reaches 20% you will go into phase 4. No more adds will spawn, but you will now have to deal with the soft enrage. Xhul’horac will use Overwhelming Chaos every 10 seconds. He will pulse for a moderate amount of Chaos damage but he will also increase his damage done by 20% each time. Use heroism at this point clear up any adds and finish him off. Just be sure to stand on a part of the platform that does not have fire or shadow.

If you liked this raiding guide please comment, subscribe and click on the like button to help us out. If you would like to keep up with when new videos come out, but you don’t have a youtube account, you can also follow us on twitter and facebook at twitter.com/bbmezzy or facebook.com/wowweekly. Also be sure to check out our written content on our website wowweekly.net. For now I’m Mezzy and I’ll see you again next time.

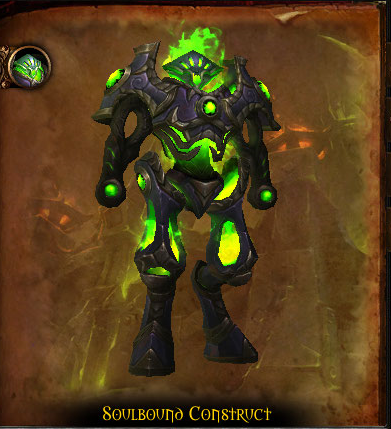
Normal/Heroic Socrethar the Eternal Raiding Guide

Socrethar the EternalHey guys I’m Sulya from WoW Weekly and today we’ll be taking a look at Socrethar the Eternal in Heroic Hellfire Citadel. These tactics also apply to the normal version.

This is a 2 phase encounter in which you will have to deal with the Soulbound Construct in one phase and with Socrethar in the other phase.

The Construct has 4 abilities. The first one is Reverberating Blow which will deal a large amount of physical damage in a cone towards the tank. So you will want to face him away from the raid. This has a second effect called Shattered Defenses, which is a stacking debuff increasing all damage taken from Reverberating Blow by 200%. It will distribute 3 stacks of the debuff on anyone close to the tank. This means that if noone is close to the tank, the tank will get all 3 stacks. To deal
with this we had the tanks soak 2 blows in a row. For the first one they did not need cooldowns, but for the second blow they did.

The next ability is Fel Prison. A ring on the floor will spawn and anyone that gets hit by it will be put into a prison for 30 seconds. They will be linked to a crystal via a chain and the crystal will need to be broken. Simply move out of the prison before it activates because you don’t want to waste dps on this crystal.

The next ability is Volatile Fel Orb. This will be put on a random player and they will get a green arrow above their head. They should move away from the rest of the group because an orb will be thrown at them dealing damage to anyone near that player.

The construct will also put a dot on random players called Overwhelming Power. This will have to be healed up.

The final ability is Felblaze Charge. With this he will target a random player and charge after him. This charge will leave a line of fire behind him, meaning your group will have to move.

In phase 1 we started on one side of the room. If a player got targeted by the charge they moved to the left. If they got targeted by the orb it didn’t matter much where they moved as long as they moved out of the raid. And then finally if a Prison got put on the raid, we all moved to the right.

Once your defeat the Construct, Socrethar will come out and you will have to battle him. 1 player will be able to take over the Construct and this should be one of the tanks. The construct will have all of the abilities except for the dot. The construct can still harm your players so don’t accidentally put your raid in a prison or a fire line.

Socrethar himself will have 2 abilities. Exert Dominance with which he will damage the Construct for 10% health, can and needs to be interrupted. This is because once the construct reaches 1 health, Socrethar will go back in it and you will go back to phase 1.

His second ability is Apocalypse. This is a 10 second raidwide AoE which will deal damage to everyone in the raid.

The reason you need to use the construct in this phase is because of 3 types of portals that will spawn adds. You’ll want to use the construct to help with them.

First off there’s the purple portals. These will spawn the Sargerei Shadowcallers. These puts Shadow Word: Agony dots on random players. This dot can be dispelled. They also cast Shadow Bolt Volleys which can be interrupted.

Secondly there’s the blue portals which spawn Haunting Souls. These will fixate on random players and if they reach them they will explode for a massive amount of damage and fear anyone nearby for 8 seconds.

Finally there’s the red portal that will spawn a Sargerei Dominator. This add will make Socrethar immune to all damage and interrupts. Every single dps should switch to this as soon as possible, because the longer it is up, the more damage it will do to the Construct. The Dominator will also put a pulsing debuff on random players. This debuff will deal damage to anyone near you. So if you get it, get away from the rest of the group.

This fight has been hotfixed which might force you to change the way you deal with phase 2.

You can use all of the abilities from the construct on the adds, including the prison. Before the hotfix you used the construct to prioritise getting rid of the Haunting Souls. However because of the hotfixes more Dominators will spawn meaning you’ll likely go back into phase 1 one more time.

If you just had the construct deal with the Souls it would mean that you would have to deal withthem once phase 1 started again. So now instead we just have the construct leave the flames from charge in the line between the portal and the raid, and have destruction warlocks kill the souls when they spawn. This gives the construct more time to deal damage to the boss himself and the dominator when they spawn. You do not want the construct charging over the Souls when they are up as they will deal a massive amount of damage to the construct when he is within 5 yards of them.

The Shadowcallers should be dealt with by the raid. Let a ranged player interrupt them and let your tank taunt them. You can assign a few dps to kill them, but you can also passively cleave them down as you’re dealing damage to Socrethar.

When the Construct reaches 1 health, Socrethar will go back in it and you’ll go back to phase 1. The adds that are still alive will stay and you will have to deal with these as well. However if your raid can kill the Dominators quickly enough you can get through the encounter without ever switching back to phase 1. Should you have the dps to do so, it also means that you can just use the Construct to prison the Haunting Souls.

When it comes to the adds in phase 2 it comes down to this: If you have the burst to quickly get rid of the dominators have the construct deal with the Haunting Souls, otherwise kill them off. You can use slows and stuns on the souls to make sure they don’t reach your group. Have your entire raid stack up on melee so that they all move in the same direction. The portals will occasionally change position so don’t be afraid to use a druid’s roar to get across the room quicker. Have your tank in the construct communicate to the group when they need to kill the Souls, and really put your burst damage into killing off the dominators as quickly as possible

In phase 1 remember to move away from the prisons. If you get targeted by the orb, move out of the raid. Tankswap after 2 Reverbating Blows. In phase 2 have an interrupt rotation going for Exert Dominance.

If you liked this raiding guide please comment, subscribe and click on the like button to help us out. If you would like to keep up with when new videos come out, but you don’t have a youtube account, you can also follow us on twitter and facebook at twitter.com/bbmezzy or facebook.com/wowweekly. Also be sure to check out our written content on our website wowweekly.net. For now I’m Sulya and I’ll see you again next time.

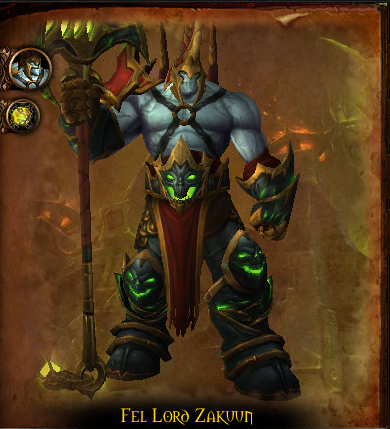
Normal/Heroic Fel Lord Zakuun Raiding Guide

Fel Lord ZakuunHey guys I’m Sulya from WoW Weekly and today we’ll be taking a look at Fel Lord Zakuun in Heroic Hellfire Citadel. These tactics also apply to the normal version.

This is a 2 phase encounter, it has the Armed phase and the Disarmed phase. Each phase will give Zakuun different abilities for the tanks to deal with. But this encounter really revolves around pillars that will spawn and waves of shadow that are not allowed to hit it. So let’s talk about how that works first.

Zakuun will cast Fissures and Crystals. This will spawn 3 or 4 green swirls on the ground and Crystal pillars will spawn from them. You can prevent pillars from spawning from 3 of these by having different players stand on top of each one. Once 3 of the swirls have been absorbed, a pillar will spawn from the 4th swirl. The idea is that once the first pillar has spawned, when Fissures and Crystals is cast again, you will want the swirl closest to the existing pillar to remain empty so that the pillars are close together.

From now on whenever a wave of shadow hit the pillar, it will deal a big amount of damage to the entire raid. On top of that the pillar will also deal damage to anyone standing close to it, and a small amount of damage to everyone in the entire raid. And on top of this the players who prevented other pillars from spawning will get the Latent Energy debuff. This basically makes them walking pillars. They are not allowed to touch the waves of shadow at any cost, as they will explodes just like the pillars if they get hit by them.

Lastly when you prevent a pillar from spawning and get a Latent Energy debuff, you will not be able to prevent another pillar from spawning until the debuff disappears. This means that everyone is responsible for dealing with pillars spawning.

So how can these waves of shadow spawn? Zakuun has a bunch of abilities that will make them do so. First of all when Zakuun is Armed he will cast Soul Cleave on the tank. This will deal a lot of shadow damage and put them in an alternate realm in which they have to dodge waves of shadow. Should they get hit it will mean damage for the rest of the raid. Once the tank is back in the regular realm some waves of shadow will spawn from them and increase their shadow damage taken by 50% for 1,5 minute. This is basicly is the tank switch mechanic for this phase.

His next ability is Cavitation with which he will send Wakes of Destruction, or as I call them the waves of shadow towards random raiders.

The final ability when he’s armed is Befouled. This will put a debuff on random players which will absorb heals. When it has healed a certain amount of heals it will fade away, but as it does it will explode dealing a huge amount of damage to any players within 6 yards of the target. So this means that when you get Befouled you should run out of the raid, to not harm anyone.

So there are multiple abilities that cause waves of shadow, which are not allowed to hit the pillars. To deal with this you want a couple of players to guard the pillars. If a wave of shadow glides toward a pillar the player should get hit by the wave of shadow instead. This is so that only that player will then take damage instead of the entire raid. This only applies to these waves of shadow though. Waves that would not hit pillars need to be dodged by everyone so that the raid doesn’t take unnecessary damage. The players assigned to guard the pillars are not allowed to prevent them from spawning because otherwise they will get the Latent Energy debuff.

You will have to continue dealing with the pillars and waves of shadow in the Disarmed phase. Zakuun will throw away his weapon, which will then pulse damage to the entire raid every 3 seconds. On top of that Zakuun’s auto attacks will now cleave to the closest target. This means that the tanks will have to stack on top of each other during the Disarmed phase. This phase hurts your tanks and they will require external cooldowns.

The new ability Zakuun has during this phase is Seed of Destruction. This will put a debuff on 5 players and after 5 seconds they will shoot out a wave of shadow in every direction. This means that players with Seed of Destruction have to get away from the rest of the raid, but also stay away from the pillars so that they don’t get so many waves of shadow moving towards them.

So just like in the Armed phase, in this phase you will also need a few players to intercept waves of shadow that move towards the pillars.

At 30% health Zakuun enrages. With this he will pulse damage and do cleaving damage even when he is Armed. Your tanks have to stack up on top of each other and you should use heroism to get through the enrage. Zakuun will now also alternate between all of his abilities.

So what you will want to do in the encounter is the following: Everyone should be responsible for preventing from pillars from spawning. Assign a few players to take the hits of waves of shadows that are heading towards pillars. Dodge any waves of shadow that are not going towards the pillars and if you get the Befouled debuff, run out of the raid.

When Zakuun is Disarmed, have your tanks stack up. And finally if you get the Seed of Destruction debuff on you, move away from the rest of the raid and the pillars.

Other than the mechanics let’s talk about the coordination in your group. To make the encounter easier we put up raid markers in each of the 4 corners of the room so we could reference them.

The raid leader would call out which swirl to leave empty for the pillar to spawn in and it also allowed easy communication to the tanks for where to go to when they’re in the alternate realm in the armed phase. You don’t want the tank to go to the corner where the pillars are and having the shadow waves from them spawn and hit the pillars.

In the Disarmed phase we moved around the red marker for the group to group on. The players with the seeds debuff would then have more room to get away from the group as well as the pillars.

If you liked this raiding guide please comment, subscribe and click on the like button to help us out. If you would like to keep up with when new videos come out, but you don’t have a youtube account, you can also follow us on twitter and facebook at twitter.com/bbmezzy or facebook.com/wowweekly. Also be sure to check out our written content on our website wowweekly.net. For now I’m Sulya and I’ll see you again next time.

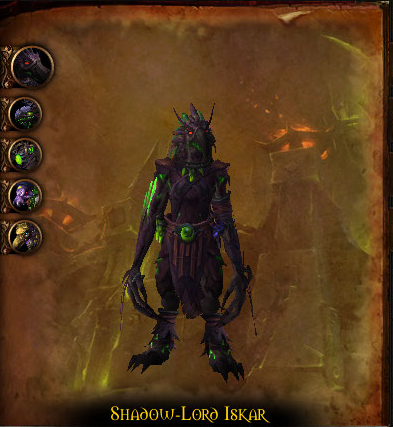
Normal/Heroic Shadow-Lord Iskar Raiding Guide

Shadow-Lord IskarHey guys I’m Mezzy from WoW Weekly and today we’ll be taking a look at Shadow-Lord Iskar in Heroic Hellfire Citadel. These tactics also apply to the normal version.

This encounter has two phases. In phase 1 you’ll be dealing with Iskar and his abilities and in phase 2 you’ll be dealing with adds. In both phases the most important mechanic is the Eye of Anzu. This is an item right near the boss at the start of the encounter and it needs to be picked up by a player. If it’s not held by a player it will start ticking fire damage to the entire raid and wipe you.

When you hold the Eye of Anzu you will get a stacking dot, meaning that you will have to rotate the Eye through 3 players. After you pass on the Eye to another player the stacking dot will slowly decrease again. Luckily the Eye is of some use to you as well because you will need it to counter multiple abilities.

You normally pass the Eye of Anzu onto other players by targeting them and clicking your extra action button, but you can also download the Iskar Assist addon. This is the list of players you see on the right of the screen. This addon allows you to just left click on the player in the list you want to throw the Eye to and you will do so without switching targets. Healers can also right click on a player to use their dispel in phase 2.

In phase 1 Iskar will regularly cast Phantasmal Winds which will put a debuff on multiple players and start pushing them off the platform. The only way to deal with this is by throwing the Eye to each of the players, the Eye will remove the debuff allowing you to remain on the platform.

Iskar will also put the Phantasmal Wounds debuff on random players. This is a dot that will cause you to take a lot of damage until you reach 90% of your health again. This can be healed up but it can also be removed by throwing the Eye of Anzu to the players effected by it. It’s up to your group to decide what is easier. Our healers found the debuff easy to heal up and thought it was better to just use the Eye for removing the Winds debuff.

Other than the Eye mechanics, there are two other abilities Iskar has in phase 1.

The first is Fel Chakram. He will target 3 players and he will throw his Chakram at them. This will deal damage to everyone in the raid. The damage gets less the further away the target is from the rest of the raid. Each of the 3 players will get a bullseye above their heads, so when you do get targeted move away from the raid and each other. When the Chakram is thrown it will also deal damage to anyone who gets hit by it while it’s flying around.

The final ability he has is Fel Incineration. You might remember this from the Skyreach’s final boss. This will target a random player and a laser beam will start chasing them. It will leave behind fire. To deal with this you could choose to either use a cooldown and let the fire stack on top of each other, or kite it out of the raid to the side in 1 straight line. You can also choose a hybrid of the two. Instead of running it out as a straight line, once you’re out of the raid run circles around the fire that’s spawning so that it leaves behind a patch of fire.

Because of the fire causing a lot of trouble, we ended up putting 5 markers in the encounter area. One on each the left, middle and right and a marker on each side away from the 3 main markers. We start on the left hand side and the Chakram targets go to the marker on the left hand side that’s away from the main group. In the video it means we stand on blue and if you get the Chakram you form a triangle near the red marker. Once we hit phase 2 we go to the middle to deal with that. Once phase 2 ends we go to the right marker and deal with phase 1 again. We repeat this.

So it’ll go phase 1 on blue, phase 2 on green, phase 1 on yellow, phase 2 on green, phase 1 on blue, etcetera. Hearing this might sound confusing, so pay attention to our movement in the video during phase transitions.

To summarize phase 1: move out of the group if you’re targeted by Chakrams and the Fel Incineration. Heal up or use the Eye for the Wounds debuff and throw around the Eye for the Winds debuff. When there are no debuffs to deal with, designate 3 players to hold the Eye until they reach 3 stacks of the dot.

At 70%, 45% and 20% Iskar will go into phase 2. In phase 2 Iskar will fly up in the air and start casting Focused Blast on the player holding the Eye of Anzu. This does nearly 2 million damage, but the damage is shared between every player that gets hit by it. So you’ll want to stay grouped up around the person holding the Eye. The beam goes in a straight line so as long as the melee are in the same line with the ranged they will share the damage as well.

The goal of phase 2 is to kill off the adds that spawn and deal with their new abilities. These will also involve the Eye of Anzu. As you go through more phase 2’s, different types of adds will spawn.

In every phase 2, the Corrupted Priest of Terokk will spawn. This will cast bombs on multiple players. After 5 seconds these will explode. To deal with this you want to throw the Eye of Anzu onto a healer. This healer will then be able to see an extra bomb, the Phantasmal Fel Bomb. The healer can dispel this, which will cause the other bombs to disappear. In the first phase 2 you can just rotate the Eye through your healers.

In the second and third phase 2’s, the Shadowfel Warden will spawn. It will start channeling Fel Conduit which will do an increasing amount of damage to your raid. This can be interrupted but only if you have the Eye of Anzu. If your healer can interrupt then they can combine doing this with dispelling the Fel Bombs. We found it easier however to have the Eye on the tank interrupting the Warden. The tank would then throw the Eye to a healer when the bombs needed to be dispelled.

In the last phase 2 you will also have to deal with the Fel Raven. This will cast Phantasmal Corruption on the tank. This will start causing AoE fire damage to nearby players and increases their damage taken by fire damage by 100%. If you hold the Eye of Anzu you will be immune to this.
In the final phase 2 we had the tank that interrupts the Warden also tank the Raven. When he didn’t need to interrupt the Warden he tanked the Raven outside of the group so that the AoE fire damage would not kill the melee. This simplified the last phase 2 because we could continue throwing the Eye between 1 tank and the healers.

Because of having to deal with every add in the last phase 2 we used heroism in that phase.

In all phase 2’s you’ll have to deal with the Fel Incineration laser beam, which further promotes moving to different parts of the room after every transition.

After a few Focused Blasts you’ll go back into phase 1. Your priority will be to finish off any of the remaining adds before switching back to Iskar.

If you liked this raiding guide please comment, subscribe and click on the like button to help us out. If you would like to keep up with when new videos come out, but you don’t have a youtube account, you can also follow us on twitter and facebook at twitter.com/bbmezzy or facebook.com/wowweekly. Also be sure to check out our written content on our website wowweekly.net. For now I’m Mezzy and I’ll see you again next time.
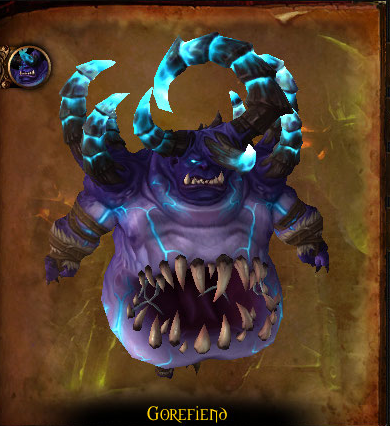
Normal/Heroic Gorefiend Raiding Guide

GorefiendHey guys I’m Myln from WoW Weekly and today we’ll be taking a look at Gorefiend in Heroic Hellfire Citadel. These tactics also apply to the normal version.

There are multiple parts to the encounter, so to start with let’s look at Gorefiends regular abilities.

His first ability is Touch of Doom, this is an 8 second debuff that will detonate after 8 seconds dealing a moderate amount of shadow damage to everyone within the raid. The further away you are the less damage it will do. However when this detonates it will also leave a void zone underneath the player that had Touch of Doom. So to deal with this when you get Touch of Doom you’ll want to move to the edge of the room to place the void zone away from the rest of the raid.

His second ability is an aura called Surging Shadows. This deals damage to every player standing within 5 yards of of each other, every two seconds. This means that on this fight as well you will need a 5 yard spread between players.

The third ability is Shared Fate. This will link 3 players together and one of them will be rooted. The other 2 players need to run towards the rooted player and when they get close enough, it will disappear. If they fail to do so within 10 seconds, they will take a big amount of damage.

The final regular ability is Crushing Darkness. Gorefiend will put shadow swirls on the ground that will explode. Simply move out of these.

Now what makes this encounter special is that when you die, you don’t actually die right away but you get teleported to Gorefiend’s stomach. Gorefiend will also regularly teleport players to his stomach with Shadow of Doom. Once inside the stomach you get a 3 minute debuff called Gorefiend’s Corruption. This will prevent you from entering the stomach again. Meaning that if you die within the next 3 minutes, you are really dead. Also once you are inside the stomach you will have 40 seconds to get back out or you will die instantly as well. To get out of the stomach simply run into the middle.

When you’re in the stomach you want to make use of the time that you have. This is because in the stomach 3 different types of adds will spawn and try to get into the middle to get to where the rest of the raid is. We’ll get to what you have to do with adds that spawn in the main realm after we deal with this phase.

Damage dealers should focus and kill as many Shadowy Constructs as possible. The only exception is when the adds spawn for the tanks. Tanks have to take care of the Enraged Spirit that spawns while interrupting Bellowing Shout. This is because the Bellowing Shout increases their physical damage done by 300%. At 70% health the Enraged Spirit will make a run for the middle and it will have to be dealt with in the regular encounter room. The dps should help getting this spirit to 70% so that the tank can go back out into the normal room. Lastly the healers will have to heal up every Tortured Essence in the stomach that they can.

One issue we ran into in our early pulls was that too many of our players were in the stomach. For example we had 2 healers in the stomach at one point, leaving too few healers in the regular encounter room. So communicate with your group and if there is more than 1 healer in the stomach, perhaps try swapping healers – whoever entered first, should be the first one out.

When an add reaches the middle they will exit the stomach and go into the main encounter area. These adds should be your absolute priority. The Shadowy Constructs will fixate on a player and move towards them. If they reach the player it will explode killing anyone within a 10 yard range.

The Essences will now start casting Spirit Volleys, which reduces your movement speed by 50% and the damage of Spirit Volley will keep increasing by 20%.

Then lastly there are the Spirits that need to be tanked. These have 3 threats to deal with now. First off they keep Bellowing Shout, so remember to always interrupt these. Secondly they now put a stacking dot on the tank called Fel Flames. This will require you to do regular tank swaps at 5 stacks. And thirdly the Spirit will charge at random players with Raging Charge. You need to get out of the way because this will stun you if you get hit.

The main priority during this first stage of the encounter is to deal with the mechanics and adds when they spawn. If your dps don’t kill the adds as soon as possible you’ll likely wipe. Especially the Spirits, they deal heavy damage to the tank so, the faster they go down, the better.

When Gorefiend reaches 0 energy he will cast Feast of Souls, dealing AoE damage every 2 seconds for 1 minute. During this phase you will want to stack up and use healing cooldowns. Gorefiend will now take 100% more damage so you should use stuff like heroism here to get the damage done on the boss. During this phase Unstable Souls will spawn which need to be touched by the tanks. This will deal a moderate amount of damage to the raid, but this needs to be done because if the souls reach Gorefiend he will gain energy more quickly.

There are a lot of abilities to keep track of but the encounter comes down to this:
If you get linked with other players move towards them quickly. Stay spread 5 yards. If you get the Touch of Doom debuff move to the edge of the room. Kill off all adds. Move away from charges and interrupt Bellowing shout. In the stomach you will also need to kill the adds and as a healer heal the Essences.

If you liked this raiding guide please comment, subscribe and click on the like button to help us out. If you would like to keep up with when new videos come out, but you don’t have a youtube account, you can also follow us on twitter and facebook at twitter.com/bbmezzy or facebook.com/wowweekly. Also be sure to check out our written content on our website wowweekly.net. For now I’m Myln and I’ll see you again next time.
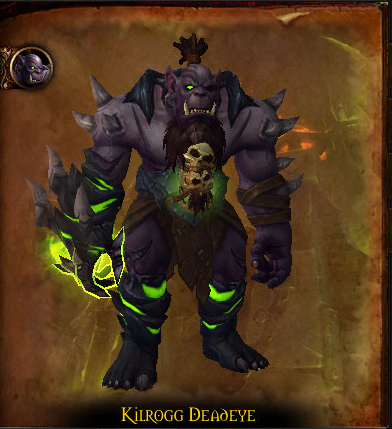
Normal/Heroic Kilrogg Deadeye Raiding Guide

Kilrogg DeadeyeHey guys I’m Sulya from WoW Weekly and today we’ll be taking a look at Kilrogg Deadeye in Heroic Hellfire Citadel. These tactics also apply to the normal version.

To start off, various abilities in this encounter will give you Fel Corruption. If this reaches 100 you will become mind controlled by the Burning Legion! However when you do have Fel Corruption, this will slowly decrease over time.

Kilrogg uses Shred Armor on the tank, increasing their damage taken by 40% per stack. However this will not apply if the tank uses Active Mitigation when Shred Armor is applied. So you’ll of course want to do so.

You’ll be dealing with a bunch of different adds, causing you to split up your group into the left side and right side. But before we get to that, Kilrogg also uses the Heart Seeker ability on a random player. You’ll see a big red arrow in the direction that he will throw it. If you get targeted by this you’ll want to move to the back, in the middle between the two groups. This is because this ability will also hit anyone else in the path of the seeker.

When Heart Seeker hits you, it will put a bleeding dot on you and it will spawn a Globule. This globule will start moving towards Kilrogg and needs to be killed. Should the Globule reach Kilrog it will deal AoE damage to the entire raid. This is where being in the middle helps, because not only will you avoid it hitting someone else, both groups will be able to reach the Globule and dps it down.

Killrogg’s last ability is Death Throes. This is a raid wide AoE that will deal less damage the further away you are from him. Not only that but he will also throw balls of fel goo, which you can dodge by not standing in the swirls. The damage of Death Throes will increase by 12% each time he uses it.

At the same time, splitting the group serves another purpose. Salivating Bloodthirster orcs will spawn at the left, right and at the back in the middle. These will run to the pools in the front of the room. The orcs need to be killed off before they reach it because if they do, they will turn into Hulking Terrors. The orcs can and should be slowed.

Once in a while you will get a Hulking Terror spawn nonetheless. Have one tank pick it up and all your dps switch to it when the other adds aren’t up. The Terror needs to be tanked facing away from the rest of the raid due to it’s conal Savage Strikes attack. It will also cast Rending Howl, which needs to be interrupted as it’s another AoE damage spell. Each time you interrupt it the casting speed will increase by 50%. When the Terror dies it will explode dealing damage to anyone within 10 yards.

Kilrogg’s eye will also open 3 runes near Kilrogg. When a player stands on one each it’ll teleport them to an alternate realm. Here you’ll have to kill as many adds as you can before you reach 1 health. The imps will cast Fel Blaze, if this finishes this will put you at 1 health instantly. The fiends explode on death and mistresses breath fire in the direction they’re standing. You will want to avoid each of these threats to prolong your time in the alternate realm.

Once you reach 1 health you’ll be teleported back into the regular encounter and you’ll have a buff increasing your damage or healing depending on how many adds you killed. This will allow dps to kill adds much more quickly and healers will also gain an aura that will reduce Fel Corruption from those that they stand close to. If your tanks are getting high on Fel Corruption you’ll want your healer to stand in melee so that their corruption can be lowered.

You will also receive a debuff preventing you from entering the next alternate realm. This means you’ll need 2 groups to go into the alternate realm. If not all the runes are taken you do not get teleported and Kilrogg will deal damage to the entire raid instead.

This isn’t an overly complicated fight. Split the raid into 2 groups: left and right. When you get targeted by Heart Seeker move to the back of the room. Kill all adds and interrupt the howl from the Terror. Dodge the AoE balls from Kilrogg and keep sending different sets of 2 players into the alternate realm.

If you liked this raiding guide please comment, subscribe and click on the like button to help us out. If you would like to keep up with when new videos come out, but you don’t have a youtube account, you can also follow us on twitter and facebook at twitter.com/bbmezzy or facebook.com/wowweekly. Also be sure to check out our written content on our website wowweekly.net. For now I’m Sulya and I’ll see you again next time.
Normal/Heroic Hellfire High Council Raiding Guide

Hellfire High CouncilHey guys I’m Mezzy from WoW Weekly and today we’ll be taking a look at the Hellfire High Council in Heroic Hellfire Citadel. These tactics also apply to the normal version.

This encounter has 3 different bosses but their health is not linked together. When one reaches 30% it will gain a new ability and this will continue being cast even after they die.

First off is Blademaster Jubei’thos. He will use Fel Blade, with which he will throw his sword in the direction of the arrow that shows up when he casts it. Simply move out of that direction to avoid any damage from that ability.

His second ability is Felstorm, which is a simple AoE that you can do nothing about except heal back up.

His third ability is Windwalk. He will summon a lot of mirror images which will each do either one of the blademaster’s abilities. These images can and should be killed off. The damage you do to these images will also transfer to the blademaster himself.

At 30% health he will gain Wicked Strike. With this he will start dealing damage to half of the group. The damage of this will ramp up over time. Once the blademaster is dead he will keep using Wicked Strike.

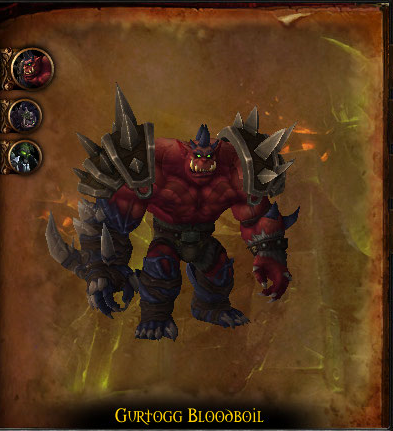
The second boss is Gurtogg Bloodboil. His first ability is Bloodboil, with this he will deal damage to the 5 players furthest away from him. This means that if you are low on health you might want to move a bit closer to Bloodboil so that you don’t die.

The second ability he has is Acidic Wound, which is a stacking dot on the tank. This will also reduce their armor with 100 per stack. The debuff itself lasts 30 seconds. Due to the last boss you can’t really tankswap. So instead to get rid of this you’ll want to use the next ability to your advantage.

The next ability is Fel Rage. With this he will target a random player and increase that player’s defenses. He will then focus on that player for 25 seconds. That player should tank him, however every successful melee hit that Gurtogg does will increase his attack speed by 10%. This means that as you get to the later part of the 25 seconds you’ll want to use a defensive cooldown to survive. Hand of protection can serve particularly well. Because this fixate only lasts 25 seconds instead of 30, there will be 5 seconds left that you need to create so that Acidic Wound is removed from the tank. When Fel Rage is getting to the 18 second mark you will want the fixated player to move far away from the tanks, so that the after the fixate ends Gurtogg will have to move back to the tank. In that time the debuff should fade from the tank.

Gurtogg’s final ability is Demolishing Leap. With this he will jump around and the further you away you are from the point of impact, the less damage it will do to you.

At 30% health Gurtogg will start casting Tainted Blood. This will reduce the maximum health of everyone by 10% per stack. After Gurtogg dies, the debuff will remain.

The final boss is Dia Darkwhisper. She has an aura called Void Haze. This will make the other 2 bosses immune to damage if they are within 25 yards of Darkwhisper. This is why you’ll have one tank on Darkwhisper and one tank on both the Blademaster and Gurtogg.

Darkwhisper will mostly cast Void Bolt on the tank, dealing a chunk of shadow damage. She can also turn into a Visage of Nightmares. While she’s in this form, she will do a ton of damage to the tank and the tank will need to be focussed on when it comes to healing.

Darkwhisper’s threat to the raid is Mark of the Necromancer. This is a debuff that will ramp up in damage over time. When you dispel it, and you will, the debuff will spread to 2 new players. This process will repeat itself and you’ll want to prevent too many players getting the debuff. Darkwhisper will cast Reap, at which point a permanent void zone will spawn underneath each person with the debuff and the debuff will disappear. So when Reap is cast and you have the debuff on you, move to the sides of the room quickly.

Darkwhisper’s last ability is Wailing Horror. Shadow elementals will spawn around the room and deal shadow damage when they fly over you. You will want to try and dodge these, but the damage is healable.

At 30% Darkwhisper will put the Mark of the Necromancer on half of the raid and no longer cast Reap. This means your healers will be dispelling a lot to reset the debuff, as Darkwhisper will no longer remove it for you.

Because of the 30% mark changes being permanent for the rest of the encounter you’ll want to get all of the bosses around 40% health. At that point you will want to first kill Bloodboil, then the blademaster and finally Darkwhisper. When Bloodboil gets to 30% be sure to use heroism so that your maximum health doesn’t get any lower than it needs to go.

So in this encounter you’ll want to kill mirror images, stay away from arrows, deal with Acidic Wound, keep away from the places Bloodboil jumps to, focus heal the tank when Darkwhisper is a terror, move to the side of the room if you have the mark of the necromancer and reap is being cast and keep Darkwhisper away from the other 2 bosses.

If you liked this raiding guide please comment, subscribe and click on the like button to help us out. If you would like to keep up with when new videos come out, but you don’t have a youtube account, you can also follow us on twitter and facebook at twitter.com/bbmezzy or facebook.com/wowweekly. Also be sure to check out our written content on our website wowweekly.net. For now I’m Mezzy and I’ll see you again next time.