fbpx
Menu Close

Category: Warlords of Draenor

Normal/Heroic Blackhand Raid Guide

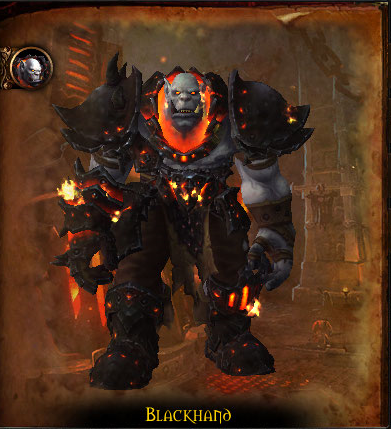
BlackhandHey guys I’m Mezzy and welcome to this warlords of draenor raiding guide. Today we’ll be taking a look at Blackhand in Heroic Blackrock Foundry. These tactics also apply to the normal version.

This is a 3 phase encounter and you will have to deal with the same abilities all throughout the fight. The way you deal with them changes as you go along.

In phase 1 the first ability you’ll have to deal with is Demolition. This will cause the ceiling to colapse. On the floor you will see swirls which indicate where the ceiling will fall, meaning you have to get out of these. There will also be 3 big red swirls. These will deal over 100k damage to anyone within 20 yards, meaning you have to move further away from these. After it has fallen it will leave behind debris piles where the big red swirls were. You will need these piles for the next ability: Marked for Death.

Blackhand will mark 2 players and after 5 seconds throw a knife at them. Anyone standing between the boss and the target will get hit by it. If a player gets hit by the knife they will receive a 45 second DoT. To prevent getting this, stand behind a debris pile if you get marked. The knife will hit the pile instead and noone will have to take any damage from it. Try to use the same pile, as you will have to deal with a mark during the next demolition phase. Should all 3 debris piles already be used before the second demolition phase, the first debris pile will spawn before the mark gets cast, so don’t panic.

The next ability you’ll have to deal with is Slag bombs. These are mines that blackhand will put on the floor, meaning your tanks will have to kite him around the edge of the room. If someone stands on it, it will explode in a 10 yard range, dealing damage and increasing the damage taken by 100% of anyone who got hit by the explosion.

In phase 1 the room will fill up with molten slag over time from all edges of the room. When the slag hits a mine it will also trigger the explosion. So not only will the tanks want to keep moving around the room, they will slowly need to move closer to the middle so that they do not stand in molten slag.

The final ability is Shattering Smash. Blackhand will cast this when he reaches 100 energy. With shattering smash he will deal a lot of physical damage, which is split by everyone that gets hit by it. It will knock them far back, clearing their threat and stun them for 3 seconds. In phase 1 only 1 tank at a time should get hit by the smash. If you’re about to reach the phase change at 70% health, have a priest lifegrip the tank when they get thrown away.

In phase 1 don’t be afraid to use a healing cooldown during demolition, and be sure to use aspect of the fox from hunters as well to make life easier. As long as noone gets hit by the marks and people dodge the demolition it’s an easy phase 1.

At 70% blackhand will smash the floor, breaking it and dealing a large amount of damage to everyone in the raid. Although you won’t see it in this video, we now have the raid group up in the middle at 70% and use a priest’s barrier to ease the transition to phase 2.

In phase 2 there will be 3 changes you need to deal with. First of all, Siegemakers will spawn from the gates around the room. Only one at a time will spawn, and after it comes out of the gate it will fixate on the closest player after a few seconds. We use 2 hunters to pick them up as much as possible. You will want the fixated player to run the maker through the mines to clear them up. The mines will also deal damage to the maker and give it the damage increase debuff.

Per maker you will have 3 sets of marked for death. You want the first 2 sets, which is a total of 4 knives to hit the maker. Meaning if you get the marked for death debuff you will want to have the siegemaker between yourself and blackhand. If the maker is still alive after the second set of knives hit it you will have to kill it as soon as possible with regular dps. This is because once the maker reaches 100 energy it will throw a mortar into the room, which will quickly cause a lot of fire to cover a part of the room. And you reaaaally don’t want that!

To reduce the chance of that happening we have everyone dot the maker up. There’s one more detail to the maker. It will start off with an armor buff reducing it’s damage taken by 90%. This gets removed once the maker gets hit by a mark or by a mine. Usually a mark will hit it before it reaches a mine, meaning you will need to do some extra damage to the maker. If a mine hits it before the first marks hit, the maker will take the full damage from the 2 knives, reducing the amount of damage you need to do as a raid to it considerably.

The 3rd mark for death set will have to be soaked by a tank, because at this point there should be no siegemaker around. Have your tanks alternate soaking the 3rd set of knives. They can soak the knives by standing right in the middle of blackhand.

So to recap, the following will occur: A siegemaker spawns, it will fixate on someone who will have to kite it through the mines, 2 players get marked for death and make sure the maker gets hit by the knives, a second set of marked players does the same. At this point the maker should be dead before he reaches 100 energy. After that the 3rd set of marked players don’t have to do anything as a tank will be soaking those knives. At this point a new maker spawns and the entire process repeats itself.

The last change in phase 2 is that iron soldiers will spawn in the rafters above you. These will keep spawning and shoot at random players. The shot they do hit anyone within 6 yards, meaning you will need a spread in phase 2. To deal with these you will want to send some dps and a healer up into the rafters to kill them off. Our group sends up 4 dps and a healer when we have more than 20 people to get rid of these soldiers as quickly as possible.

You get up in the rafters by getting hit by the shattering smash blackhand does when he reaches 100 energy. This is good because it means that more players will share the damage with the tank in phase 2 when the smash does happen. The assigned group for the rafters should go up at every smash, kill off the soldiers and then jump down. You can reduce the damage you take from the soldiers by silencing them when you are up there.

There are rafters on both sides of the room and you can’t run from one side to the other. This means you might not be able to clear both sides. Alternate the sides you get thrown to by putting yourself in an angle towards the side you need to clear relative to the smash. The smash shows a circle which can help you with that.

And then finally, if a tank accidentally gets the 100% damage increase debuff by accident, be sure to have the other tank taunt and let them take the smash.

If you can deal with both the smash and the siegemaker you’ll reach phase 3 when blackhand reaches 30% health. Again he will destroy the floor, dealing damage to the raid and you will fall down.

In phase 3 he now attaches the mines to random raiders and the marks will fly through anyone in the knive’s path. This means that if you get marked for death, you will want to move to the right of the raid so noone else gets hit. Also be sure not to stand on top of each other as you don’t want to get hit by both knives.

If you get a mine attached to you run it out to the left of the raid. The mine will explode after 3 seconds. When the mines explode and the boss does his smash, slag craters will be left behind, which will reduce the amount of space you have. To deal with this you will want to use the edges of the room for the smashes and mines and dps him down before you run out of space. The smash deals a lot of damage now, meaning you will want your entire raid to stand behind the tank so that everyone gets hit by the smash. This makes it very important to make sure you go out of the raid if you get a mine or a mark.

Once you get into position after you reach phase 3 you will want to use heroism. Use an aspect of the fox whenever shattering smash is about to land, and be sure to reposition yourself. Also be sure to not put yourself in a weird angle for the smash. If you do you might be thrown off the edge of the platform instead of back to the middle of the platform.

Blackhand will regularly cause the slag to erupt, which will deal raidwide damage. Be sure not to be standing in any slag, but that should go without saying.

This is a fairly easy boss mechanics wise for an end tier raid boss and it comes down to executing the few tactics that are in play. It was a really enjoyable fight so I hope you enjoy it as well and good luck!

If you liked this raiding guide, please comment, subscribe and click the like button! If you would like to keep up with when new videos come out but you don’t have a youtube account you can follow us on twitter or facebook, at twitter.com/bbmezzy or facebook.com/wowweekly. Also be sure to check out our website wowweekly.net where you can find written content as well. For now I’m Mezzy and I’ll see you again next time.

Normal/Heroic Iron Maidens Raid Guide

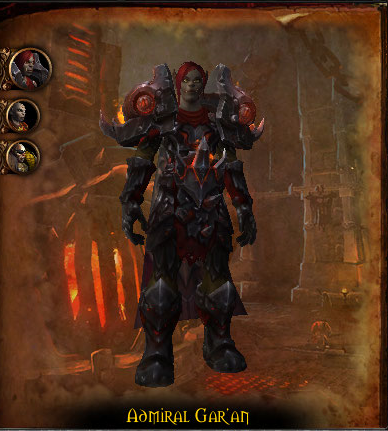
Iron MaidensHey guys I’m Mezzy from WoW Weekly and welcome to this Warlords of Draenor raiding guide. Today we’ll be taking a look at Iron Maidens in Heroic Blackrock Foundry. These tactics also apply to the normal version.

There are 3 bosses in this encounter that all have separate health pools and different abilities.
These bosses are Admiral Gar’an, Enforcer Sorka and Marak the blooded.

The iron maidens have an energy bar, Iron Fury. This will increase at a steady rate over time. The amount of IF will determine how many abilities they have. When any of the maidens reaches 20% health, they will all instantly get 100 iron fury.

First up is the Admiral. She works like a hunter and as such you cannot tank her. Your tanks can taunt her to get her close to the other bosses so that she can take cleaving damage.

Her first ability is Iron Shot. With this she will randomly shoot players, dealing a moderate amount of damage to that player. Her second ability is Rapid Fire, with which she will target a player location and deal a large amount of fire damage to anyone within 5 yards of impact. Afterwards it will follow around that player. Get this out of the raid and then kite it around.

At 30 Iron Fury she gains Penetrating Shot, which is like the Klaxxi Aim from Siege of Orgrimmar. She targets a player and anyone standing in between the admiral and the player will share the damage of the aim. As such you will want as many players to soak it as possible. We use the purple marker for the targeted player to stand on so that there is plenty of room for the rest of the raid to help soak it. You can use target removing abilities such as feign death to completely remove the penetrating shot.

At 100 IF she will deploy a turret which shoots in a circular motion. The turret puts a stacking dot on players that get hit, meaning you will have to move away from the direction it’s shooting. When these spawn in the final phase, always prioritize killing these over anything else.

The next Maiden you will have to deal with is Sorka. Her basic ability is Blade Dash, which deals a moderate amount of damage and chains to anyone within 8 yards. We deal with this by keeping a loose light spread.

At 30 IF she gains Convulsive Shadows, which is a debuff with stacks. This can be dispelled. Stacks reduced by 1 every time to deals damage. And if it’s dispelled it will deal 40k damage per stack to that player, so do not dispel.

At 100 IF she gains Dark Hunt, with which she will target a player. After 8 seconds she will deal a lot of damage to that player and with everything else happening you need to make sure the players are fully topped up.

And finally we have Marak, and her basic ability is Blood Ritual. With this she will target a player within 45 yards and deal damage to everyone in a cone towards that player. The closest player hit by it receives an additional 300k physical damage. This means the tank will have to stand infront of her and soak it. We deal with this by placing a marker to the left and right of the tank and moving to one of these. By doing this it means the group will not take damage.

At 30 IF she gains Bloodsoaked Heartseeker.This is an Axe bounces between 3 marked players, these players need to get away from each other as the damage decreases the further away they are from each other.

At 100 IF she gains Sanguine Strikes, making her damage on the tank also pulse for aoe on the raid. To help deal with this in the final phase the tank will have to use his cool down and call for any externals that he needs to reduce the damage to the raid.

While all of this is going on all of the maidens will occasionally go to the Dreadnaught, which will warm up the main gun. If it’s not interrupted it’s a wipe. When the ship phase is initiated, players on the ground will have to dodge bombs that the dreadnaught will be sending over.

When this happens you will need to send a group of people over to the Dreadnaught by using the chains that are located at the back right of the encounter area. This group should consist of 1 tank 1 healer and 4 dps. However if the admiral has gone to the Dreadnaught and then it will be 5 dps and 1 healer.

Each maiden will go onto the ship once. Which ever maiden has the lowest health of the maidens that still need to go on it, will go onto the ship during the Dreadnaught phase. Each maiden will have their own mini boss encounter on the Dreadnaught when they go up.

When the Admiral goes up you will face Uktar and the Battle Medic Rogg. During this phase you will want to spread out around Uktar and kill him. When Rogg starts to cast Earthen barrier you will need to interrupt him.

When Sorka goes up you will encounter Gorak and his Iron Eviscerators.
You will have to take down Gorak and his main ability is Deadly Throw. This will do high damage to any group member it hits so we have the tank stand in the way. Gorak will also call for reinforcements. When he does this the Iron Eviscerator will land and will fixate on a random membor of the group. We ask the fixated member to stand on the tank so we can aoe down them down.

When Marak goes up you will come up against Uk’urogg. His main ability is Blood Corruption Aura. This will cause the group members to spawn puddles underneath them and they will need to move out of these asap. Simply move around the boat until Uk’urogg is dead.

When you defeat the mini-boss one of the players on the boat will have to run to the main gun and click on the bombs that rotate in it. Once this happens you will be thrown back onto the platform. Be careful during this as you do not want to land on the platform when all bombs have landed and are about to explode.

We recommend the following order for initiating the ships: The Admiral, followed by Sorka and then Marak.

While the group is on the ship bombs will land on the main encounter area. The first wave will cover a small area, you can see these bombs by the big red circle that shows their impact area. While the second will cover the rest of the floor. You can avoid these blasts by standing out of the clearly marked red area. Once both sets of bombs have landed the first ones to land will explode. Then the second set will shortly after. When this happens you need to stand on the last bombs to land and when the first wave explodes move to the open space.

While all this is going on you will have to dps all of the targets down to 20%.We do this by firstly dpsing down general until she goes to the dreadnaught, then we move onto sorka, again until shes goes to the dreadnaught and then we dps Marak down to about 30%. After this you will need to balance your dps until all 3 are at 20% when the last phase will start. If they are close enough to reaching 20% and you can skip the third boat phase by dpsing down Marak to 20% quickly then do so.

All of the maidens will now have 100 IF so you will have to deal with Marak first as her Sanguine Strikes will cause problems for your healers. While you are busy killing Marak, the admiral will put down her Turrets. These must be taken care of straight away, so when they do spawn have your ranged dps kill them quickly. Once Marak is dead you then move onto the Admiral before finishing off Sorka.

When you first go for this fight on heroic difficulty it can be a pretty challenging fight during the last 20%, so good luck!

If you liked this raiding guide, please comment, subscribe and click the like button! If you would like to keep up with when new videos come out but you don’t have a youtube account you can follow us on twitter or facebook, at twitter.com/bbmezzy or facebook.com/wowweekly. Also be sure to check out our website wowweekly.net where you can find written content as well. For now I’m Mezzy and I’ll see you again next time.
Normal/Heroic Kromog Raid Guide

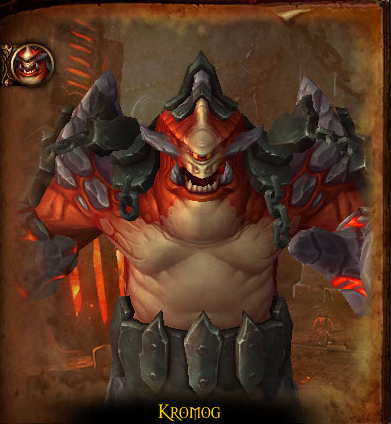
KromogHello everyone, my name is Tokk and welcome to this wowweekly.net warlords of draenor raiding guide. Today we’ll be taking a look at Kromog, Legend of The Mountain in Heroic Blackrock Foundry. These tactics will also apply to the normal version of this fight.

Most of Kromog’s abilities are straight forward to deal with, so to start with let’s check out the tank specific ones. The tanks will have to deal with the following 2 abilities.

The first of these is the Fists of Stone which causes Kromog’s melee attacks to deal a massive amount of damage. This damage can be shared with a second target within 15 yards of the original target. All this means is that the 2 tanks should be standing on top of each other in order to split the melee attacks.

Secondly the tanks will have to deal with the Warped Armor debuff. This increases the damage taken by Kromog’s Primary target. After your first tank gets 2 stacks of this, the other tank should taunt it off him. At this point your tanks swap once the debuff falls off of the other tank. Your ideal scenario is that the tanks each take 2 stacks of the debuff and switch. However due to the timings of the other abilities in this fight, more often than not one tank will get a third stack before the debuff falls off. Don’t be afraid to use cooldowns to deal with the stacks.

Kromog’s second set of abilities are to be dealt with by everyone in the raid. First off he has Stone breath, with which he will deal a lot of AoE damage to the entire raid. This damage is unavoidable, so just heal through it.

The next ability is Rippling Smash. Kromog will face a direction and after casting the smash, a wave of earth will flow in that direction. Because of the cast before the smash you can get out of the area he’s facing. You have to do this because the earth does a huge amount of damage to you, meaning that if you’re not topped off you might die.

Kromog can also cast an ability called slam. This will deal a pretty high amount of damage if you’re close to him. But the further away you are from him the less damage it will do. So melee and tanks might want to consider moving away from him when he casts this so they don’t take as much damage. If a tank has multiple stacks of the warped armor debuff it’s highly recommended you move away. Just move back as soon as possible so that you can continue soaking the cleaving damage of his melee attacks.

The last regular ability to watch out for is Rune of Crushing Earth. You’ll easily spot this one due to the big red rune on the floor. On either side of it a hand will spawn. These hands will fly towards the rune and deal a large amount of damage to anyone they touch and stun them for 5 seconds. When the first rune spawns it will not activate right away, so you’ll have some time to move away from the path. However once the second rune spawns with its hands, they will both activate so be sure to move away from them, as soon as possible.

The final ability of his normal phase is a passive ability called Reverberations. Several of his abilities will cause sound discs to spawn, which will move towards the raid after a short pause. They deal a good amount of damage, so just move away from them when they spawn.

With that out of the way, let’s talk about Rune of Grasping Earth. When Kromog casts this, small yellow runes will spawn on the floor. Each and every member of your team will have to move on top of one of these runes. And most importantly each rune will only hold one person. When players stand on top of these runes they will be gripped by hands. You want them to do so because once the runes have spawned, Kromog will cast Thundering blows, dealing a huge amount of damage to anyone not gripped and tossing them up in the air, killing them.

These hands are targetable and you need to dps them during the Thundering Blows ability. You will want to get out of the hands as quickly as possible once Thundering Blows is over, because the hands themselves also deal increasing damage to the people they’re holding. The main point to emphasize is to not stand on other players runes. The best way you can prevent this is to split your group up across the room so that everyone can be sure there is a rune available to them.

At 30% the boss will soft enrage, increasing damage done, attack speed and ability frequency. So you will want to save heroism for this part of the fight.

It’s a rinse and repeat fight with a lot of avoidable damage.

If you liked this raiding guide, please comment, subscribe and click on the like button! If you would like to keep up with when new videos come out but you don’t have a youtube account you can follow us on twitter or facebook, at twitter.com/bbmezzy or facebook.com/wowweekly. Also be sure to check out our website wowweekly.net where you can find written content as well as video guides. For now this has been Tokk and I will see you again next time.

Normal/Heroic The Blast Furnace

The Blast FurnaceHey guys I’m Mezzy and welcome to this warlords of draenor raiding guide. Today we’ll be taking a look at The Blast Furnace in Heroic Blackrock Foundry. These tactics also apply to the normal version.

This is a 3 phase encounter in which the first two phases matter most. If you can deal with them efficiently you should have no trouble with phase 3.

The goal of phase 1 is to disable the 2 Heat Regulators on either side of the blast furnace. The heart of the mountain in the blast furnace will cast blast regularly, dealing aoe damage. It’s energy will increaes over time, which decreases the cooldown of blast, meaning if you don’t get out of phase 1 quickly enough you’ll get overwhelmed.

In phase 1 you’ll have to deal with a mini boss and a bunch of adds that will keep spawning throughout the phase. So let’s start with the engineers, these are the key to destroying the heat regulators on the sides of the blast furnace. The engineers will attach bombs onto random players, which will explode after 10 seconds. This explosion also deals damage to the heat regulators and is the only way to destroy them. When a bomb is attached to you, you can use the extra action button to detonate the bomb before the timer ends. So when you get a bomb, run it over to the heat regulator and let it detonate.

You’ll want to kill the engineers as quickly as possible because when they die they will also drop bombs allowing you to speed up the process. The bombs are the most important part of the phase so be sure to pick them up and destroy the regulators. The engineer also has a chain lightning and can repair the regulators. When they cast repair you must interrupt them as quickly as possible.

The next type of add is the Bellows Operator. These do not attack you, but instead channel loading which will increase the energy of the heart of the mountain. Because of this you will want to kill the operators as soon as they spawn.

The final type of add is the Security guard. These don’t really do much except put Defense zones on the floor. Any add standing in the zone, except for the operator, will get their damage taken reduced by 90%. So you will want to keep moving the adds out of these so you can keep killing them.

The mini boss, Foreman Feldspar, will also need to be killed. He pulses aoe damage through Hot Blooded but you will just have to heal through that. He casts Pyroclasm on random players and this can be interrupted. It does a medium amount of damage and if you have spare interupts be sure to use them. But the most important ability that he has is called Rupture, this will put a debuff on the player and after a couple of seconds will leave a lava type void zone underneath them. You want to put these off to the sides of the room so that you’ll have as much room as possible for the following phases.

They’re a lot of abilities, but in executing the fight there’s not that much you have to do. Have the entire raid start off on the left hand side to destroy that heat regulator first. Whenever there is an operator up on the right hand side have all of the ranged dps switch to it. Once the operator is dead go back to the other side.

As a rule of thumb use the following dps priority: Operators > Engineers > Guards > Foreman. Cleave as much as you can if it increases your dps because the adds will keep spawning. If you fall behind on add killing it will wipe you.

Once the regulator on the left hand side is dead, move your raid to the other side. When an operator spawns on the left hand side, let your ranged dps kill that one first. After the second regulator dies you will go into phase 2. Kill off the remaining adds and the foreman should be low on health as well at this point.

In phase 2, 4 elementalists will spawn with shields. These will each have to be removed and killed off. To remove the shield from an elementalist you will need a Slag elemental to stand on top of the elementalist. These elementals will fixate on a player and start casting burn. Whoever it targets has to stand on top of the elementalist you want to kill. Then the elemental should be interrupted when it casts burn so that it moves to the fixated player. Get the elemental to 1 health and it will explode dealing damage in an 8 yard radius. This explosion causes the elementalist’s shield to be removed and your raid should focus the elementalist. The shield will come back after a limited time so put your back into it as you really want to kill the elementalist in this small window of time.

Once an elementalist has lost health it will regularly get the reactive earth shield buff, which needs to be dispelled. If it’s not dispelled wthin 8 seconds, it will heal the elementalist. This buff will continue to appear if you do not kill the elementalist within the removal of 1 shield. So if you need a second slag elemental to explode, continue dispelling the earth shield while you’re working on the slag elemental.

Slag elementals will revive after they’ve been hit by blast from the blast furnace 4 times and more will continue to spawn, which acts as another soft enrage mechanic.

To further complicate the matter, guards will continue spawning and you’ll also have to deal with the new Firecaller adds. When firecallers are up there are 2 things you have to deal with. First of all, cauterize wounds which is another healing buff which can be dispelled, but the cast can and should be interrupted. Secondly they cast Volatile Fire on random players, after 10 seconds they will explode and deal damage to anyone within 8 yards. So if you get the Volatile Fire move out.

Again with all this information the phase seems complicated but it’s not.

– Keep the guards off of the slag elementals and elementalists so that their damage reduction doesn’t interfere.
– Interrupt slag elementals and have the fixated player stand on top of an elementalist.
– When the slag elemental reaches 1 health and explodes, switch to the elementalist and nuke it down.
– Have someone dispell the earth shield, we used a priest for this.
– Repeat this for all 4 elementalists.
– At the same time, interrupt the firecallers cauterize and kill them off.
– And finally if you get Volatile Fire move away from the rest of the group.

Once you kill off all 4 elementalists phase 3 will start. This phase is pretty straight forward, so here’s what you need to know:

– Start at the back of the room, as you’ll need the space.
– The tanks should taunt the boss off each other when the other tank reaches 2 stacks of the Heat debuff. Heat will deal more and more damage due to the Tempered debuff, which acts as a soft enrage.
– The ranged players will have to deal with the Melt debuff. Melt will cause a puddle of lava to spawn beneath the player after 6 seconds. This puddle will continue to grow, which means that your raid will have to continue moving forward through the entire room.
– When a player gets this, they should move it back into the room as much as possible. Call out to your tanks over ventrilo when they need to move forward when you start to run out of space.

You’ll want to save heroism for phase 3 and kill the heart of the mountain.

There are a lot of abilities to deal with over the course of this encounter, but in execution the fight is a lot simpler than it would first appear. It might take you some pulls though, so good luck!

If you liked this raiding guide, please comment, subscribe and click the like button! If you would like to keep up with when new videos come out but you don’t have a youtube account you can follow us on twitter or facebook, at twitter.com/bbmezzy or facebook.com/wowweekly. Also be sure to check out our website wowweekly.net where you can find written content as well. For now I’m Mezzy and I’ll see you again next time.
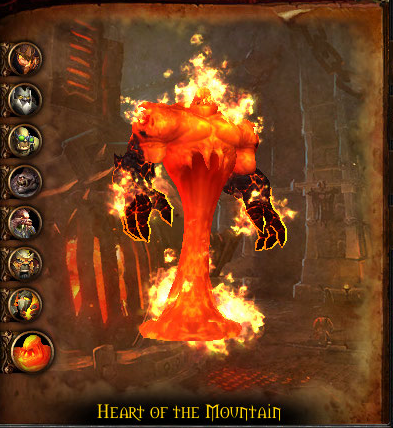
Normal/Heroic Operator Thogar Raid Guide

Operator ThogarHey guys I’m Mezzy and welcome to this warlords of draenor raiding guide. Today we’ll be taking a look at Operator Thogar in Heroic Blackrock Foundry. These tactics also apply to the normal version.

The operator encounter is mainly an environmental and add encounter. But before we get to that, let’s go over Thogar’s abilities.

The first is Enkindle which is a stacking dot on the tank, increasing the damage taken from Enkindle by 35% for 25 seconds. This requires a tankswap after the second stack.

The second ability is Prototype Pulse Grenade, which is a grenade you simply need to move out of or take damage.

His final ability is Berated, which will increase the damage, movement speed and haste of adds, and also decrease their casting speed. There’s nothing you can do about this ability, but it does indicate the importance of killing adds when they appear.

So the challenge of this encounter is that you’re fighting on 4 train tracks, and trains will ride over these, killing you if you get hit. Some of the trains will pass right through, but some will stop and bring adds to deal with. Not only that, but the trains are solid, which means that if they spawn adds you will not be able to move through the trains to the other side of the room. You will have to kill all adds from a train before the train moves away.

I will explain how these work, but after the recording of this video one guild member informed me of the addon Thogar Assist, which will warn you well enough in advance on which tracks the trains are coming from, and if they’ll bring along any adds and which types. So this is an addon you might want to look into.

Moving forward we’ll give each track a number. The track closest to the boss is track 1, the next one is 2, and so forth. The track closest to the raid when you enter the room is track 4.

The doors on the sides of the room will open up before the trains actually come through them, this means that you can watch which tracks the trains will ride over and you can move off those tracks.
Although adds will continue to spawn throughout the encounter, at the 2 and 6 minute marks fully sized trains will bring adds on tracks 2 and 3. This makes you have to split up your raid into 2 groups, to stand on tracks 1 and 4 to kill off the adds and make the trains on tracks 2 and 3 leave again. This also means that one of the two groups will have to take the boss with them, so a tank swap right before the split happens would be good to start from 0 stacks on the tank who takes the boss.

In practise dodging the trains is quite easy, especially due to the cue from the doors opening. The only thing you would otherwise be unaware of is the split on the 2 and 6 minute marks.

So which adds will you have to contend with?

The first type of add is the Iron Gunnery Sergeant. These will spawn on tracks 1 and 4, and stay on top of the train. This means only the ranged can take these out. The gunnery sergeant will fire Delayed Siege bombs, targeting a specific player. These will follower the player around until they land, meaning they should kite it away from other players. After it lands it will do damage and after 30 seconds it will explode in a 9 yard radius.

The two cannon fodder adds are the Crack Shots and Raiders.

Crack Shots deal physical damage to their target, and will throw grenades if no one is in melee range.

Raiders will but a bleed dot on their target and throw grenades if no one is in melee range.

There are two more types of adds, and these are both important to kill as soon as possible. With the first one being the most important.

Firemenders cast an interruptible AoE heal, which will need to be interrupted. And once again throw grenades if no one is in melee range. These have to die as soon as possible.

Men-at-arms deal lots of aoe damage to the entire raid and have a Reckless Slash, charging to the location of a random raider and dealing damage to everyone within a 7 yard range. Simply have a slight spread to deal with this.

If you prioritize the adds, avoid the trains, stay out of grenades and can spread your raid into 2 groups for the 2 and 6 minute marks then you’ll have no trouble dealing with this boss. To recap this encounter:

– Tankswap on 2 stacks of Enkindle
– Move away from grenades
– Always prioritize adds
– Prioritize firemenders, interrupt them and then kill men-at-arms
– Ranged players need to kill the Gunnery Sergeants
– If targeted by delayed siege bomb, kite it away from the rest of the raid, prefferably to the sides
– Full length trains will come at the 2 and 6 minute marks
– This means the raid has to be split into 2 groups, one will fight on track 1 and one on track 4.

If you liked this raiding guide, please comment, subscribe and click the like button! If you would like to keep up with when new videos come out but you don’t have a youtube account you can follow us on twitter or facebook, at twitter.com/bbmezzy or facebook.com/wowweekly. Also be sure to check out our website wowweekly.net where you can find written content as well. For now I’m Mezzy and I’ll see you again next time.
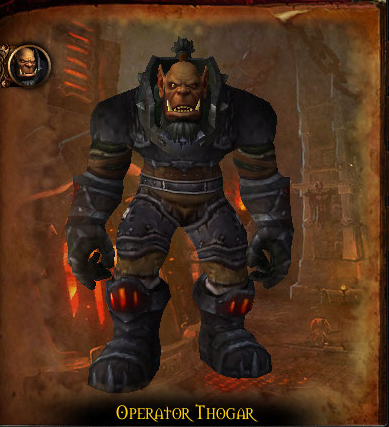
Normal/Heroic Hans’gar and Franzok Raid Guide

Frans'gar and FranzokHey guys I’m Mezzy and welcome to this warlords of draenor raiding guide. Today we’ll be taking a look at Hans’gar and Franzok in Heroic Blackrock Foundry. These tactics also apply to the normal version.

When you read the dungeon journal you might get a Siegecraft 2.0 impression by this fight, but in actuality the fight is pretty simple. These orc twins are so close that they share their health so stacking them on top of each other for cleaving attacks will shorten the encounter. As their health decreases their damage will increase. There are some environmental factors at play, but before we get to those let’s take a look at their abilties.

Both orcs have the ability Body Slam. They will target random players and when they reach that player they will debuff them with Shattered Vertebrae, increasing physical damage taken by 40%. They will then leap back to the tank and debuff them as well. This will hit anyone within a 12 yard range of the random player, meaning this player should move away from the rest of the raid. To complete this annoying ability, when they land the raid will also take some aoe damage in the form of the debuff Aftershock. If the tank gets the arrow on their head, keep your distance as a melee player so that you don’t also get Shattered Vertebrae.

The second ability you’ll have to contend with is the Crippling Suplex ability. The bosses will smash the two tanks against each other dealing a large amount of damage to both tanks. This means that the tanks will have to use cooldowns and externals to survive this ability. This will happen at 85%, 55% and 25%. Each time this will trigger the environmental mechanic but we’ll get to that in a moment.

Franzok also has two abilities that Hans’gar doesn’t, the first of which is Disrupting Roar, which interrupts anyone within a 100 yard range. So as usual with these mechanics, stop casting when it’s cast.

His second ability is Skullcracker, with which he will throw a hammer to a random target. This ability will hurt especially if you have the Shattered Vertebrae debuff.

To recap before we go into the environmental mechanics of this fight:
– Move away if you’re the body slam target
– Use cooldowns and externals for Crippling Suplex so that the tanks survive.
– Stop casting when Disrupting Roar is cast
– Tank the orcs on top of each other to make use of cleave damage.

At 85% one of the two brothers will go out of the room and activate the Searing Plates. The conveyor belts will start moving and searing plates will start spawning at the entrance of the room. You will have to dodge the plates by using the different lanes. There are narrow strips between the belts that don’t move so be sure to use them. Once this phase ends the second brother will return.

At 55% one of the brothers will activate the Stamping Presses. The belts will again start moving and now you will see the segments on the belts lighting up. If you’re standing on a segment that lights up, get off of it quickly as the stamping presses will soon press onto the segment, turning you into a pancake if you’re still on the segment. Although this doesn’t kill instantly on normal or heroic, you’ll want to practise not getting hit by them at all as on mythic they kill you instantly.

And then finally at 25% you will have to deal with both the Searing Plates and Stamping Presses. The searing plates will come first and then soon after you will have to deal with another set of presses. The presses will stop once the bosses are dead, so you might want to use heroism for the final 25% of the fight.

If you liked this raiding guide, please comment, subscribe and click the like button! If you would like to keep up with when new videos come out but you don’t have a youtube account you can follow us on twitter or facebook, at twitter.com/bbmezzy or facebook.com/wowweekly. Also be sure to check out our website wowweekly.net where you can find written content as well. For now I’m Mezzy and I’ll see you again next time.
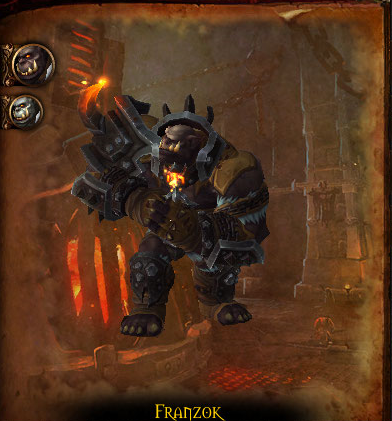
Normal/Heroic Flamebender Ka’graz Raid Guide

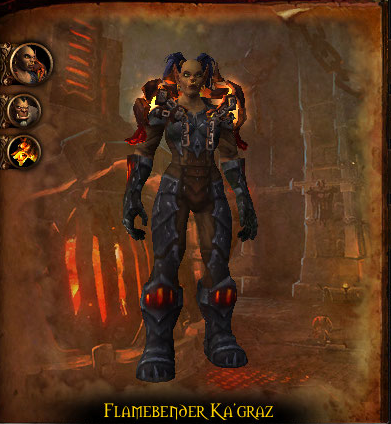
Flamebender Ka'grazHey guys I’m Mezzy and welcome to this warlords of draenor raiding guide. Today we’ll be taking a look at Flamebender Kagraz in Heroic Blackrock Foundry. These tactics also apply to the normal version.

Ka’graz starts out with 2 abilities and gains energy over time. At 25, 50, 75 and 100 energy she gains new abilities and the energy will reset at 100.

The first ability is Lava Slash, she will target a random ranged raid member and it will create a fire line between the boss and where the player was standing when it was cast. When the line reaches the player’s original location it will deal damage to anyone within 7 yards. If any players get hit, fire lines will also be created between the boss and them.

She also uses Summon Enchanted Armament, which are weapons that you need to stay away from as they will randomly deal damage to anyone within 6 yards of the weapon.

At 25 energy the flamebender will gain the ability Molten Torrent, this targets a random raid member and after 6 seconds a meteor will fall on that player for a huge amount of damage. This damage can be shared with anyone within 8 yards, meaning this player should run in to melee and share the damage with the melee players. You can also use immunities such as deterrence to completely negate the effect. If you do use an ability like that though, be sure that noone else is within the circle of the torrent so that noone dies.

At 50 energy she summons 2 cinder wolves. These will need to be killed. One will be overheated and will need to be tanked and the other will fixate random players, which will need to kite the wolf around. The wolves will alternate in being overheated. When overheated the wolf will have Charring Breath, which is a fire cone attack with a stacking debuff that increases damage taken by it by 200%. This means that tanks take turns tanking overheated wolves. Whichever tank is not tanking an overheated wolf needs to tank the boss.

These wolves are linked with a fire line called Fiery Link, if players stand in it they’ll get a stacking dot. You should of course not be standing in this link. This is also the mechanic that makes the kiting the fixating wolf harder. You do not want to be running the fire line through the entire raid.

The final ability the wolves have is called Rekindle which simply put means you have to kill the wolves at the same time. If it takes longer than 8 seconds to kill the second wolf, the first wolf will revive to 100% health.

At 75 energy the boss puts Blazing Radiance on random raid members, dealing fire damage every 2 seconds to all allies within 10 yards. This means that the player that is debuffed needs to move away from the rest of the raid.

At 100 energy a couple of things will happen. First off Firestorm will deal damage to the entire raid for 12 seconds. If the wolves are still up, these will also deal fire damage to the raid. The wolves should be dead well before this though. Secondly after it ends and the boss’ energy resets she gains Magma Monsoon for 30 seconds. She will throw magma orbs around, which need to be dodged. There are clear circles on the floor that indicate where it will hit. If you do get hit you’ll receive a large amount of damage.

And then finally for 50 seconds she will gain Flamefury, giving her melee attacks a stacking dot, requiring a tank swap at 5 to 6 stacks of the debuff.

Other than the flamebender, Aknor Steelbringer is part of the fight. This is an orc with 2 abilities:

Devastating slam, which is a cone that needs to be faced away from the raid by the tank. And Drop the hammer, he leaps towards a random player and anyone within 10 yards needs to move away from where that player was standing.

What you want to do in this fight is:
– Stay spread
– Kill Aknor
– Watch out for the weapons that spawn, move away from them
– If you get Molten Torrent, move it to the melee to share the damage with them
– When the wolves spawn, non flamebender tank tanks the overheated wolf, tankswap when the other wolf gets overheated
– Kill the wolves at the same time
– At 75+ energy, if you get the Blazing Radiance debuff, move it away from the rest of the group
– After she goes back to 0 energy, dodge the magma orbs
– Tank swap after 5-6 stacks of Rising Flames

If you liked this raiding guide, please comment, subscribe and click the like button! If you would like to keep up with when new videos come out but you don’t have a youtube account you can follow us on twitter or facebook, at twitter.com/bbmezzy or facebook.com/wowweekly. Also be sure to check out our website wowweekly.net where you can find written content as well. For now I’m Mezzy and I’ll see you again next time.