
 Hey guys I’m Mezzy from WoW Weekly and welcome to this Warlords of Draenor raiding guide. Today we’ll be taking a look at Iron Maidens in Heroic Blackrock Foundry. These tactics also apply to the normal version.
There are 3 bosses in this encounter that all have separate health pools and different abilities.
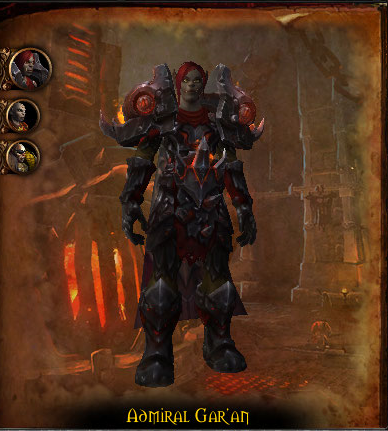
These bosses are Admiral Gar’an, Enforcer Sorka and Marak the blooded.
The iron maidens have an energy bar, Iron Fury. This will increase at a steady rate over time. The amount of IF will determine how many abilities they have. When any of the maidens reaches 20% health, they will all instantly get 100 iron fury.
First up is the Admiral. She works like a hunter and as such you cannot tank her. Your tanks can taunt her to get her close to the other bosses so that she can take cleaving damage.
Her first ability is Iron Shot. With this she will randomly shoot players, dealing a moderate amount of damage to that player. Her second ability is Rapid Fire, with which she will target a player location and deal a large amount of fire damage to anyone within 5 yards of impact. Afterwards it will follow around that player. Get this out of the raid and then kite it around.
At 30 Iron Fury she gains Penetrating Shot, which is like the Klaxxi Aim from Siege of Orgrimmar. She targets a player and anyone standing in between the admiral and the player will share the damage of the aim. As such you will want as many players to soak it as possible. We use the purple marker for the targeted player to stand on so that there is plenty of room for the rest of the raid to help soak it. You can use target removing abilities such as feign death to completely remove the penetrating shot.
At 100 IF she will deploy a turret which shoots in a circular motion. The turret puts a stacking dot on players that get hit, meaning you will have to move away from the direction it’s shooting. When these spawn in the final phase, always prioritize killing these over anything else.
The next Maiden you will have to deal with is Sorka. Her basic ability is Blade Dash, which deals a moderate amount of damage and chains to anyone within 8 yards. We deal with this by keeping a loose light spread.
At 30 IF she gains Convulsive Shadows, which is a debuff with stacks. This can be dispelled. Stacks reduced by 1 every time to deals damage. And if it’s dispelled it will deal 40k damage per stack to that player, so do not dispel.
At 100 IF she gains Dark Hunt, with which she will target a player. After 8 seconds she will deal a lot of damage to that player and with everything else happening you need to make sure the players are fully topped up.
And finally we have Marak, and her basic ability is Blood Ritual. With this she will target a player within 45 yards and deal damage to everyone in a cone towards that player. The closest player hit by it receives an additional 300k physical damage. This means the tank will have to stand infront of her and soak it. We deal with this by placing a marker to the left and right of the tank and moving to one of these. By doing this it means the group will not take damage.
At 30 IF she gains Bloodsoaked Heartseeker.This is an Axe bounces between 3 marked players, these players need to get away from each other as the damage decreases the further away they are from each other.
At 100 IF she gains Sanguine Strikes, making her damage on the tank also pulse for aoe on the raid. To help deal with this in the final phase the tank will have to use his cool down and call for any externals that he needs to reduce the damage to the raid.
While all of this is going on all of the maidens will occasionally go to the Dreadnaught, which will warm up the main gun. If it’s not interrupted it’s a wipe. When the ship phase is initiated, players on the ground will have to dodge bombs that the dreadnaught will be sending over.
When this happens you will need to send a group of people over to the Dreadnaught by using the chains that are located at the back right of the encounter area. This group should consist of 1 tank 1 healer and 4 dps. However if the admiral has gone to the Dreadnaught and then it will be 5 dps and 1 healer.
Each maiden will go onto the ship once. Which ever maiden has the lowest health of the maidens that still need to go on it, will go onto the ship during the Dreadnaught phase. Each maiden will have their own mini boss encounter on the Dreadnaught when they go up.
When the Admiral goes up you will face Uktar and the Battle Medic Rogg. During this phase you will want to spread out around Uktar and kill him. When Rogg starts to cast Earthen barrier you will need to interrupt him.
When Sorka goes up you will encounter Gorak and his Iron Eviscerators.
You will have to take down Gorak and his main ability is Deadly Throw. This will do high damage to any group member it hits so we have the tank stand in the way. Gorak will also call for reinforcements. When he does this the Iron Eviscerator will land and will fixate on a random membor of the group. We ask the fixated member to stand on the tank so we can aoe down them down.
When Marak goes up you will come up against Uk’urogg. His main ability is Blood Corruption Aura. This will cause the group members to spawn puddles underneath them and they will need to move out of these asap. Simply move around the boat until Uk’urogg is dead.
When you defeat the mini-boss one of the players on the boat will have to run to the main gun and click on the bombs that rotate in it. Once this happens you will be thrown back onto the platform. Be careful during this as you do not want to land on the platform when all bombs have landed and are about to explode.
We recommend the following order for initiating the ships: The Admiral, followed by Sorka and then Marak.
While the group is on the ship bombs will land on the main encounter area. The first wave will cover a small area, you can see these bombs by the big red circle that shows their impact area. While the second will cover the rest of the floor. You can avoid these blasts by standing out of the clearly marked red area. Once both sets of bombs have landed the first ones to land will explode. Then the second set will shortly after. When this happens you need to stand on the last bombs to land and when the first wave explodes move to the open space.
While all this is going on you will have to dps all of the targets down to 20%.We do this by firstly dpsing down general until she goes to the dreadnaught, then we move onto sorka, again until shes goes to the dreadnaught and then we dps Marak down to about 30%. After this you will need to balance your dps until all 3 are at 20% when the last phase will start. If they are close enough to reaching 20% and you can skip the third boat phase by dpsing down Marak to 20% quickly then do so.
All of the maidens will now have 100 IF so you will have to deal with Marak first as her Sanguine Strikes will cause problems for your healers. While you are busy killing Marak, the admiral will put down her Turrets. These must be taken care of straight away, so when they do spawn have your ranged dps kill them quickly. Once Marak is dead you then move onto the Admiral before finishing off Sorka.
When you first go for this fight on heroic difficulty it can be a pretty challenging fight during the last 20%, so good luck!
If you liked this raiding guide, please comment, subscribe and click the like button! If you would like to keep up with when new videos come out but you don’t have a youtube account you can follow us on twitter or facebook, at twitter.com/bbmezzy or facebook.com/wowweekly. Also be sure to check out our website wowweekly.net where you can find written content as well. For now I’m Mezzy and I’ll see you again next time.