fbpx
Menu Close

Category: Warlords of Draenor

GameBeat Dev Interview With Watcher, Mastering the Many Mounts

GameBeat Dev Interview With Watcher

WoW dev Watcher was interviewed by GameBeat about the subscriber drop among other things. You can find the full interview here. Here’s a summary:

  • The team was gratified for the increase in numbers when the expansion first launched.
  • Their goal is to make a fun and engaging experience. It’s not about the numbers, if the game is fun the numbers will follow.
  • More people than ever before are doing organized (large group dungeon) raiding.
  • They recognize 5man dungeons as a problem area. They didn’t incentivize running the dungeons after the initial gearing up. They felt it was silly to keep running the same content over and over to get stronger and still get the reward in the form of Valor points. But with the removal of Valor they went too far with not keeping an incentive in place to do the content.
  • Logging in just to do your garrison missions isn’t necessarily a bad thing. “I don’t know that those are coming at the direct expense of, I’m going to log on and go do my guild raid, or I’m going to log on and do battlegrounds, or do PvP or whatever else I might have been doing — core multiplayer social functions.”
  • They rise and drop of subscribers is cyclical. These days a lot of players join when new content comes out, and when they are finished with that they play other games until the next patch of content comes out.
  • Key highlights of 6.2 content are
    • Mythic dungeons
    • Timewalker dungeons (and hope to expand upon that in the future)
    • The Adventure Guide
    • Hellfire Citadel Raid
    • Tanaan Jungle
    • The shipyard (garrison)
  • Patch 6.2 represents iterations on existing systems, applying lessons learned from 6.0. Doing massive class overhauls during content patches is something they’ve stepped away from.
  • The WoW token has not had a major influence on subscriber numbers.
  • When it comes to mythic raiding they’re not sure they have the ability to tune mythic raids for the flex system. Right now they have the freedom to expect 3 tanks or a priest for mind control. The current system allows them to expect one of every class in your raid.

Mastering the Many Mounts

Quote from: Blizzard
Mastering the Many Mounts

In this series of blog posts, we’ll look at some of the content in World of Warcraft where you might need a helpful nudge in the right direction—maybe you’re stuck, maybe you got sidetracked, or maybe you don’t even know how to begin! Join us as we travel all over Azeroth and Draenor to uncover and thoroughly tackle the many different little adventures available to any player.

In this edition, we’re looking at some of the more fun and interesting ways to grow your collection of mounts. If you haven’t done much (or any) mount collecting since the launch of Warlords of Draenor, you’re in for a treat, as the latest expansion introduced more than 40 new mounts to the game. Some are exceptionally difficult to obtain, but this article focuses primarily on mounts that more easily attainable—but still require a bit of effort and know-how.

What follows is intended for players who haven’t already overcome the content, though keep it mind it will contain minor spoilers. If this particular information isn’t for you because you’re already a mounted master, then well done! In the comments below, let us know what you’d like to learn how to master in a future blog post.

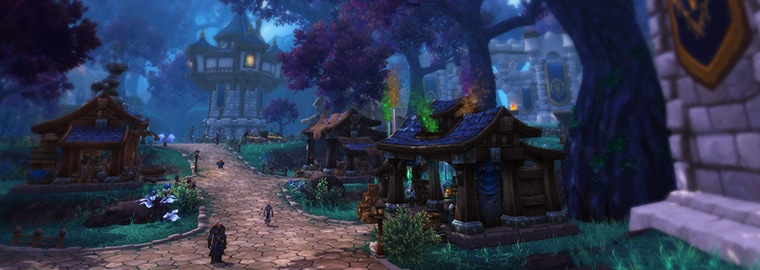
There’s No Place Like Home

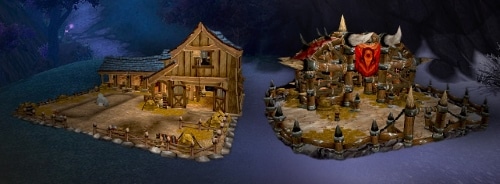
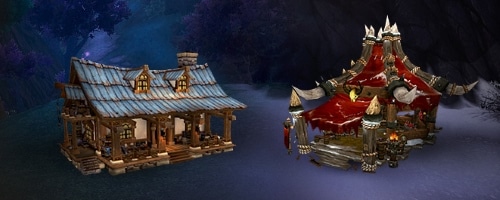
Your Garrison offers you the most direct way to get your reins on 10 new mounts, eight of which are available via the Stables. If you don’t have a Stables, it’s a building that requires a large-sized plot, so you’ll have to demolish your Barracks, Bunker/War Mill, Gearworks/Workshop, or Mage Tower/Spirit Lodge to make room for it. Don’t worry if you want to demolish the Stables later once you’re done with it—any mounts you earn from the Stables will remain in your collection permanently.

These six mounts are obtainable via quests that pop up in your Stables each day:

The quests will require you to track down wild beasts in various zones, lasso them, break them, and ultimately tame them and make them love you.

Once you have all six, you can take on the achievements Advanced Husbandry and The Stable Master. The first rewards an Armored Frostboar, and the second grants you the Armored Frostwolf. This is where things get tricky.

The achievements require you to go to Nagrand and kill each of six named enemies while mounted on each of your six trained mounts. Additionally, you have to have a debuff item in your possession. For Advanced Husbandry, you’ll need to have the Black Claw of Sethe, and for The Stable Master, you’ll need to complete all 36 kills while under the effects of the Garn-Tooth Necklace. Look around your Stables for those items, and be ready to move slower and take more damage on your trained mounts when you’ve got them.

For an in-depth walkthrough of the Stables, check out the Guide to the Garrison Stables on Wowhead.

It’s also possible to obtain two more mounts using your Trading Post:

In either case, you’ve got to build a Trading Post, advance it to at least level 2, and gain a lot of rep. Once again, Wowhead has the lowdown with their Laughing Skull Reputation Guide and this Sha’tari Defense Reputation Guide.

Let’s Go Camping

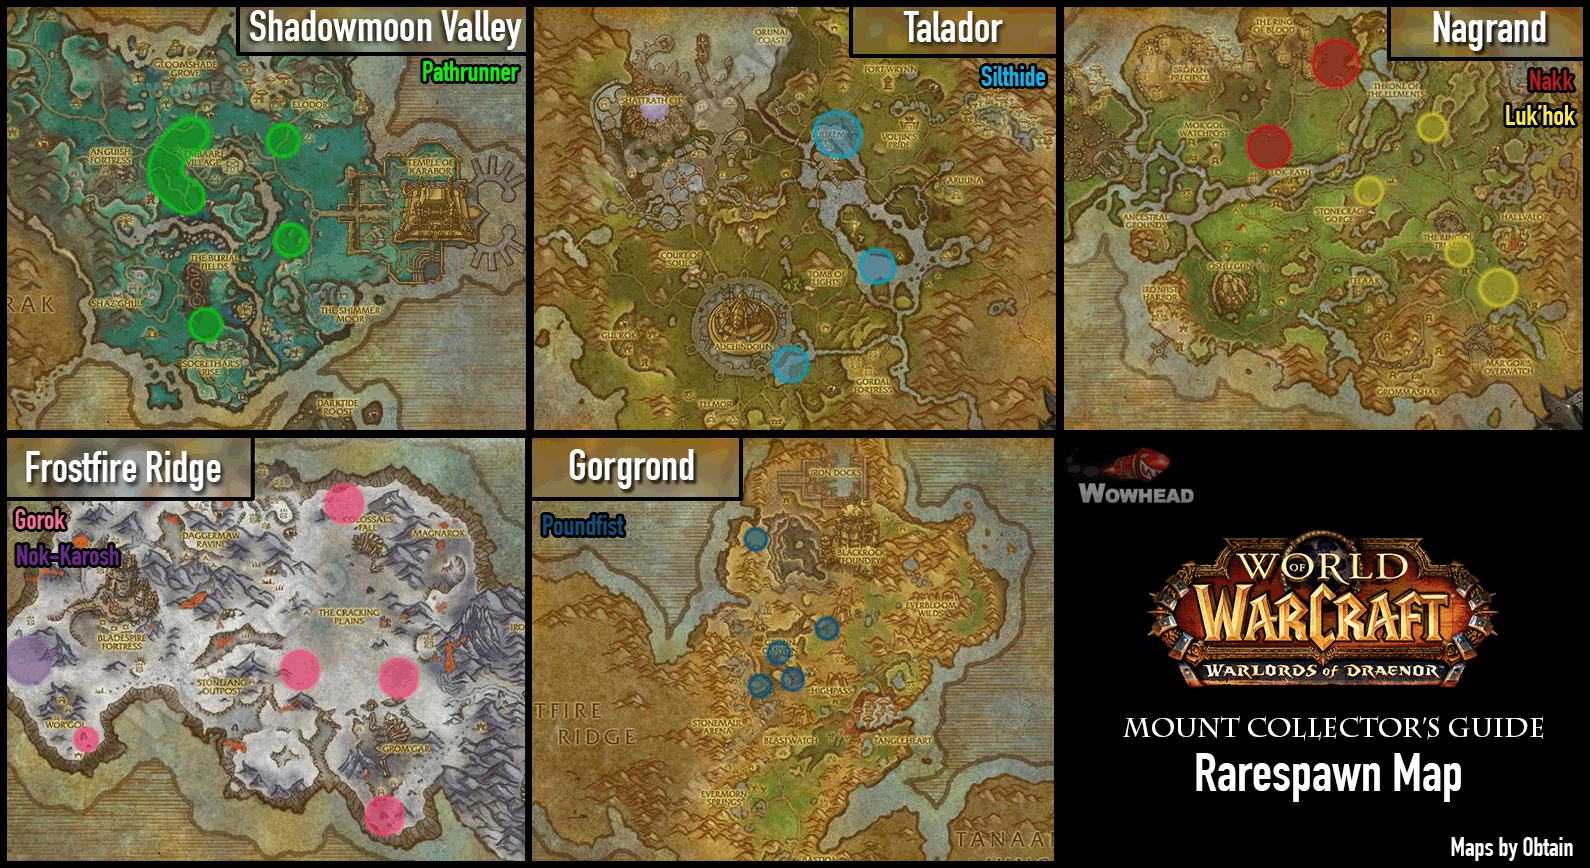
There’s nothing quite like the feeling you get when a rare NPC spawns after you’ve spent a long time waiting for it, and you capture the mount of your dreams. In Draenor, there are eight such mounts, and six of them are a guaranteed drop for any character who takes part in the kill:

The most basic way to acquire any of these mounts is to hunt down the rare creatures that drop them, usually by spending some time in each of the spots where they are known to spawn. Over on Wowhead, a community member named Obtain has published a handy map of their spawn points, and if you’re looking for more detail, check out his Warlords of Draenor Mount Collectors Guide.

The key to wrangling these rare mounts is patience. The enemies that drop them spawn very infrequently, and in only one of several possible places, so a fair amount of luck is required. Wherever you place yourself, you’ll likely be far away from most of the other spawn points, and these rare creatures are usually taken out quickly. However, once you’ve collected most of them, it will get easier to find the others, since you’ll have so much less territory to cover to do so.

You Can’t Take It With You

You may have overlooked or never known that there are seven mounts available to you to purchase in Warspear for gold and Apexis Crystals (and more are coming in Patch 6.2!).

If you’re interested in gathering Apexis Crystals to pick up these mounts, refer to Wowhead’s Farming and Spending Apexis Crystals in Warlords of Draenor guide.

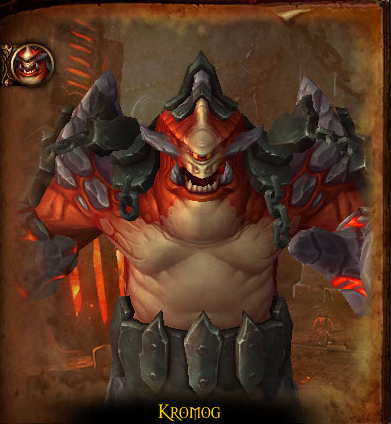
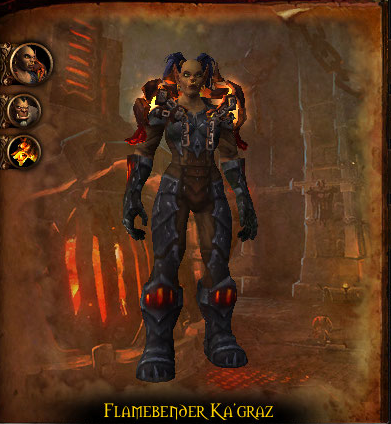
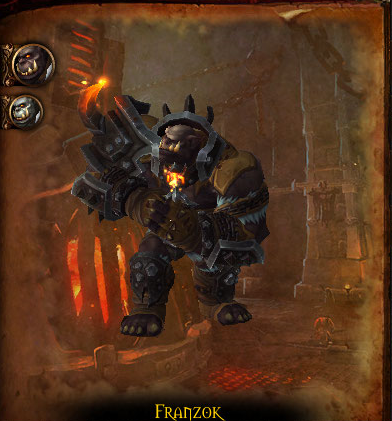
Or We’ll Come To You

One very good reason to participate in a Garrison invasion every week and go for the gold rating is actually four very good reasons:

You can only find these four mounts in the Invader’s Forgotten Treasure left behind after you earn a Gold Rating in your defense. The chance of finding each in your cache is quite small, so you’ll want to keep defending your and your friends’ Garrisons each week. For some good advice on getting a gold rating, check out the Garrison Invasions guide on Wowhead.

Are you hitting any snags expanding your mount collection in Draenor? Tell us about it in this forum thread in our General discussion forum. Master mount collectors are standing by!

Mythic Oregorger Raiding Guide

OregorgerHey guys I’m Mezzy and welcome to this warlords of draenor raiding guide. Today we’ll be taking a look at Oregorger in Mythic Blackrock Foundry. This video will focus on the changes to the mythic encounter, so if you don’t know the heroic mechanics check out our guide in the annotation.

On mythic you’ll have to deal with increased health and damage, as well as some small changes. First and foremost is that in phase one Blackrock Barrage will now have 5 charges instead of 3. This means that you’ll need 5 interruptors to deal with this. It’s very important that they all get interrupted because each successful cast will still waste 5 mana and deal a chunk of damage to your raid. You will only have 3 phase ones to deal with the oregorger before he enrages so you’ll want every extra second you can get.

The Acid Torrent does a lot of damage and you should be getting 7 to 8 casts per phase 1. As such you’ll want to use a cooldown for every single one of the torrents to reduce the damage not just on your tanks but on your raid as a whole.

You’ll still deal with the rest of the abilities in the same way. For Retched Blackrock, move as a group around the walls. And of course as a melee move away from the Explosive Shard.

In phase 2 you’ll have to deal with a new ability. Every time the oregorger bumps into a wall he will leave behind an Unstable Slag. If the oregorger hits the same spot again, that slag will explode, shooting a wave of fire in every direction. If that fire hits another unstable slag, that one will explode as well. Think of it like a bomber man minigame. Obviously the fire does damage and you’ll want to avoid it by moving into a hallway it won’t move to. At the same time, keep an eye on the Oregorger because you’d rather get hit by fire than by the boss.

To end the phase as quickly as possible and to reduce the amount of unstable slag there is around we divided the area up into 4 quarters. Every group in the raid was assigned one of them, and the blackrock crates in those had their priority. Once those crates were dead, they could of course help other quarters.

When you transition back to phase 1 the unstable slag will stay around, so in the second phase 2 expect more unstable slag explosions and dodging of fire.

I cannot stress enough how important it is to keep interrupting the blackrock barrages as it is the single most important element of phase 1 next to dealing with acid torrents. This is a potentially frustrating boss to progress on so good luck!

If you liked this raiding guide, please comment, subscribe and click the like button! If you would like to keep up with when new videos come out but you don’t have a youtube account you can follow us on twitter or facebook, at twitter.com/bbmezzy or facebook.com/wowweekly. Also be sure to check out our website wowweekly.net where you can find written content as well. For now I’m Mezzy and I’ll see you again next time.

Mythic Beastlord Darmac Raiding Guide

Beastlord DarmacHey guys I’m Mezzy and welcome to this warlords of draenor raiding guide. Today we’ll be taking a look at Beastlord Darmac in Mythic Blackrock Foundry. This video will focus on the changes to the mythic encounter, so if you don’t know the heroic mechanics check out our guide in the annotation.

This encounter has a multitude of changes. Other than the expected damage and health increases, the beastlord will also dismount his mount once it reaches 40% health, meaning your tanks will have to tank both mount and master 3 times. Besides that, the Beastlord gains a new mount once he reaches 25% health.

To start off, due to the increased overall damage you’ll be killing the mounts in a different order compared to our original heroic guide. You’ll want to kill Cruelfang first, then Dreadwing and finally Ironcrusher. This is because Tantrum does so much damage now you want to reduce the amount of Tantrums you have to heal through, whereas you can avoid a lot of the damage Dreadwing brings to the table.

The beastlord will still mount his mounts at 85%, 65% and 45% health. Once each of the mounts reaches 40% health he will dismount them. You will want one tank to tank the beast, while the other tanks the beastlord. Your dps should focus on killing the beast as soon as possible. Other than this not much changes for the first 3 mounts.

There is one mythic change you need to be aware of though. The pack beasts will now increase their damage and movement speed over time. So these will need to be killed as soon as they spawn because they will start hurting. Have your hunters misdirect them to a tank so that they do not run wild and kill off random members in your team. Stunningthe pack beasts to reduce damage on your tanks is recommended, especially later in the fight.

Now obviously so far, as I’ve described it not much changes for a big part of the fight. While mechanically this is true, everything hurts so much more and you need to avoid taking as much damage as possible.

When you start dealing with Rend and Tear, you need to make sure that your raid doesn’t take a ton of stacks because your healers will not be able to keep up. If someone that’s not a tank reaches 2, 3 or even more stacks something needs to change. You can use a paladin’s blessing of protection to get rid of the stacks but you’d rather not have to resort to that.

When you start dealing with the Inferno Breath, you need to not only make sure you have a good spread but if your area gets targeted you have to move out of it as soon as possible to not get more than 1 stack of the debuff. And speaking of debuffs, Conflagration will target 3 players and you’ll want that to be dispelled off of them all quickly. As a baseline you could assign a group per healer to dispell the Conflagration off.

And then there’s the Tantrum. Your healer team will know best, but it’s almost inevitable to have to use a raid healing cooldown for every Tantrum. Personal cooldowns and amplify healing will of course help too.

When you’re battered and bruised and reach 25%, the Beastlord will call upon his newest beast: Faultline. Faultline will spawn at the big gates opposite of the entrance to the room. Because this is a new mount, the boss will not dismount him at 40%, which is quite a relief.

His first ability is Heavy Smash. This is basicly a cleave like on Kromog, which makes the tanks stack on to of each other while the clefthoof is up.

His next ability is Unsteady which deals damage to the entire raid and slows them by 50%. The slow can be a killer due to Cannonball Barrage. The boss will fire cannonballs into the air and they will deal damage whereever they land. You can see where they will land due to the red swirls on the ground. You’ll obviously have to move out of these swirls before the cannonballs land, which is why a 50% movement speed decrease is not the best news you can get.

Faultline’s most important ability, as it will carry over to the Beastlord when he dies is Epicenter. Faultline will cast this regularly, causing an earthquake to spawn beneath him. This will deal damage to and slow anyone in the Epicenter. This means the tanks will have to move Faultline around the room and use the space as effectively as possible. To deal with this we had the first 3 or 4 Epicenters placed next to each other near his spawn point. After that we had Faultline or the Beastlord move through the middle so that we had as much space left over for our team. Pay special attention to the movement of the tanks in the video once we reach the Faultline phase.

The final ability that Faultline has, which also carries over to the Beastlord is Unstoppable. This acts as a softenrage and regularly increases the damage done of the Beastlord or Faultline by 10%.

Due to the tanks having to move around the room at this stage of the fight, misdirecting the pack beasts to the tanks becomes increasingly important because you do not want to have them attacking your raid.

Once the Clefthoof dies, the beastlord’s remaining health will double and it’s a race against the clock to kill him before he kills you. Use heroism, use personal cooldowns as needed, continue to kill the pack beasts and do not, I repeat, do not get hit by spears as that will mean certain death at this stage in the encounter. There are so many sources of damage at this point that you need to avoid as much as you can.

Once the beastlord himself reaches 0% health, he will actually die and the encounter will be over. As you advance in this fight, it will become increasingly difficult and it will challenge you to maximise your damage, healing and minimize your damage taken. Good luck with bringing these guys down!

If you liked this raiding guide, please comment, subscribe and click the like button! If you would like to keep up with when new videos come out but you don’t have a youtube account you can follow us on twitter or facebook, at twitter.com/bbmezzy or facebook.com/wowweekly. Also be sure to check out our website wowweekly.net where you can find written content as well. For now I’m Mezzy and I’ll see you again next time.

Raid Testing Schedule – May 14-18, Recent Actions Against Botting in WoW

Raid Testing Schedule – May 14-18

Quote from: Blizzard
Sorry for the late notice, but we were waiting on PTR build status to confirm testing dates. From tomorrow through Monday, we will continue our Hellfire Citadel raid testing, including both Heroic and Mythic raid testing. As is always the case with PTR raid testing, it is quite possible that there will be technical or gameplay issues that disrupt our plans. Thank you in advance for your patience and understanding.

Remember that Heroic difficulty scales for any group size between 10 and 30 players, so feel free to assemble and bring a group of any size within that range. Mythic difficulty requires a fixed 20 players. Our general plan is to test every encounter on Heroic difficulty first, and then test sections of the raid on Normal and Raid Finder, alongside targeted Mythic tests.

Each encounter should be available at approximately the listed times below on all PTR servers.

Thursday, May 14

Socrethar – Heroic Hellfire Citadel
13:30 PDT (16:30 EDT, 22:30 CEST)

Archimonde – Heroic Hellfire Citadel
15:00 PDT (18:00 EDT, 24:00 CEST)

Friday, May 15

Shadow-Lord Iskar – Mythic Hellfire Citadel
11:30 PDT (14:30 EDT, 20:30 CEST)

Hellfire High Council – Mythic Hellfire Citadel
13:30 PDT (16:30 EDT, 22:30 CEST)

After Mythic raid testing concludes on Friday, we will open the Bastion of Shadows Raid Finder wing, including Iskar, Socrethar, and Tyrant Velhari, over the weekend.

Monday, May 18

Iron Reaver – Heroic Hellfire Citadel
13:30 PDT (16:30 EDT, 22:30 CEST)

Mannoroth – Mythic Hellfire Citadel
15:00 PDT (18:00 EDT, 24:00 CEST)

As always, this testing schedule is very fluid and subject to the realities of a PTR environment. We might have to change the time of a testing session, change the boss being tested, or cancel a test entirely, due to bugs, server hardware issues, etc. Keep an eye on this forum for the latest information, and thank you in advance for testing and providing feedback.

Important Testing Notes

Q: How do I get into the raid zone?

A: In Stormwind, Orgrimmar, and your garrison, you may speak to Nexus-Lord Donjon Rade in order to teleport into the raid zone while it is open for testing. (The option to teleport into a zone will not be available when the zone is not open for testing.) You can also teleport to Tanaan and just walk in the standard entrance.

Q: How long does testing last?

A: The primary purpose of testing is to give us the information we need to balance the encounters, evaluate how mechanics are playing out in practice, and identify bugs. Once we’re satisfied that we’ve received that information for a given boss, we’ll be shutting down testing. Usually this takes anywhere from 45 minutes to 2 hours, but there are no guarantees.

Recent Actions Against Botting in WoW

Quote from: Blizzard
We’ve recently taken action against a large number of World of Warcraft accounts that were found to be using third-party programs that automate gameplay, known as “bots.” We’re committed to providing an equal and fair playing field for everyone in World of Warcraft, and will continue to take action against those found in violation of our Terms of Use. Cheating of any form will not be tolerated.If you believe that you’ve encountered a player abusing a bot, exploit, or cheat, please let us know! You can do so by using the right-click report functionality in the game, and/or by emailing information to [email protected].

Mythic Kromog Raiding Guide

KromogHello everyone, welcome to another Warlords of Draenor raiding guide. I’m Myln and Today we’ll be taking a look at Kromog in Mythic Blackrock Foundry. This video will focus on the changes to the mythic encounter, so if you don’t know the heroic mechanics yet, make sure to check out our guide in the annotation.

On mythic mode the increased health and damage matter a lot. So much so in fact that it won’t be unusual to use raid healing cooldowns during stone breath. During Runes of Grasping Earth phase you want to assign your raid group to specific runes as you need to maximise the damage output to destroy the hands as quickly as possible. This is because Kromog’s only new ability and change to the encounter can happen right after the normal rune phase ends.

The new ability is called Trembling Earth. During this phase you will get spikes spawning randomly – just move out when you see shaky ground beneath you and you should be fine. But more importantly Kromog will cause big pillars to spawn 1 at a time. These pillars will appear on the left, in front and to the right side of the boss, but the order in which they spawn is totally random.

These pillars have a good chunk of health and need to be dealt with before the phase ends. Which means when the third pillar spawns, you will have very little time to get rid of it. At this point, this is what we suggest you do: When the first pillar appears you want all your dps focusing it right away, when the second appears you want all dps to switch to it except for the group assigned to the first pillar; and when the last one appears, just nuke as fast as you can. You probably want to use some cooldowns at this point since you have only a short amount of time to destroy it.

You will notice that only the upper-part of the pillars is destroyed; the lower part is needed for the next phase and we’ll get to that in a moment. Once you take care of all the pillars you’ll reach the next phase when Kromog will cast: Call of the Mountain. This ability will 1-shot you if you don’t get behind the remaining pillars. And here’s why they don’t completely disappear when you destroy them. So for now, just just get cover behind them and you’re safe. After he casts Call of the Mountain, Kromog will face one of the pillars and use Rippling Smash to destroy it before doing his next Call. So you’ll need to stand behind each of the pillars in order to survive and continue with the encounter.

For the Rune of Trembling Earth Phase you could assign your dps as follows:
– When the first pillar spawns all dps should dps it
– When the second pillar spawns groups 2 and 3 should dps it
– When the third pillar spawns group 3 should dps it

In our Boss kill, we had Mages in group 3 as they had the highest burst damage. If you are missing dps to kill the pillars in time, save up your cooldowns and use them during this phase. but don’t use Heroism or Bloodlust as you need it when the boss reaches 30% health.

You can optimize your raid positioning for the runes of grasping hands phase using the Exorsus Raid Tools addon. This addon allows you to assign raid members to specific runes so they know exactly which ones to take.

Once you’ve optimzed your dps for both rune phases and have had a bit of practise on this fight, you’re sure to get Kromog down in no time.

If you liked this raiding guide, please comment, subscribe and click the like button! If you would like to keep up with our new videos come out but you don’t have a youtube account you can follow us on twitter or facebook, at twitter.com/bbmezzy or facebook.com/wowweekly. Also be sure to check out our website wowweekly.net where you can find written content as well. For now I’m Myln and I’ll see you again next time.

Mythic Flamebender Ka’graz Raiding Guide

Flamebender Ka'grazHey guys I’m Sulya and welcome to this warlords of draenor raiding guide. Today we’ll be taking a look at Flamebender Kagraz in Mythic Blackrock Foundry. This video will focus on the changes to the mythic encounter, so if you don’t know the heroic mechanics check out our guide in the annotation.

This is probably the easiest boss in mythic compared to it’s heroic counterpart. In mythic, as you can expect, everything has more health and does more damage. However the 2 encounter changes are both related to the wolves. First off the fire lines between the wolves will now empower the weapons if they touch them. So obviously you’ll want to prevent this from happening.

Second of all when the wolves spawn, 4 of them will now spawn with 3 out of the 4 fixating on random ranged players. To deal with both the mythic changes you will want to tank the Flamebender more in the middle of the room as opposed to at the forge. Secondly, whenever someone gets fixated by the wolves they should run into the melee and use a personal cooldown to reduce the damage they take from their fixated wolf.

By having all of the wolves in the middle you can AoE them down and kill them as quickly as possible. Should the overheated wolf change, you will obviously still want a tank swap, and you’ll need cooldowns for those flame breaths. When it comes to the fixated ranged players, we assign a healer to each fixated player so that they don’t die in the process. As soon as a wolf doesn’t fixate on you anymore, run out of the melee because you still have the lava slash to deal with from heroic.

At 100 energy you will now want to have all of your raid move into melee so that your AoE heals are a lot more effective. Use a raidwide cooldown to reduce the damage or increase your healing. When the flamebender reaches 100 energy, 2 players should still have the Blazing Radiance debuff. These will need to stay out of the middle until the debuff fades. This means they will require extra attention from the healers so that they don’t die from the combined damage of the debuff and firestorm.

Once the firestorm ends, of course move back into range. Other than that, everything is still the same. If you’ve killed hans and frans, this encounter should be a piece of cake.

If you liked this raiding guide, please comment, subscribe and click the like button! If you would like to keep up with when new videos come out but you don’t have a youtube account you can follow us on twitter or facebook, at twitter.com/bbmezzy or facebook.com/wowweekly. Also be sure to check out our website wowweekly.net where you can find written content as well. For now I’m Sulya and I’ll see you again next time.

Mythic Hans’gar and Franzok Raiding Guide

Frans'gar and FranzokHey guys I’m Sulya and welcome to this Warlords of Draenor raiding guide. Today we’ll be taking a look at Hans’gar and Franzok in Mythic Blackrock Foundry. This video will focus on the changes to the mythic encounter, so if you don’t know the heroic mechanics check out our guide in the annotation.

On Mythic mode this encounter requires plenty of coordination, so we’ll take it one step at a time.

There is now another environmental ability called Smart Stampers. This will activate shortly after the start of the fight, after the Searing Plates phase and after the regular Pulverizing Stampers phase.

These stampers are called Smart, because they will press down on wherever players are standing. When the Smart Stampers activate, the segments on which players are standing will start to light up. After 8 seconds a stamper will crash down onto that segment and will stay down for some time. So you will want to move to the next segment before this happens.

To deal with this, and you should definitely pay attention to how we do this in the video as well, we have 2 groups of 10 people. Each group has access to 2 rows of the encounter area and the groups stay on the same segments relative to each other. So when the Smart Stamper phase is about to start we have groups 1 and 2 on a segment in the third row and groups 3 and 4 on the same segment in the first row.

5 seconds after the segment starts to glow, the raid leader calls out next, and everyone moves to the segment to the right. Again we wait 5 seconds, wait for the raid leader’s call and move over. Rinse and repeat until you hit one of the transition phases from heroic mode.

If someone accidentally activates a segment too far, you can have the raid leader call out “move 2” so that the entire raid can move 2 segments and is still in the same position relative to each other.

The second change in this encounter is that body slam hurts like a truck, but it’s damage is now shared among everyone who gets hit by it. This means that during the smart stamper phase you’ll automatically deal with it because you have 2 sets of players moving as a group. However in the regular phases from heroic your 2 clumps of people will need to keep close together to share the damage then as well.

All stampers in this encounter will now 1shot you, so you’ll certainly have to perfect not getting hit by the stampers in the regular stamper phase. In both the Searing Plates and normal stampers phases new patterns have been added.

In the Searing Plates phase, 4 plates can spawn at a single time, meaning there will only be 1 line that will be safe. During the normal stampers it won’t be unusual that a lot of the segments will be covered. We’ve got multiple markers as safe spots, which indicate places where there should always be 1 safe segment.

After you finish watching this video, check out our extra Mythic Hanz und Franz Presser Dodging, which I originally recorded for my guild. In it you can see how little you actually have to move to dodge the normal pressers.

While progressing through this encounter we found that the normal presser phase was the most deadly. It starts around 53% and ends around 38%. We found it was best to use heroism at this point, so that we could get through it as quickly as possible. Now that we have it on farm, we use heroism at 25%.

This fight just comes down to movement so it’ll just take your team practice to get used to the waves and motions of this fight.

To conclude this guide the following is the phase organization of this encounter:

10 seconds after the start of the encounter to 85% health you’ll have to deal with smart pressers.
85% to 69% health you’ll have to deal with Searing Plates.
69% to 53% you’ll have to deal with smart pressers.
53% to 39% you’ll have to deal with regular pressers.
39% to a rough 25% you’ll have to deal with smart pressers.
And finally 25% to 0% you’ll have to deal with Searing Plates and then regular pressers.

If you liked this raiding guide, please comment, subscribe and click the like button! If you would like to keep up with when new videos come out but you don’t have a youtube account you can follow us on twitter or facebook, at twitter.com/bbmezzy or facebook.com/wowweekly. Also be sure to check out our website wowweekly.net where you can find written content as well. For now I’m Sulya and I’ll see you again next time.