
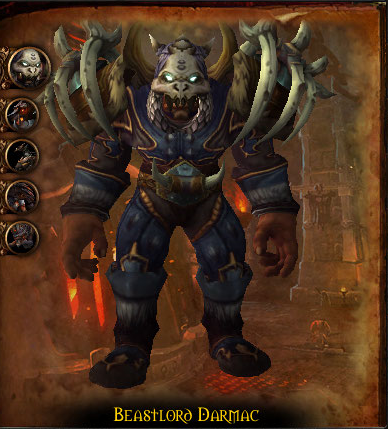
 Hey guys I’m Mezzy and welcome to this warlords of draenor raiding guide. Today we’ll be taking a look at Beastlord Darmac in Mythic Blackrock Foundry. This video will focus on the changes to the mythic encounter, so if you don’t know the heroic mechanics check out our guide in the annotation.
This encounter has a multitude of changes. Other than the expected damage and health increases, the beastlord will also dismount his mount once it reaches 40% health, meaning your tanks will have to tank both mount and master 3 times. Besides that, the Beastlord gains a new mount once he reaches 25% health.
To start off, due to the increased overall damage you’ll be killing the mounts in a different order compared to our original heroic guide. You’ll want to kill Cruelfang first, then Dreadwing and finally Ironcrusher. This is because Tantrum does so much damage now you want to reduce the amount of Tantrums you have to heal through, whereas you can avoid a lot of the damage Dreadwing brings to the table.
The beastlord will still mount his mounts at 85%, 65% and 45% health. Once each of the mounts reaches 40% health he will dismount them. You will want one tank to tank the beast, while the other tanks the beastlord. Your dps should focus on killing the beast as soon as possible. Other than this not much changes for the first 3 mounts.
There is one mythic change you need to be aware of though. The pack beasts will now increase their damage and movement speed over time. So these will need to be killed as soon as they spawn because they will start hurting. Have your hunters misdirect them to a tank so that they do not run wild and kill off random members in your team. Stunningthe pack beasts to reduce damage on your tanks is recommended, especially later in the fight.
Now obviously so far, as I’ve described it not much changes for a big part of the fight. While mechanically this is true, everything hurts so much more and you need to avoid taking as much damage as possible.
When you start dealing with Rend and Tear, you need to make sure that your raid doesn’t take a ton of stacks because your healers will not be able to keep up. If someone that’s not a tank reaches 2, 3 or even more stacks something needs to change. You can use a paladin’s blessing of protection to get rid of the stacks but you’d rather not have to resort to that.
When you start dealing with the Inferno Breath, you need to not only make sure you have a good spread but if your area gets targeted you have to move out of it as soon as possible to not get more than 1 stack of the debuff. And speaking of debuffs, Conflagration will target 3 players and you’ll want that to be dispelled off of them all quickly. As a baseline you could assign a group per healer to dispell the Conflagration off.
And then there’s the Tantrum. Your healer team will know best, but it’s almost inevitable to have to use a raid healing cooldown for every Tantrum. Personal cooldowns and amplify healing will of course help too.
When you’re battered and bruised and reach 25%, the Beastlord will call upon his newest beast: Faultline. Faultline will spawn at the big gates opposite of the entrance to the room. Because this is a new mount, the boss will not dismount him at 40%, which is quite a relief.
His first ability is Heavy Smash. This is basicly a cleave like on Kromog, which makes the tanks stack on to of each other while the clefthoof is up.
His next ability is Unsteady which deals damage to the entire raid and slows them by 50%. The slow can be a killer due to Cannonball Barrage. The boss will fire cannonballs into the air and they will deal damage whereever they land. You can see where they will land due to the red swirls on the ground. You’ll obviously have to move out of these swirls before the cannonballs land, which is why a 50% movement speed decrease is not the best news you can get.
Faultline’s most important ability, as it will carry over to the Beastlord when he dies is Epicenter. Faultline will cast this regularly, causing an earthquake to spawn beneath him. This will deal damage to and slow anyone in the Epicenter. This means the tanks will have to move Faultline around the room and use the space as effectively as possible. To deal with this we had the first 3 or 4 Epicenters placed next to each other near his spawn point. After that we had Faultline or the Beastlord move through the middle so that we had as much space left over for our team. Pay special attention to the movement of the tanks in the video once we reach the Faultline phase.
The final ability that Faultline has, which also carries over to the Beastlord is Unstoppable. This acts as a softenrage and regularly increases the damage done of the Beastlord or Faultline by 10%.
Due to the tanks having to move around the room at this stage of the fight, misdirecting the pack beasts to the tanks becomes increasingly important because you do not want to have them attacking your raid.
Once the Clefthoof dies, the beastlord’s remaining health will double and it’s a race against the clock to kill him before he kills you. Use heroism, use personal cooldowns as needed, continue to kill the pack beasts and do not, I repeat, do not get hit by spears as that will mean certain death at this stage in the encounter. There are so many sources of damage at this point that you need to avoid as much as you can.
Once the beastlord himself reaches 0% health, he will actually die and the encounter will be over. As you advance in this fight, it will become increasingly difficult and it will challenge you to maximise your damage, healing and minimize your damage taken. Good luck with bringing these guys down!
If you liked this raiding guide, please comment, subscribe and click the like button! If you would like to keep up with when new videos come out but you don’t have a youtube account you can follow us on twitter or facebook, at twitter.com/bbmezzy or facebook.com/wowweekly. Also be sure to check out our website wowweekly.net where you can find written content as well. For now I’m Mezzy and I’ll see you again next time.