Developer Interviews Roundups
A few developer interviews have been posted in the last few days. Vanion, WoWhead and The Instance all got to interview developers about patch 6.2. Here’s a summary of potentially new or interesting information we got from them:
- They are happy with how players are progressing through normal and heroic in the first week of Hellfire Citadel.
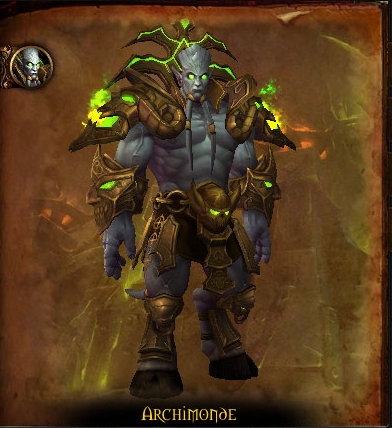
- Ion “Watcher” Hazzikostas would not say if mythic Archimonde is more like Imperator Margok or Blackhand in the terms of extra phases.
- You have to kill mythic bosses to unlock the mythic cache from the naval garrison missions.
- The naval missions for raid loot will spawn every 2 or so weeks.
- If you fail the raid mission (despite 85% success chance for example), a new one will appear right away.
- Grom was the planned end boss for Warlords, but as they went through development they changed their mind. (The wording at the end of this explanation was structured to say Archimonde was the villain of this patch)
- There are no plans to make the legendary questchain accountwide.
- Once you have the legendary ring you can loot an item that will upgrade your ring by 3 item levels from archimonde. You can loot one of them per week.
- Tanaan Jungle and HFC were being worked on in November 2014. Because of the amount of time it takes to develop content, it takes time to be able to bring content to players that has the feedback of players taken into account. Tanaan has taken steps to improve the game as a whole, and future content will have been able to use more of the player feedback.
- They plan to add another timewalking event for cataclysm dungeons and expand upon the existing events with more dungeons such as Shadow Labs.
- For shipyard missions you want to be sure to counter the ships. It’s up to you if you think spending 500 resources on equipment is worth an increase of 5% on your success chance.
- Hellfire Citadel trash loot is personal loot based.
- The nerf to gold through garrison missions and the salvage yard are to counter the gold inflation that was caused by the garrison gold missions pre-6.2.
- The salvage yard nerf also happend because the salvage yard felt mandatory to have in your garrison.
- The transmog system revamp is being actively worked on but it’s not a simple system and requires a lot of time.
- It will be weeks, not months for patch 6.2.x and thus flying in Draenor.
- “Tanaan is going to be a big part of the game for the rest of the expansion.”
Patch 6.2 Hotfixes – June 29
Here you’ll find a list of hotfixes that address various issues related to the recently released World of Warcraft Patch 6.2.0. Hotfixes are updates made without requiring a new client-side patch. Some of the hotfixes below take effect the moment they were implemented, while others may require a realm restarte to go into effect. Please keep in mind that some issues cannot be addressed without a client-side patch update. This list will be updated as additional hotfixes are applied.
The latest batch of hotfixes are listed below. Previous hotfixes have been compiled by category to provide a quick summary of all hotfixes that have been applied since the start of World of Warcraft Patch 6.2.0.
Tags may be added to some hotfixes to denote a special condition.
- [Requires a realm restart] means the hotfix will not take effect until after a scheduled rolling restart or maintenance.
- [Hotfix in testing] means the hotfix is in early stages of testing and may not be implemented just yet. However, the change is important and is posted to provide as much advanced notice as possible.
Patch 6.2.0 Information |
June 29
Class
Class Trinket Tuning Changes
Please note that the following changes to class trinkets are currently still in testing.
- Bleeding Hollow Toxin Vessel had its effect increased by 28% for Combat Rogues, and had its effect increased by 40% for Subtlety Rogues.
- Core of the Primal Elements now deals 40% more damage for Enhancement Shaman.
- Empty Drinking Horn’s Fel Burn effect can now stack up to 30 times, down from 50.
- Fragment of the Dark Star had its effect increased by 20% for Affliction Warlocks.
- Reaper’s Harvest had its chance to trigger reduced by 6% for Unholy Death Knights.
- Repudiation of War had its effect increased by 30% for Shadow Priests.
- Seed of Creation has had its chance to trigger reduced by 14% for Balance Druids. (The chance to trigger is exactly 100% at Mythic Warforged.)
- Soul Capacitor‘s Spirit Eruption effect should now properly only hit intended targets within its area of effect.
- Talisman of the Master Tracker had the chance to trigger reduced by 6% for Survival Hunters.
- Tome of Shifting Words had its effect reduced in power by 33% for Frost Mages, and had its chance to trigger reduced by 6% for Fire Mages.
Raid Finder Armor Set Tuning Changes
The following changes have been made to set armor pieces found on Raid Finder difficulty.
Blackrock Foundry
Ebonflame Cloth Armor
- 4-piece set bonus for Healers now has an 8-second internal cooldown (up from 3 seconds).
Sootfur Leather Armor
- 4-piece set bonus for Damage Dealing Spellcasters no longer triggers twice on crits.
- 4-piece set bonus for Healers now has an 8-second internal cooldown (up from 3 seconds).
- 4-piece set bonus for Tanks now has an increased proc rate of approximately [1.7, increased by Haste] per minute (up from [0.85, increased by Haste]).
Ashlink Mail Armor
- 4-piece set bonus for Damage Dealing Spellcasters had its damage dealt reduced by 75% and has an 8-second internal cooldown (up from 3 seconds).
Blacksteel Plate Armor
- 4-piece set bonus for Healers now heals each successive target in the chain for 50% less than the previous target, and reduced the number of targets in the chain to 3 (down from 4).
- 4-piece set bonus for Tanks now has an increased proc rate of approximately [1.7, increased by Haste] per minute (up from [0.85, increased by Haste]).
Hellfire Citadel
Felfume Cloth Armor
- 4-piece set bonus for Damage Dealers now has a 3-second internal cooldown.
Ironpelt Leather Armor
- 4-piece set bonus for Healers now has a 3-second internal cooldown.
- 4-piece set bonus for Tanks now has a 2-second internal cooldown. The change should have a negligible impact on throughput.
Rancorbite Mail Armor
- 4-piece set bonus for Physical Damage Dealers no longer scales with Attack Power, the Fel Explosion effect is now centered on the target, and has a 3-second internal cooldown.
- 4-piece set bonus for Damage Dealing Spellcasters now has a 3-second internal cooldown.
Demonbreaker Plate Armor
- 4-piece set bonus for Healers now has a 3-second internal cooldown.
- 4-piece set bonus for Tanks now has an increased proc rate of approximately [3.67, increased by Haste] per minute (up from [1.7, increased by Haste]).
Death Knight
Frost
- Obliterate should now correctly deal full damage against other players in PvP combat.
Hunter
Armor Sets
- [Hotfix in testing] Tier-18 4-piece set bonus for Survival Hunters should now correctly trigger Shadow Nova on all targets affected by Black Arrow, not just on the primary target. Additionally, Shadow Nova should be be correctly benefitting from the Tier-18 2-piece set bonus, Black Decay.
Monk
General
- [Requires a realm restart] Fixed several issues that made Roll and Chi Torpedo work inconsistently. The abilities should now always travel a consistent distance, be unaffected by snare effects, and reach the destination faster with increased stacking movement speed.
- Fixed an issue where Surging Mist had no resource cost while Timewalking.
Rogue
Combat
- Killing Spree should now correctly only provide immunity to roots, snares, and knockback effects.
Armor Sets
- Tier-18 2-piece set bonus for Subtlety Rogues should now work correctly with Anticipation.
Shaman
Glyphs
- Glyph of Ghostly Speed should no longer incorrectly trigger its movement speed increase while in combat.
Warrior
Armor Sets
- Tier-18 2-piece set bonus for Protection Warriors should now work correctly if the Warrior knows Gladiator’s Resolve.
Creatures and NPCs
Tanaan Jungle
- Savage Whale Shark should now drop Equipment Blueprint: Trained Shark Tank for all players that have attacked it.
- Fixed an issue where Sargerei Nullifier could immediately despawn after being defeated.
- Fixed an issue where players may occasionally defeat a version of The Night Haunter that does not have loot.
Ashran
- Kor’lok should no longer knock players out of Ashran with his ability, MASSIVE Kick!
Quests
General
- Fixed an issue affecting quests that required the player to target something with a quest item or ability not correctly providing credit towards completing the quest.
Tanaan Jungle
- Fixed an issue where Demonslayer of Tanaan, The Battle for the West, and Unseen Influence was not displaying correctly on the map.
Raids and Dungeons
Timewalking
- Group leaders are now able to re-queue if someone leaves a Timewalking dungeon group.
Hellfire Citadel
Hellfire High Council
- Blademaster Jubei’thos should no longer incorrectly reset the number of battle resurrections available to the raid group when he uses his Windwalk ability.
Iron Reaver
- Fixed an issue that could cause the Iron Reaver to animate incorrectly and face the wrong way when using the Blitz ability.
- Fixed an issue where Iron Reaver’s Blitz ability could cause players to be stuck when attempting to use a flight path after the encounter.
Gorefiend
- Gorebound Spirits should no longer summon players out of the world and teleport to them instead.
- Players in the stomach phase in the Gorefiend encounter should now always be able to see the circle denoting where the exit is.
Socrethar the Eternal
- Sargerei Shadowcaller’s Shadow Word: Agony can no longer be copied by Dark Simulacrum.
Fel Lord Zakuun
- Wake of Destruction should no longer incorrectly deal more damage than intended if multiple players are standing on top of each other when it explodes.
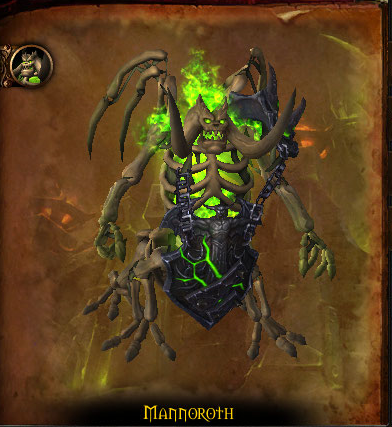
Mannoroth
- Fixed an issue where Mannoroth can go into evade mode if his primary target is knocked into a Fel Spire.
Archimonde
- [Hotfix in testing] Archimonde will now heal for 5% of his maximum health if Nether Banish hits less than 3 players.
- Archimonde’s Nether Banish should now be able to target players under the effects of Wrought Chaos, Focused Chaos, or Shackled Torment in Phase 3.
- Archimonde no longer casts Demonic feedback before Nether Banished had faded in Phase 3.
- Shadowed Netherwalkers should now attack players when they enter the Twisting Nether, regardless of where they are on the platform.
PvP
Ashran
- Fixed an issue where players may incorrectly receive a Silver Strongbox for the previous Warlords PvP Season.
- Slightly increased the delay between events.
- Champion’s Honor can no longer be used before the start of the relevant Warlords PvP Season.
Items
- Defending Champion should now be correctly increasing maximum health by 10% instead of only by 10 health.
- Figurine of the Colossus should now be correctly flagged for Timewalking.
- Gemcutter Module: Critical Strike can now drop for multiple Jewelcrafters at the same time upon defeating Shadow-Lord Iskar in Hellfire Citadel.
- Wild Gladiator’s Greatcloak and Wild Gladiator’s Tabard should no longer be available for sale.
Collections
Toy Box
- Vial of Red Goo should now correctly prevent players from performing actions while they’re transformed.
Bug Fixes
- Players on a mount using the flight master at Vol’mar or Lion’s Watch to fly to the Throne of Kil’jaeden should now be correctly dismounted.
- Fixed an issue where Rogue Tier-18 Normal armor set was incorrectly using the appearance of the Mythic armor set.
- Fixed an issue where Draenor Siege Engines and Demolishers did not have a cooldown on their first ability.
- Fixed an issue where player combat pets were not being automatically resummoned after leaving a vehicle.
- Fixed an issue where abilities that trigger when a target leaves an area like Binding Shot or Ursol’s Vortex were incorrectly still triggering its effects after the ability has expired.
- Fixed an issue where players were able to retain the Well-Rested buff from Leatherworking Tents while in a Raid instance.