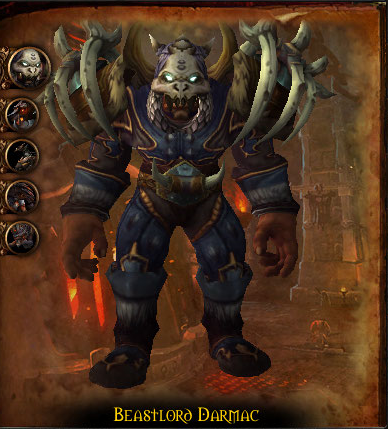

This is a multi-phase encounter and you have control over the order in which the phases occur. The beastlord starts out with a basic set of abilities and at certain percentages he will mount the closest beast, permanently gaining additional abilities from them. He mounts beasts at 85%, 65% and 45%. When he’s mounted you can only attack the beast. The recommended order for mounting the beasts is Cruelfang – Ironcrusher – Dreadwing.
He has two basic attacks, of which first is Pin Down. With this he will throw a spear, dealing aoe damage to anyone within 25 yards and pinning down players within 3 yards. To get the players out you will have to kill to the spear. The area they will land on is marked, and as such players should move out. If they don’t hit anyone they can still be killed. Due to later abilities, you should still dot these up if they don’t hit anyone.
His other basic ability is Call the Pack, he will summon adds called Pack Beasts, which need to be tanked and killed. These spawn at a specific gate as you can see in this video, and thus you should always have Darmac being tanked there to have no issues in picking up the adds for tanking. Your dps can just AoE them down.
Once again, he will mount the closest beast when he reaches certain health percentages. And as such he should automatically mount Cruelfang at 85% if you’re standing near the spawn place of the pack beasts.
When you activate Cruelfang the new ability the beastlord will get is called Rend and Tear. For rend and tear ranged players should be spread out 7 yards apart and no one should be standing within 7 yards of the tank tanking the boss. The boss will leap to a random player, giving them a 30 second bleed dot and then leaping to the tank, giving the same debuff. He will also increase their damage taken by rend and tear by 10%, requiring a tankswitch.
The second ability you will have to deal with, which he does not keep when Cruelfang dies, is Savage Howl. This does damage to players near the boss and giving the boss and any adds an enrage effect. This can be dispelled.
Once Cruelfang is dead and the beastlord reaches 65% you will want him to mount Ironcrusher. To be sure this happens move Darmac closer to the clefthoof so that he does not mount the Rylak. This is the only mount you’ll have to move him actively and away from the Pack Beast gate.
When you activate Ironcrusher the new ability the beastlord will get is called Tantrum. This is a very simple aoe to the entire raid. Naturally this will require healing, and you will want to consider using your healing cooldowns here.
The next ability which he does not keep is called Crush Armor, this is a stacking debuff reducing the tank’s armor by 10% per stack. However because you’re already tank swapping on Rend and Tear, you don’t have to worry about this when it comes to swapping.
The final ability is called Stampede. He will charge to a random ranged player and deal damage to anyone getting hit by him. So naturally you just move away.
When Darmac reaches 45% he will mount the final beast, Dreadwing. He will gain three abilities, of which the first he keeps permanently.
The first ability is Inferno breath, Dreadwing will point to a random direction and breath a cone of fire. This will also give you a dot so be sure to move out of it. The longer you stand in it the more damage the dot does. So use your movement speed increases if you have to. This can be dispelled if needed.
The second ability is called Searing Fangs, dealing damage and giving a stacking debuff increasing fire damage taken by 20% per stack. Once again because of Rend and Tear the tanks are already performing tankswaps and as such, this should not require extra swapping.
The final ability is Conflagration, which is a dot, causing the player to run around and it will spread to anyone within 8 yards of that player. This means that it has to be dispelled asap so that no other players get it and lose control of their character.
When dreadwing dies, inferno breath turns into Superheater Shrapnel, which now also leaves fire zones on the floor.
Other than the other beasts, when dreadwing dies, the beastmaster gets additional effects to his abilities. The pack beasts deal aoe fire damage due to Flame Infusion. And the Heavy Spears will use Seeking embers, dealing fire damage to random players. This is why you’ll want to multi dot any spears that do not impale players.
To get through this last phase as quickly as possible you’ll want to use Heroism when Dreadwing dies.
And that’s all you need to know for this encounter. It’s an easy fight and as such you shouldn’t have much trouble with it, whether it’s on normal or heroic depending on your group. But nevertheless good luck!
If you liked this raiding guide, please comment, subscribe and click the like button! If you would like to keep up with when new videos come out but you don’t have a youtube account you can follow us on twitter or facebook, at twitter.com/bbmezzy or facebook.com/wowweekly. Also be sure to check out our website wowweekly.net where you can find written content as well. For now I’m Mezzy and I’ll see you again next time.
