The Q&A is being moved to Saturday, June 13, at 2:00 PM Pacific time (5:00 PM Eastern, 11:00 PM Central Europe), and I’ve updated the original post with the new schedule. The window of time to submit questions will be extended as well.Look forward to seeing you then!
This Saturday, I’ll be joining World of Warcraft Lead Game Designer Ion Hazzikostas to answer your questions live on Twitch.TV! With Patch 6.2 rapidly approaching, we wanted to take the opportunity to not only answer any questions the community has regarding the new content and features in the patch, but also take a look back at the challenges we’ve faced (and the lessons we’ve learned) when developing the Warlords of Draenor expansion and Patch 6.1.
When: Saturday, June 13, 2:00 PM to 3:00 PM Pacific time (see this handy tool to find when that is in your local time!)
Where: The World of Warcraft channel on Twitch.TV/WoW
There are two ways to submit questions. If you’re using Twitter, simply tweet your question using the hashtag #WarlordsQA. You can also ask it as a reply to this forum thread; however, as we’d like to get to as many questions as possible, we will only consider questions using 40 words or less. Make them count! In order to be considered, your question must be submitted before 12:01 AM Pacific time on Saturday, June 13.
Since the last time we looked at Timewalker dungeons, the health of the mobs has been increased but the damage they do still seems low. The timewalker dungeons are now inactive, but once they open for testing we’ll check them out again to see if the difficulty has been tuned more.
What are Timewalker dungeons?
One of the features coming in patch 6.2 is the Timewalker event. It’s one of 7 possible weekend events. One is for The Burning Crusade, and one is for Wrath of the Lich King. During the event there is a quest you can do to get 1 extra raid loot bonus roll coin that does not count towards the 3 per week cap. To get this you will have to do 5 random Timewalker dungeons. You can pick up this quest in your garrison.
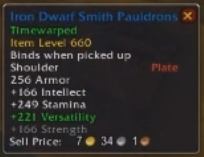
Other than the quest the bosses also drop timewalker items that look like their original TBC/WotLK counterparts. These have the “timewarped” tag. At level 100 these have an item level of 660. If you do the timewalker dungeons as a level 90, these will have a 463 item level. You’ll be able to do timewalker dungeons if your level is atleast as high as the original dungeon’s requirement. This means level 70 for TBC timewalking and level 80 for WotLK timewalking. The item level of the loot will adjust to your level when it drops.
Welcome to the WoW Weekly Design Corner! In this editorial series I (Mezzy) look at different parts of WoW and see how I would design the next new thing, or perhaps improve upon it. The following designs and mock content are NOT official, they are my own ideas. As great as it would be for it to be, it will never actually be ingame content.
It’s been a while since the last Design Corner article, but I have finally had the time to flesh out one of the bigger ideas I have had. In the next 3 articles I’ll be designing my very own raid instance, including lore and art (boss art done Drakopoulos Designs).
Keep in mind that this is NOT actual content planned by blizzard, even though I would very much like it to be. It’s no secret that I would one day like to be designing games myself (perhaps at Blizzard? 😉 ), and I hope you’ll enjoy this what if scenario! So without any further adieu, welcome to WoW Weekly Design Corner: Time-Lost Halls of Karazhan!
There are a lot of different elements to the general instance and the first raid wing on it’s own, so to not make this a kilometer long article, the design has been put into different tabs: Lore of the zone, ingame narrative and of course each of the 3 bosses in the first wing!
Zone Lore
Due to the shenanigans (yes that’s right, shenanigans) of Kairoz, the Time-Lost Glade has become quite unstable. Strange spirits have been reported around the Glade and have started invading multiple zones within Draenor. In a time when the Horde and Alliance are taking out threats in an alternate world, the cause of their passage to the savage lands themselves is now threatening to overwhelm Draenor. It is up to the Alliance and Horde to right the wrongs of Kairoz and investigate the new portal that has opened up.
Patch x.x will open up the portal to the Time-Lost Halls of Karazhan. As Prince Malchezaar forewarned, all realities, all dimensions were open to him. Could his possession of Gorehowl back during The Burning Crusade have already foreshadowed that he knew of this alternate Draenor we would be visiting? Could the gorehowl he had, be from Garrosh himself? What reality will be awaiting the brave, foolish souls that step into the portal?
Ingame Narrative
Before heading into the raid instance, players will learn about what is going on through a quest chain. The spirits wrecking havoc on Draenor are those that escaped the TLHoK, as a throwback to the original Karazhan they will have the same simple model. They learn that the portal that has opened up goes to an alternate Karazhan which has been distorted and corrupted by the disturbed timeways. Not only is it an entirely different version of Karazhan, where even the structure is different, it’s inhabitants of the past, present and future that are/were/will be dead might not be dead anymore/yet.
Khadgar himself, who wields Atiesh, feels a strong sense of urgency to clean up whatever is lurking in the TLHoK to prevent it causing any more chaos in this already troubled world. So Commander, it is up to you to help out this possible new guardian and find out what has been causing all this trouble.
These circumstances would also allow for a great way to introduce in-world invasions (like the rifts from Rift)
The Raid Instance
The Time-Lost Halls of Karazhan will consist of 3 wings.
The Courtyard (3 bosses)
The Time-Lost Halls (3 bosses)
The Tower of Karazhan (Final boss)
Originally the instance was going to consist of 5 wings and 15 bosses. But due to the size of the project it had to be cut down to 7. While now the courtyard leads straight into the time-lost halls, originally the courtyard would lead into the basement, revealing that the courtyard was magically set up to look like it was outside, but was in fact inside.
We were also going to have custom art for each of the raid bosses, but due to real life circumstances, only 1 raid boss was done before the artist had other obligations to tend to. To balance this I have made custom dungeon journal entries for each of the bosses.
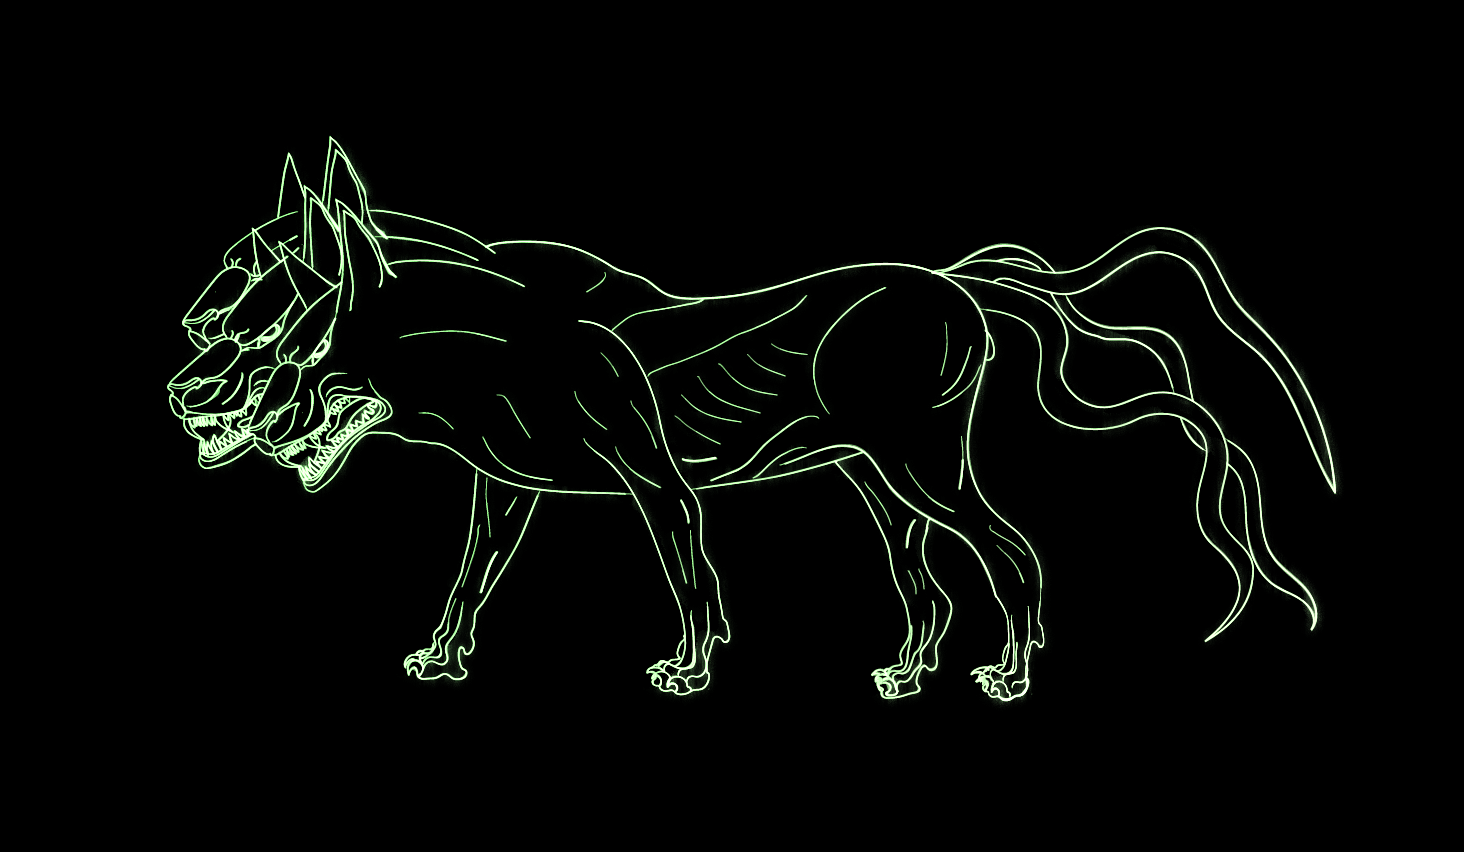
Celeus, the Ethereal Hound
Celeus, the Ethereal Hound
Celeus is a 3 headed guard dog who has eaten 3 fel infused beats from draenor. These unlucky beasts went through the portal and were greeted by Celeus. Due to them being fel infused, it had some side effects on Celeus and players will have to face each of them when battling Celeus.
Encounter description and development notes:
Boss has eaten the 3 beasts and takes on their powers in a rotation of 45 seconds per animal and uses their abilities
Khadgar emote: “Fel energies? Here? Is Gul’dan lurking around?”
Aspect of the Elekk
Enrages after 30 seconds to run around in a mad stampede for 15 seconds, becoming untankable
Shout of Anguish – Frontal cone dealing x amount of fel damage and increasing damage taken by next shout of anguish by 200% (stacks)
Aspect of the Wolf
Ravaged Armor Debuff, increases damage taken by 15% per stack
Howl of the cursed den mother – summons fel wolf cubs
Fel wolf cub: Have aggro table, deal x amount of auto attack damage
Tear Weapon – steal the weapon from your target, disarming them for 5 seconds
Aspect of the Clefthoof
Fel Infused Stomp, damaged the entire raid for X damage per second for 5 seconds
Infected bite – deals 300k damage, damage is reduced in half if active mitigation is used
Encounter Design Goals:
Introduce tank swapping (debuffs)
Introduce adds that dps have to switch to, and tanks picking them up
Introduce raid healing with coordinating CDs
Introduce dodging things like charges
Introduce using active mitigation
I originally designed this encounter before Blackrock Foundry had even released and I had no knowledge of the Beastlord encounter. Because of this there are similarities, but as all abilities will continue to persist in a cycle I felt it was different enough. Also it feels like a good encounter to be the first one in an instance. So that even those without raid experience can get their first taste of dealing with different elements in raiding.
This encounter is missing mythic changes. The mythic change would likely be that instead of 1 of the 3 aspects active at a time, the raid would have to deal with 2 at the same time.
Ethereal Demons
Ethereal Demons
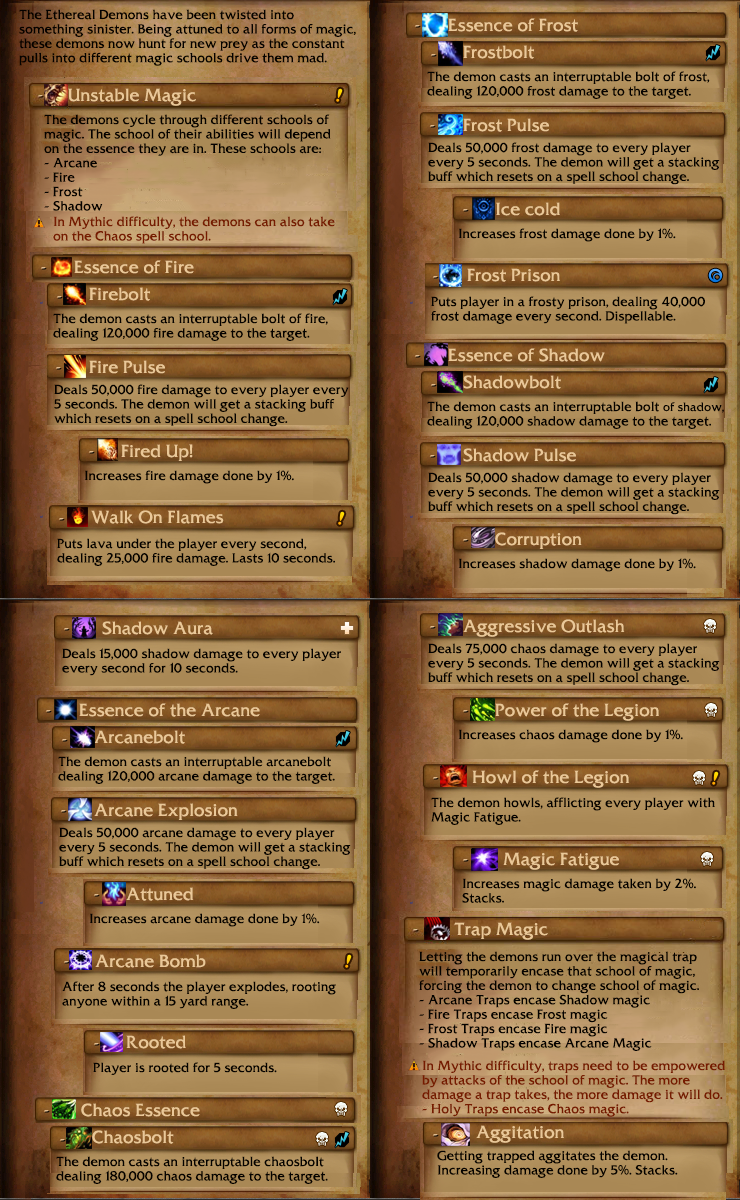
As you’ll notice the instance has a heavy magic theme and you’ll see it in these 2 Ethereal Demons right away. They have been twisted by their master and are now attuned to all forms of magic. To not be overwhelmed by one school of magic, players will have to use traps that spawn to temporarily encase that school of magic.
On mythic difficulty the players will have to empower the traps to not only encase the demonic magic, but harm the demon as well in the process.
Which demon model they would use is uncertain, however they will be ethereal like the spirit beasts. As their magic school changes, so will the color of the demon.
Encounter description and development notes:
The demons deal auto attack damage in their school.
Each 5 seconds they will pulse an aoe with damage of that school, and each time the damage increases
The raid triggers a change in school by letting the hounds walk over a trap infused with the school of magic opposite to the hound’s magic
If fire, trap in frost
If Frost, trap in fire
If Shadow, trap in arcane
If Arcane, Trap in Shadow
If Fel, trap in Holy (Mythic only)
When they get trapped they get a stacking buff increasing their damage done by 5%
When a trap gets used it’ll take 45 seconds before the next one spawns.
Mythic Only: The traps have to be empowered by attacks of the school of magic. The more damage the trap has taken (for example from shadow damage), the more damage it will do to the hound.
Other than their pulsing AoE they will cast a bolt spell of the school they’re in which can be interrupted.
One more special ability/debuff depending on the school of magic:
Fire: Lasts 10 seconds, puts fire under the player every second
Frost: Puts the player in a frost prison that has to be dispelled
Shadow: Entire raid takes extra ticks of damage for 10 seconds
Arcane: After 8 seconds the player explodes, rooting anyone within a 15 yard range for 5 seconds.
Fel: Stacking nondispellable debuff that increase magic damage taken by 2%.
Encounter Design Goals:
Introduce interacting with the environment (traps)
Introduce Moving debuffs out of the raid
Introduce soft enrage mechanics
Make players choose when the damage is getting too high and should be reset
Read left to right, top to bottom
With Agitation (spelling mistake in the journal entry) being in play, there will be a soft enrage active to make certain that eventually players will either overcome or fall to the demons.
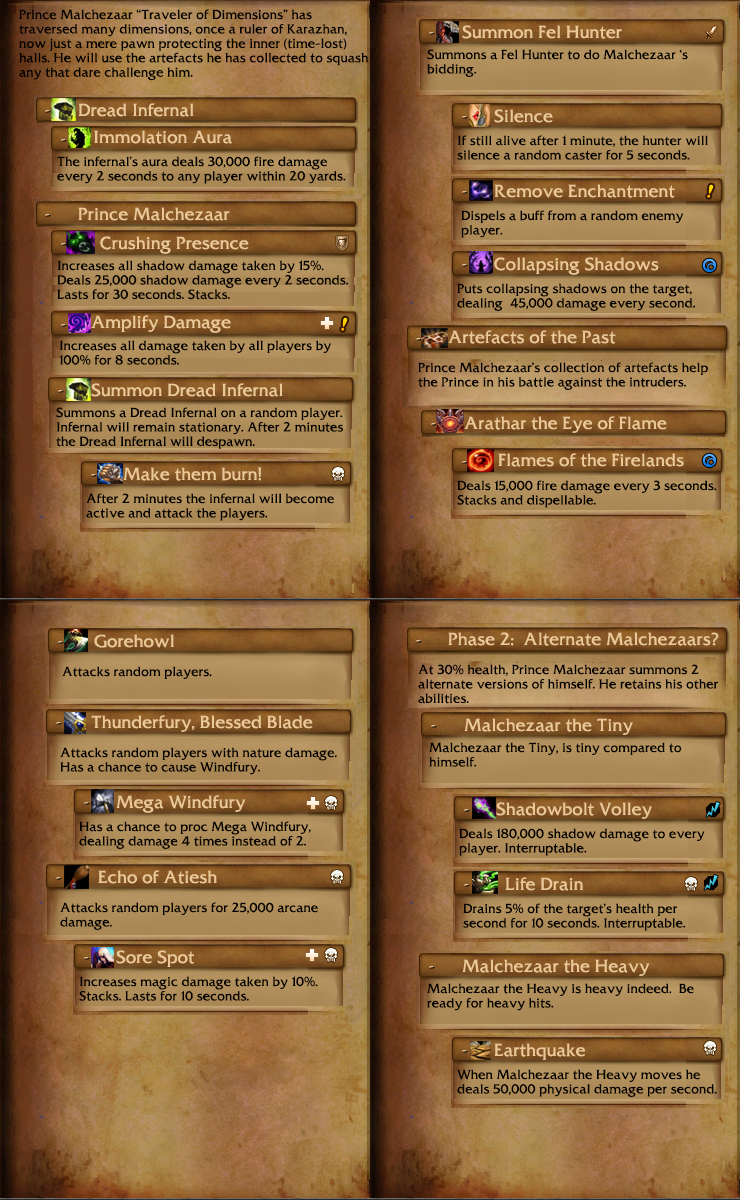
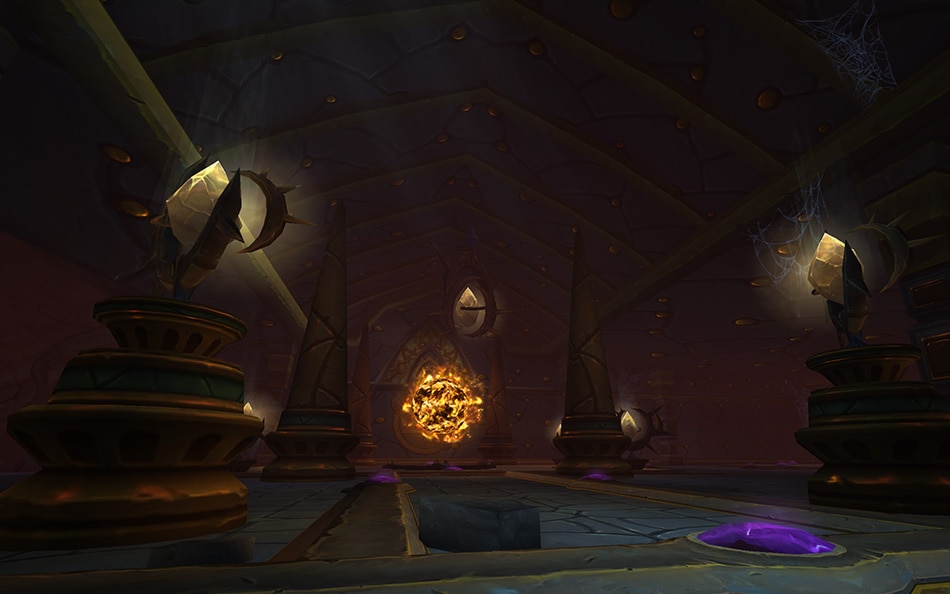
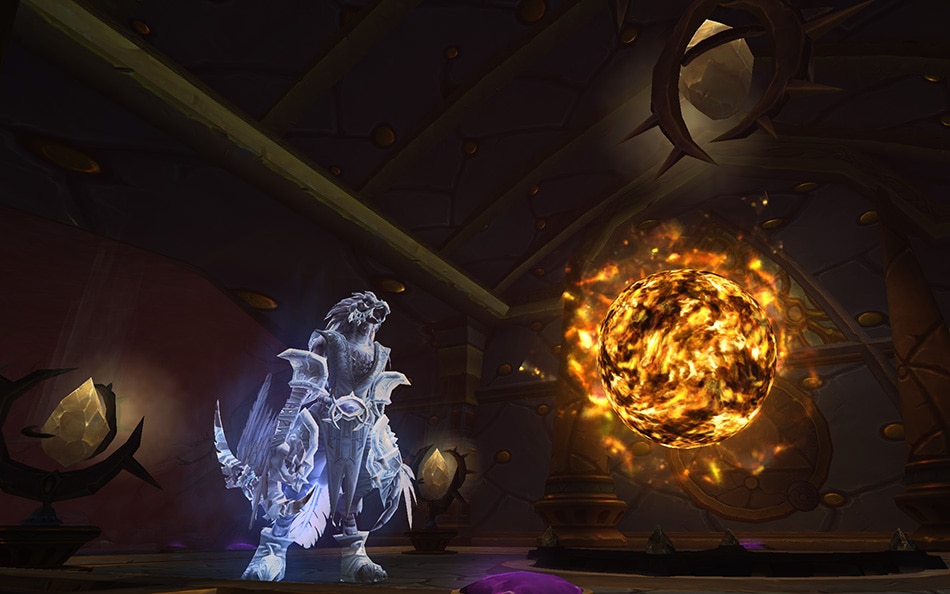
Prince Malchezaar, Traveler of Dimensions
Prince Malchezaar, Traveler of Dimensions
Malchezaar is back and this time he has a little more up his sleeve instead of 2 random axes. He’s been collecting artifacts in different dimensions and isn’t afraid to show it. The encounter has both old and new elements to it and it should make for an interesting fight.
Encounter description and development notes:
The fight starts with 2 infernals blocking the door, flames will then surround the raid to determine the encounter environment
After the infernals die a demon gate opens up and Prince Malchezaar steps through
Emote: “What are you doing in this dimension?!”
Instead of his old axes that attack random people, artifact weapons he’s collected and players have encountered over the years:
Gorehowl
Physical auto attack damage
Arathar the Eye of Flame
Fire auto attack damage
leaves a stacking dot, dispellable
Thunderfury
Nature auto attack damage
Can proc windfury
Mythic: Can proc “super windfury”
(Echo of) Atiesh
Arcane bolts “auto attack damage”
Mythic: Increases magic damage taken by 10% per stack when hit by arcane bolt
Stacking debuff on the tank: Increases all shadow damage taken by 15%. Deals 25,000 shadow damage every 2 seconds. Lasts for 30 seconds.
Amplify Damage returns, debuff on all players increasing all damage taken by 100% for 8 seconds.
Of course the infernals will be dropping from the sky again
These will drop on players specifically, making players run around as a group. Disappears after 2 minutes.
Mythic: After 2 minutes these become active adds, pulse aoe damage within a 20 yard range and have an aggro table
but also summons felhunters as adds
that can silence (done after 1 minute on a random caster/healer if still not dead),
dispel buffs and
leave a shadow dot on players.
Emote on summon: “I see you defeated my ethereal hound, there’s more where that came from!”
At 30% 2 alternate versions of malchezaar join the fight
Emote “All realities, all dimensions are open to me!”
A small one, as big as a human
Casts shadowbolt volley, interruptible
Mythic: Life drain for 5% of health per second for 10 seconds, converts into +1% health / second for add
One half his size that’s quite fat
Heavy melee hitter
Mythic: Moving him will cause an earthquake dealing aoe damage
All other mechanics still apply
Encounter Design Goals:
Introduce players to a changing layout
Let players continue practicing other things such as interrupting, add switching and dispelling
Let players prioritize targets and feel the consequences of not doing so
Read left to right, top to bottom
On mythic it should get really interesting as players will not only have to deal with the aura from infernals that become active after 2 minutes, but they will not want to move Malchezaar the Heavy around too much.
Concluding Remarks
No testing can, of course, be done for each of the encounters so damage and timer numbers are technically placeholders. As such they are not properly tuned, but do give an idea how ability damage compares to other abilities.
The next wing is still in early development, I’m hoping to be able to release it within a month but we shall have to see! In the meantime I am very curious as to what you think of the zone and encounter ideas. Do they seem appealing? Are there too many abilities or too few? Are there any adjustments you’d make to what you’ve seen so far.
The podcast is back this week and in it we talked about everything major within WoW that’s happened within the last month. The main topics are the subscriber drops, no flying in the forseeable future and the content coming in patch 6.2 and our experiences on the PTR so far.
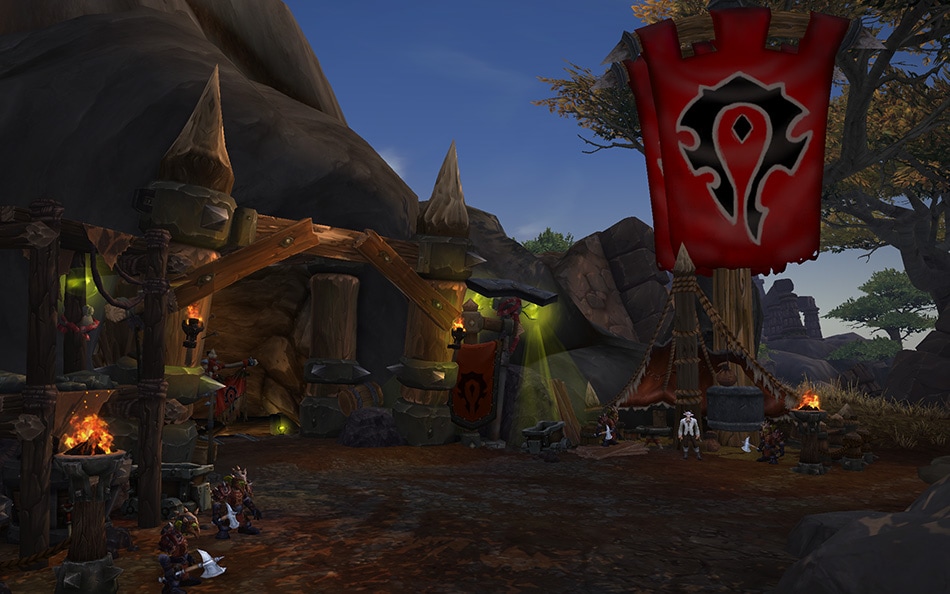
In Patch 6.2, Warlords of Draenor’s PvP zone Ashran is getting some new quests and an eerie new area to explore. Here’s a rundown of what you’ll encounter on the glorious battlefield between Warspear and Stormshield.
Warning: Here be spoilers!
New Quests
Faction bosses and events will no longer reward Conquest points after Patch 6.2, but will continue to reward Honor points and strongboxes. To fill your pockets with lots of Conquest points going forward, you’ll want to pick up and complete these new quests:
Slay Them All! – A weekly quest to rack up 200 honor kills for a reward of 200 Conquest points.
Ashran Dominance – Rewards 500 Conquest points when you kill the enemy faction boss and win five events—also weekly.
Continue the Domination – A repeatable quest that unlocks after Ashran Dominance is completed. Rewards 500 Conquest points when you kill the enemy faction boss and win five events.
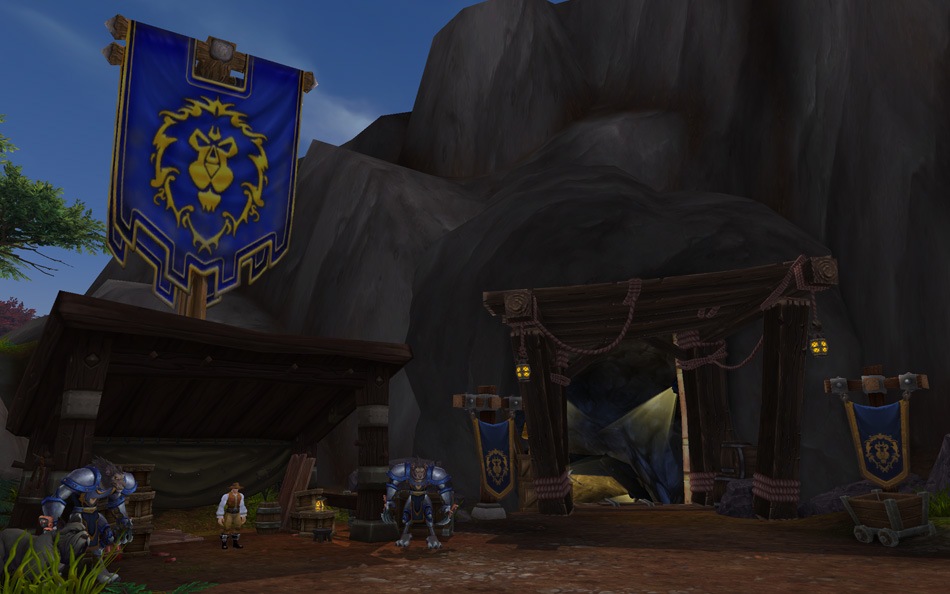
This is new. What could be going on in here?
Meanwhile, Belloc Brightblade and Harrison Jones have followed the siren-like call of a new artifact being unearthed in Ashran. They each offer a quest leading you to fight your way into a new section of the zone. . . .
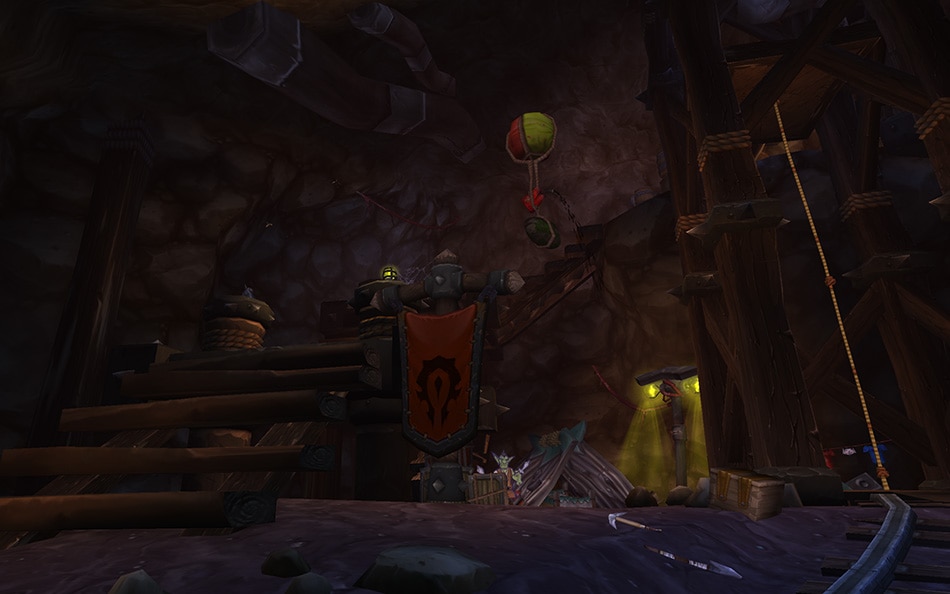
A New Area
The Ashran Excavation has been revealed, and its unearthly inhabitants are none too pleased about the presence of you and other visitors.
Once you enter the Ashran Excavation, you’ll find yourself inside a very large underground area. Similar to other parts of Ashran, a competitive event is randomly triggered in the area. When the event begins, your goal is to collect Apexis Marks of Redemption by taking down the Arakkoa ghosts that haunt the depths.
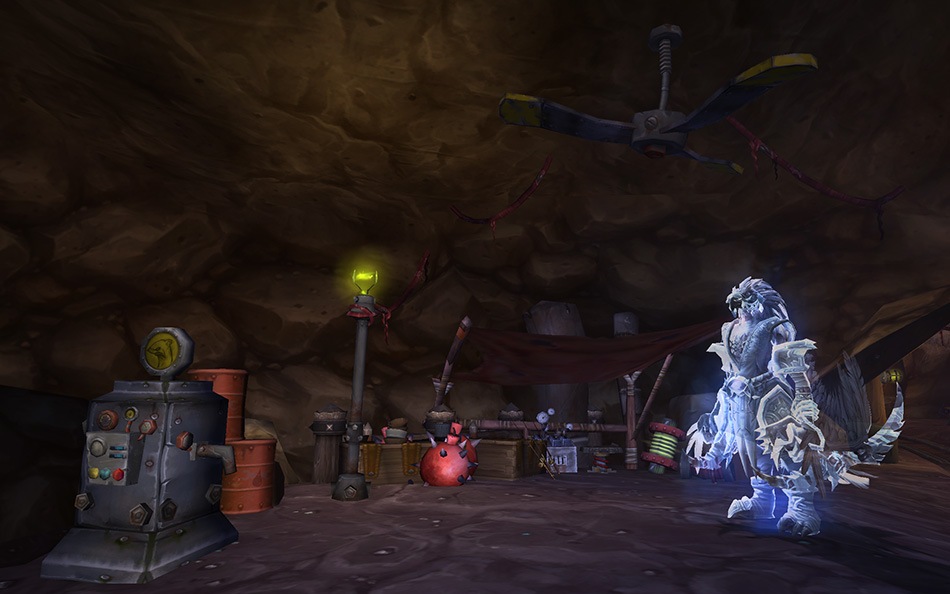
Later on, you can tell all the ghost stories you want.
Somewhere in this underground labyrinth, you’ll find a ghost named Rukmaz—one of the few entities here who doesn’t want to kill you on sight. He’s a collector of Marks of Redemption, and he’s waiting to award victory over the Ashran Excavation to whichever faction turns in 50 Marks first.
Rukmaz doesn’t like being called “the friendly ghost”.
There’s a lot going on in Ashran, and if you haven’t fully explored Draenor’s sprawling PvP zone yet, you might want to check out Wowhead’s Ashran Reputations Guide and their Comprehensive Ashran Guide by HelloKitty. Enemy players are in there right now, just waiting for you to kill them.
This Saturday, I’ll be joining World of Warcraft Lead Game Designer Ion Hazzikostas to answer your questions live on Twitch.TV! With Patch 6.2 rapidly approaching, we wanted to take the opportunity to not only answer any questions the community has regarding the new content and features in the patch, but also take a look back at the challenges we’ve faced (and the lessons we’ve learned) when developing the Warlords of Draenor expansion and Patch 6.1.
When: Saturday, June 6, 3:00 PM to 4:00 PM Pacific time (Sunday, June 7, 12:00 AM to 1:00 AM CEST). See this handy tool to find when that is in your local time! Where: The World of Warcraft channel on Twitch.TV/WoW
There are two ways to submit questions. If you’re using Twitter, simply tweet your question using the hashtag #WarlordsQA. You can also ask it as a reply to this forum thread; however, as we’d like to get to as many questions as possible, we will only consider questions using 40 words or less. Make them count! In order to be considered, your question must be submitted before 12:01 AM Pacific time on Saturday, June 6.
On Saturday, June 6th, at 2:00 PM Pacific time, I’ll be sitting down with Lead Game Designer Ion “Watcher” Hazzikostas to answer your questions about Warlords of Draenor — including the upcoming 6.2 Content Patch, as well as lessons we’ve learned throughout Warlords of Draenor’s development.
We’ll be sharing more information, including how to submit your questions, in a full announcement on Monday, but wanted to give the community as much advance notice as possible regarding the date and time of this upcoming Q&A. We’ll see you there!
We went onto the PTR again on Tuesday night (which we livestreamed) to check out the Mythic dungeons. Currently on the PTR your item level gets reduced to an average of 660, to test the difficulty of the mythic dungeons. We found that beside a few abilities that could nearly 1 shot (which need to be interrupted), the dungeons were not that hard on mythic difficulty.
What are Mythic dungeons?
One of the features coming in patch 6.2 is the Mythic dungeon difficulty. Each of the 8 Warlords of Draenor dungeons will have this difficulty. On this difficulty the bosses will drop ilvl 685 gear and they have a chance to upgrade to ilvl 700 gear. Mythic dungeons have a weekly loot lockout. This means that you can do the mythic dungeons as many times as you want, but you’ll only be eligible for loot on your first kills within the mythic dungeons every week.
There is also a weekend event to go along with this difficulty. During the Draenor dungeon weekend event you’ll be able to pick up a quest that will reward you with a heroic Hellfire Citadel cache. It will require you to do 4 mythic dungeons.
Mythic dungeons will work a lot like Challenge Modes when it comes to starting the dungeons. You will have to get together your own group as there is no random mythic dungeon queue. You can of course use the LFG tool to find a team though, as the mythic dungeons are cross realm enabled. Once you have your group together you will need to physically walk to the entrance of the dungeon and zone in. Don’t forget to put dungeon difficulty on mythic before you do so!
Welcome to Mezzy Talks! The editorial where I take a look at something within World of Warcraft culture, game design (which has been moved to the design corner) or anything else WoW related.
“We’ve reached a point in 6.2 testing where going forward, builds deployed to PTR are going to be flagged as “release” versions.”
This makes an end of June / start of July release a lot more likely.
Original Article:
Recently the first bit of patch 6.2 hit the background downloader causing a lot of speculation as to when the patch will be released. As it’s a quiet Sunday night, I thought it would be good to tackle the subject of the release of patch 6.2.
Since the background download has started there have been 2 camps of speculation. The first one being that the patch will already be released within the next week or two. You’ll mostly find these players in-game in the trade channel, whenever the background downloader gets mentioned.
The second camp is one you’ll more likely come across in the online community and social media. You’ll more likely hear from this camp that it’ll take 1 month – 4 weeks for patch 6.2 to be released. Let’s take a look at each of the speculations and then I’ll do some speculating of my own.
Speculation of 1 week
When it comes to addressing this particular time frame we can be done pretty quickly about it. Before a major patch is released there is always at least 1 release candidate pushed to the PTR, if not more than 1 candidate. We’re currently getting 1 new PTR build a week and the content itself isn’t done yet (which we’ll go into more deeply shortly). There is no way in the emerald nightmare that we’ll see 6.2 release in 1 or even 2 weeks.
Speculation of 1 month
Another factor – timewalker (and raid) tuning
One month – 4 weeks would seem more reasonable, but at the current state of things it would mean just a meager 4 more PTR builds. They could (and likely will) increase the amount of new builds they do per week, but there’s still a lot that has to be done to make the 6.2 patch complete.
The shipyard can’t be upgraded to even level 2 yet, the quest(s) to get more than 2 ship blueprints still do not work properly (beyond having used a bug in previous builds to obtain the submarine), the way shipyard missions work still don’t seem to be final (the mission requirement changes in the last build indicate that at the very least) and the new reputations for Tanaan Jungle Watcher recently talked about in an interview haven’t even made it onto the PTR yet. In fact, they’re still being fleshed out. They’re not even fully designed yet.
So while 1 month seems reasonable and puts 6.2 at a end of June release, I feel it’s unlikely with the amount of time and effort that undoubtedly still needs to go into 6.2. After all if there’s one thing we learned from the delayed release of WoD, it’s that game design takes time.
Neither
So if it’s not 1 week, 2 weeks or even 1 month, when can we expect the release of 6.2? Well given the pattern Blizzard has shown in the past, I feel there are 2 possibilities that take the “soon” comment from the recent interview into account.
The first possibility is mid July which would put the wait time at 6 to 7 weeks. The second possibility is mid August. Which would put it at another 10 to 11 weeks. So you might be wondering, why the gap? Well at the start of August Gamescom takes place from the 5th to 9th of August. Whenever these events occur, the week before and the week after nothing usually happens.
Speculating the release of a new patch is a very inexact science. No one actually knows how far 6.2 is in the development process outside of Blizzard themselves. So while we as a community enjoy the guessing, in the end we’ll just have to wait for the official announcement. 1 month is possible but unlikely, let’s just hope it isn’t actually another 2,5 months!