
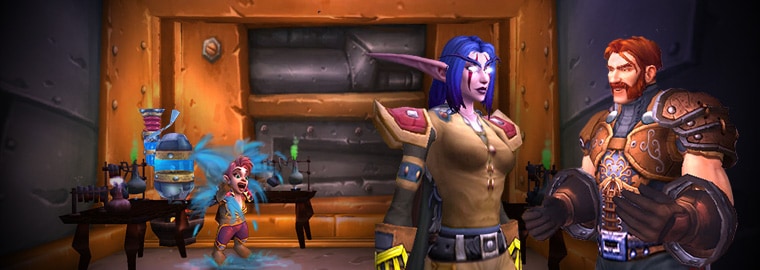
One of the events that we have come came across in Tanaan Jungle is the Blood Moon event. It has been slightly bugged in past PTR builds, and even now the event icon will not go away even when the event is not active. Obviously bugs are part of the PTR, but it was good to see it finally working. As such we’ve got a preview video of how the event will work and what the reward is when you complete it!
Polygon recently interviewed lead designer Ion Hazzikostas about 6.2 and the future of WoW. You can read the full interview here. Below is a summary of the new bits of news:
- They will add a couple of reputations for players to earn from multiple factions in Tanaan Jungle.
- You can gain these by defending certain areas that come under attack or by hunting rare creatures.
- Awards will include cosmetic upgrades, some player power items and some convenience items.
- There will be no flying in Draenor. And there might not be in future expansions.
- “The world feels larger, feels more dangerous. There’s more room for exploration, for secrets, for discovery and overall immersion in the world. At this point, we feel that outdoor gameplay in World of Warcraft is ultimately better without flying. We’re not going to be reintroducing the ability to fly in Draenor, and that’s kind of where we’re at going forward.”
- There might be flight options in specific expansion ideas or zones that would benefit from it
- Patch 6.2 will not be the last content patch of Warlords of Draenor.
- “We’ve got plenty of more story to be told after this”
- Patch 6.2 will be released “soon”.
The Timewalker dungeons are active on the PTR again, this time they’re The Burning Crusade dungeons! We took a look at two of them today. These seem a lot easier than the Wrath of the Lich King versions. Other than a few trash mobs that really could hurt, it was a walk in the park. So there is likely still some balancing to be done, after all it is the PTR!
On the last preview article the question was asked if legendaries can be used in these dungeons. They can! Both Tokk and Mezzy used their Thoridal bows during the first run.
What are Timewalker dungeons?
One of the features coming in patch 6.2 is the Timewalker event. It’s one of 7 possible weekend events. One is for The Burning Crusade, and one is for Wrath of the Lich King. During the event there is a quest you can do to get 1 extra raid loot bonus roll coin that does not count towards the 3 per week cap. To get this you will have to do 5 random Timewalker dungeons. You can pick up this quest in your garrison.
Other than the quest the bosses also drop timewalker items that look like their original TBC/WotLK counterparts. These have the “timewarped” tag. At level 100 these have an item level of 660. If you do the timewalker dungeons as a level 90, these will have a 463 item level. You’ll be able to do timewalker dungeons if your level is atleast as high as the original dungeon’s requirement. This means level 70 for TBC timewalking and level 80 for WotLK timewalking. The item level of the loot will adjust to your level when it drops.
Quote from: Blizzard
In World of Warcraft Patch 6.2, we’re making some changes to our Raid itemization with the goal of improving the Personal Loot experience, creating more interesting distinctions among items, and providing rewards that more closely reflect the challenge players face to earn them.
Personal Loot Improvements
The Personal Loot system offers several advantages to certain group types, but there are still several areas where we think we can make improvements. Our goals with Personal Loot going forward are threefold:
- Make Personal Loot more consistent and rewarding.
- Bring Personal Loot up to be competitive with Group Loot, so players who prefer Personal Loot receive rewards comparable to those you get from groups using Master Loot or Need/Greed.
- Celebrate rewarding Personal Loot within the group in a way that captures the excitement of receiving rewards in Group Loot.
First, rather than treating loot chances independently for each player—sometimes yielding only one or even zero items for a group—we’ll use a system similar to Group Loot to determine how many items a boss will award based on eligible group size. As a result, groups will receive a much more predictable number of drops when they defeat a boss. In addition, set items will reliably drop in Personal Loot, just like they do in Group Loot today. The end result is that groups using Personal Loot will acquire their 2- and 4-piece set bonuses at around the same time as groups using Group Loot acquire theirs.
We’re also increasing the overall rate of reward for Personal Loot, giving players more items overall to offset the fact that Personal Loot rewards can’t be distributed among group members. We know that finding that one awesome specific trinket to round out your gear set can be difficult with Personal Loot, and this should help increase your odds.
Finally, the most visible change is the new Personal Loot UI. Part of the fun of raiding is progressing and improving as a group, not just as an individual. The previous Personal Loot system celebrated your own rewards, but would bury what your groupmates received in the chat log. However, the moment when your friend finally wins that long sought-after sword can be just as important to you as that moment you won your boots—and we wanted the game to help you celebrate it, too. Now when you loot an item, everyone in your group will see what you won!
These Personal Loot improvements aren’t limited to Hellfire Citadel—we’re updating all of our Draenor dungeons, including Mythic dungeons, to use the same system.

Loot distribution underway here
Secondary Stats
In the early days of World of Warcraft, Raid bosses didn’t have that many items to drop—there were only 150 items in all of Molten Core, and more than half of those were set items. This small amount of total gear in a Raid meant there might only have been one or two items per slot in an entire tier that were appropriate for your class—and if you were a Hunter or a Shaman in a place like Molten Core, that meant your only option for a belt in the entire Raid zone was your class set piece. On top of that, if an item wasn’t class restricted, it was shared between many other specializations with wildly different ideas of which stats were good or bad. When very few items were available to fill any given slot, the desire to make sure they were useful for many specs led us to keep from straying too far from a 50/50 split on secondary stats.
…we’ve decided to shake things up with how secondary stats appear on Raid loot in this patch.
As the game has evolved, we’ve increased the number of items that bosses drop per kill, as well as the variety of items they drop. We’ve made secondary stats more competitive with one another, and we’ve reduced the frequency of oddball items that were only useful to a few classes. This made more items useful to more people, but eroded the distinction and sense of identity that items held in the past. Too rare became the situation where you knew for sure that this drop was your awesome piece of equipment, and that feeling of finding a truly special item came less often than we would have liked.
To help bolster that sense of excitement, we’ve decided to shake things up when it comes to how secondary stats appear on Raid loot in this patch. Inside Hellfire Citadel, you’ll see a wider range of high and low secondary stat values on items than you have in a long time. Alongside some tuning adjustments that should ensure your attuned stats are the right choice, this change should also make it easier for you to identify which items are good for you in a more interesting way than just “equip the highest Item Level.” Our goal is to help make Hellfire Citadel Raid items more distinct and meaningful to you, and we hope you’ll let us know how things feel once you start collecting your new gear.
Item Level Ramp
As this expansion has progressed, it’s become increasingly apparent that there is a mismatch between challenge and reward for guilds that delve deep into large Raid zones. When the Item Level for rewards across a given difficulty of a zone is flat, a caster staff from Heroic Imperator Mar’gok is largely equal in power to one from Heroic Tectus, despite Mar’gok being the far more challenging boss. We often see and hear about guilds killing a late-zone boss like Blast Furnace for the first time, only to disenchant most of the drops because everyone already has loot from earlier bosses in those slots. On top of that, many guilds move on to higher difficulties before they fully complete a difficulty, because Heroic Darmac loot is stronger than Normal Blackhand loot—and you can get it for much less effort.
To address this, we are structuring Hellfire Citadel so that the Item Level of the loot awarded by bosses increases as players proceed deeper into the zone, culminating in Archimonde—providing both the ultimate challenge and the ultimate reward.
… it feels good to get higher-level items as you progress through a zone.
We’re doing this for a few reasons. First, it feels good to get higher-level items as you progress through a zone. One of the more prominent pieces of feedback we got about Blackrock Foundry was that it felt unrewarding for challenging bosses like Iron Maidens to drop loot that was just as good as—or possibly worse than—Gruul’s.
This also breaks up where your best items are in a good way. The power of the items that you can get in a particular slot will differ based on how far through the zone you are. The best boots for you will likely be different if you are on Normal Gorefiend than they would be if you’re on Heroic Mannoroth, which would be different than if you’re on Mythic Iron Reaver, and so on.
We can’t overstate how much we appreciate your feedback on topics like this, especially when you’ve taken the time to join us on the Patch 6.2 PTR and experienced the changes for yourself. As always, everyone’s encouraged to join us and other testers in the 6.2 PTR Discussion forum as we prepare to unleash Hellfire.
Quote from: Blizzard
As we continue to explore new territory in Draenor, it should come as no surprise that new battle pets and new battle pet rewards will be found. Thus far, Draenor has contained a great deal of diversity for pet battlers, and Patch 6.2 will be no different. Let’s take a look at some of what’s in store for your collection.
Please note: Spoilers are ahead! If you want to discover the new battle pets and rewards for yourself, don’t read any further!
Tanaan Stop Action
First and foremost, Tanaan Jungle is where the action can be found on all fronts. You will find battle pets of all types dotting the landscape, four of which are new and just waiting to be caught for the first time:
- Bloodbeak
- Cerulean Moth
- Violet Firefly
- Fen Crab
Keep an eye out for the new quest “A Fel Puppy of My Own”, through which you can acquire the delightful new Fel Pup.
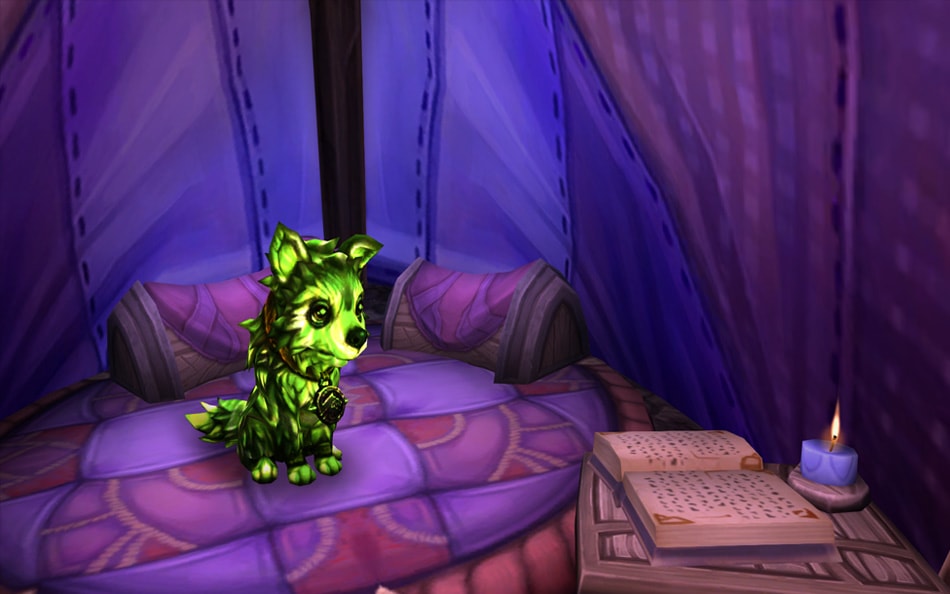
Just delightful.
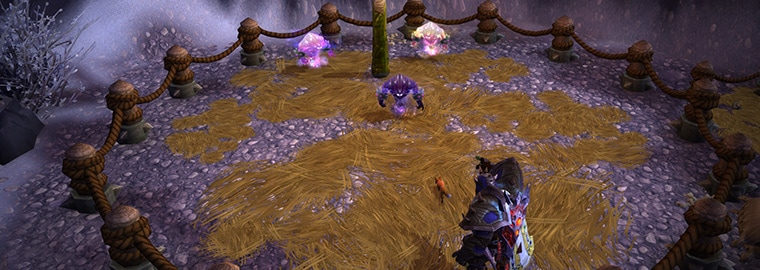
But the jungle doesn’t only provide garden-variety battle pets. If you look carefully, you’ll find that there are 15 fel-corrupted legendary pets scattered throughout Tanaan. Your Pet Battle Master in your garrison will have some new information for you to get started. You can only defeat any of these legendaries once per day, and when you do, you’ll receive a container of Fel-Touched Pet Supplies, which will include:
- Gold
- Pet Charms
- Pet Bandages
And has a small chance to include:
- A Fel-Touched Battle-Training Stone (single use, grants +5 pet levels)
- One of these rare pets:
- Periwinkle Calf
- Zangar Spore
- Seaborne Spore
- Nightmare Bell
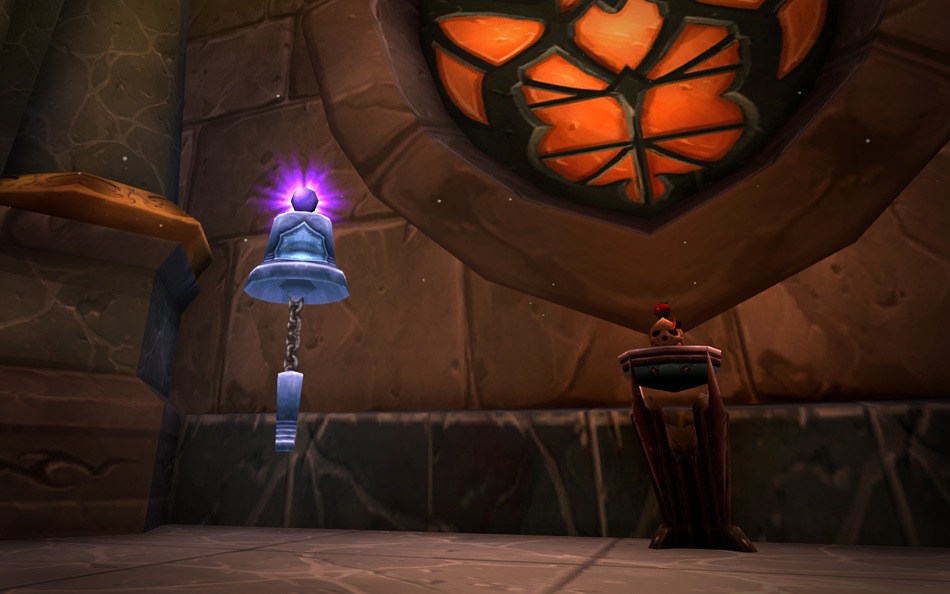
You can ring my Nightmare Bell. Ring my Bell.
We’ve also got a new achievement for you when you defeat all 15 legendary opponents in Tanaan Jungle.
You’re Too Charming
Patch 6.2 is going to introduce a new vendor to your level 3 Garrison Menagerie. Tiffy Trapspring and Giada Goldleash have been attracted to your impressive stash of Pet Charms, and want to take them off your hands in exchange for the following pets:
- Dusty Sporewing
- Bloodthorn Hatchling
- Glowing Sporebat
- Lost Netherpup
And the following toys:
- Magic Pet Mirror
- Indestructible Bone
- Spirit Wand
And the Hunt Continues
A number of new battle pets coming to World of Warcraft with patch 6.2 can be found all over the worlds. Back home in Azeroth, adventurers will cheer when they find the non-combative Nethaera’s Light glowing in Dalaran. Meanwhile, two new fishing pets are turning up at the Darkmoon Faire. One is called Blorp (also a non-combat pet), and the other is the wondrous Ghostshell Crab.
Their shells are made of ghosts.
Even more pets have found their way to the fields of battle on Draenor. Look carefully, and you may find:
- Crimsonwing Moth — A rare spawn in Talador with many spawn points, and only one ever appearing in the zone at a time.
- Sapphire Firefly – A rare spawn in Spires of Arak who also has many spawn points and appears only once at a time.
- Cinder Pup – Available from a new Garrison mission in patch 6.2.
- Corrupted Nest Guardian – Dropped by Shadow Lord Iskar in the new Hellfire Citadel raid.
Get a first look at all of the above by testing Patch 6.2 with us on the PTR. Please note that availability to test some PTR content may be limited to certain time frames. Learn more about the upcoming Patch 6.2 and how to participate on the PTR in our 6.2 PTR Patch Notes.
Please try entering https://graph.facebook.com/822778381143754/photos?fields=source,link,name,images,album&limit=1000 into your URL bar and seeing if the page loads.
A while ago we first posted our Tanaan Jungle Screenshot Gallery from our facebook page. Since then we’ve updated it with a bunch of new screenshots of the zone, check them out below:
Facebook API came back with a faulty result. You may be accessing an album you do not have permissions to access.Quote from: Blizzard
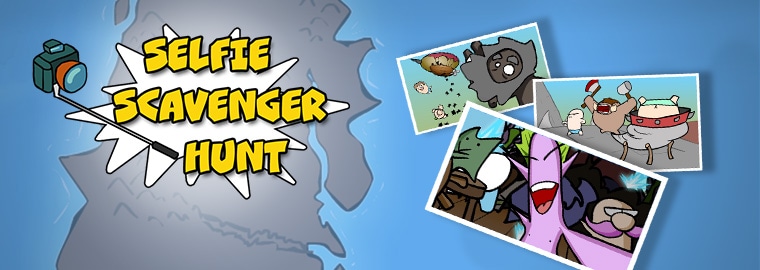
Hunt down the weekly location, take a screenshot of yourself there, submit it on our sweepstakes site, and you could win big prizes!
The WoW Selfie Scavenger Hunt sweepstakes has begun, and every week you have a chance to win Blizzard gear, Battle.net Balance codes, or an iPhone 6—and every week you enter it increases your chances to win the Grand Prize: a trip for two to BlizzCon 2015!
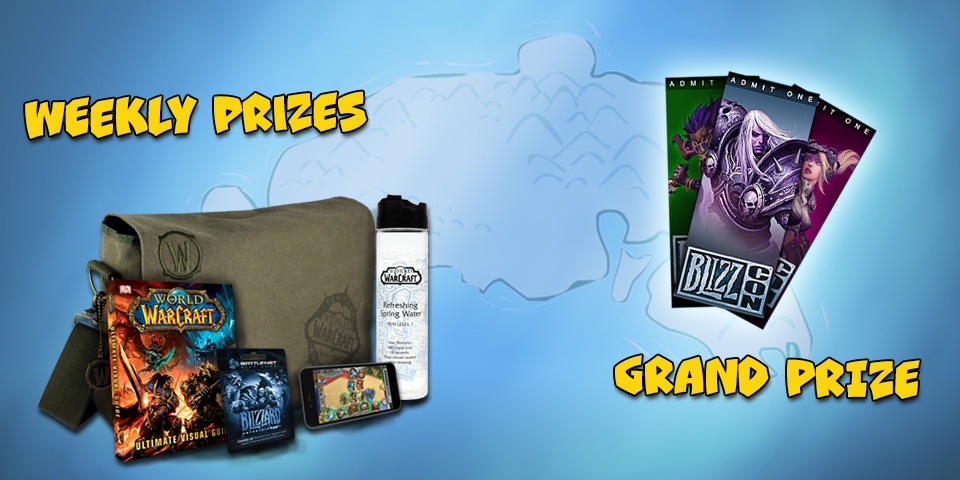
Visit the WoW Selfie Scavenger Hunt site now to enter, and come back each week for a new challenge.